Oven Baked Venison Summer Sausage with Pork Fat
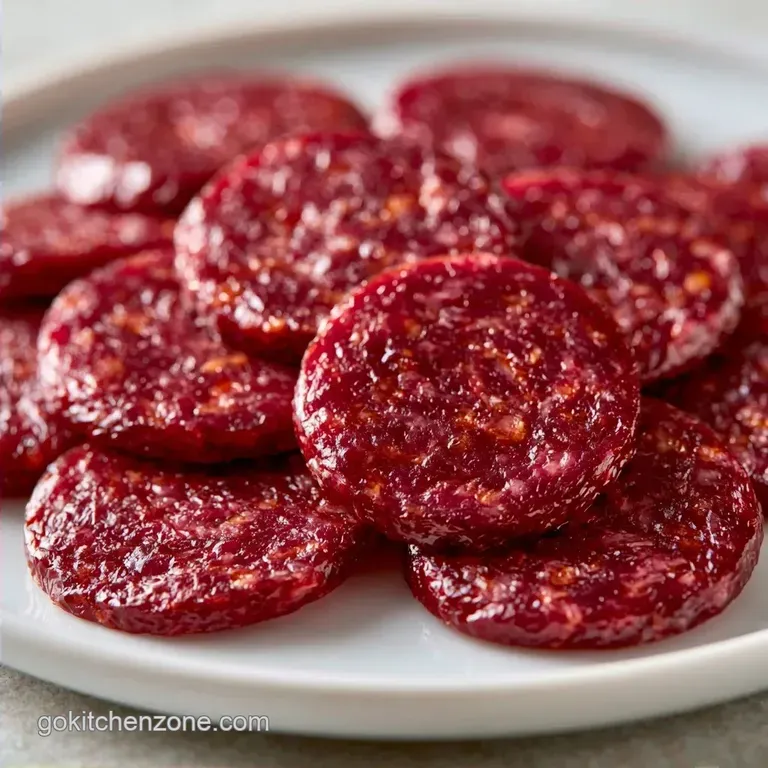
- Time: 30 min active + 28 hrs total (includes cure)
- Flavor/Texture Hook: Firm, sliceable mahogany logs with a smoky punch
- Perfect for: Preserving wild game or high protein snacking
Nothing is more disappointing than pulling a "summer sausage" out of the oven only to find it has the texture of a crumbly meatloaf. I've been there. My first few attempts were just lean deer meat that fell apart the second I tried to slice it, leaving me with a pile of salty mush.
The problem is that venison is too lean on its own. Without the right fat ratio and a specific mixing technique, you don't get that classic deli style bind. You just get a log of cooked ground meat.
This Oven Baked Venison Summer Sausage fixes that by using a heavy hand with pork fat and a long cure. It gives you that dense, sliceable consistency and deep color without needing a professional smokehouse in your backyard.
Oven Baked Venison Summer Sausage
The Sticky Bind: Mixing the meat vigorously until it feels tacky creates a protein bond that holds the sausage together.
Low Heat Logic: Baking at 200°F keeps the pork fat from melting away, which prevents the logs from shrinking or becoming greasy.
The Cure Time: Letting the meat sit for 24 to 72 hours allows the Prague powder to set the color and flavor throughout the entire log.
| Approach | Time | Texture | Best For |
|---|---|---|---|
| Fresh Sausage | 20 mins | Loose/Juicy | Breakfast/Patties |
| Oven Baked | 3 hours | Firm/Dense | Slicing/Snacking |
Why These Ingredients Work
| Ingredient | What It Does | Best Swap |
|---|---|---|
| Prague Powder #1 | Cures meat and keeps pink color | None (safety requirement) |
| Pork Fat/Butt | Adds moisture and prevents dryness | Beef tallow (firmer set) |
| Liquid Smoke | Mimics the smokehouse flavor | Smoked paprika (less intense) |
| Kosher Salt | Draws out proteins for the bind | Sea salt (use slightly less) |
For the Meat Base
- 2 lbs ground venison (lean) Why this? Lean deer meat provides the core savory flavor.
- 1 lb ground pork fat or pork butt Why this? Essential for the "snap" and juicy mouthfeel.
For the Curing & Seasoning
- 2 tbsp liquid smoke Why this? Gives that traditional outdoorsy aroma.
- 1 tsp Prague Powder #1 Why this? Prevents spoilage and gives the mahogany hue.
- 2 tbsp kosher salt Why this? Essential for protein extraction during mixing.
- 1 tbsp garlic powder Why this? Adds a punchy, aromatic baseline.
- 1 tbsp smoked paprika Why this? Deepens the color and adds earthiness.
- 1 tsp ground black pepper Why this? Provides a sharp, classic bite.
- 1 tsp mustard seed Why this? Adds tiny bursts of tang.
- 1/2 tsp cayenne pepper Why this? Just a hint of warmth at the end.
Minimal Gear Needed
You don't need a fancy smoker for this. A large mixing bowl, some aluminum foil, and a baking rack are the heavy hitters here. I prefer using a digital meat thermometer because guessing the internal temp is how you end up with dry meat.
If you're prepping a huge batch of meat, a stand mixer such as KitchenAid can save your arms during the mixing phase, but hand mixing is just as reliable.
From Prep to Plate
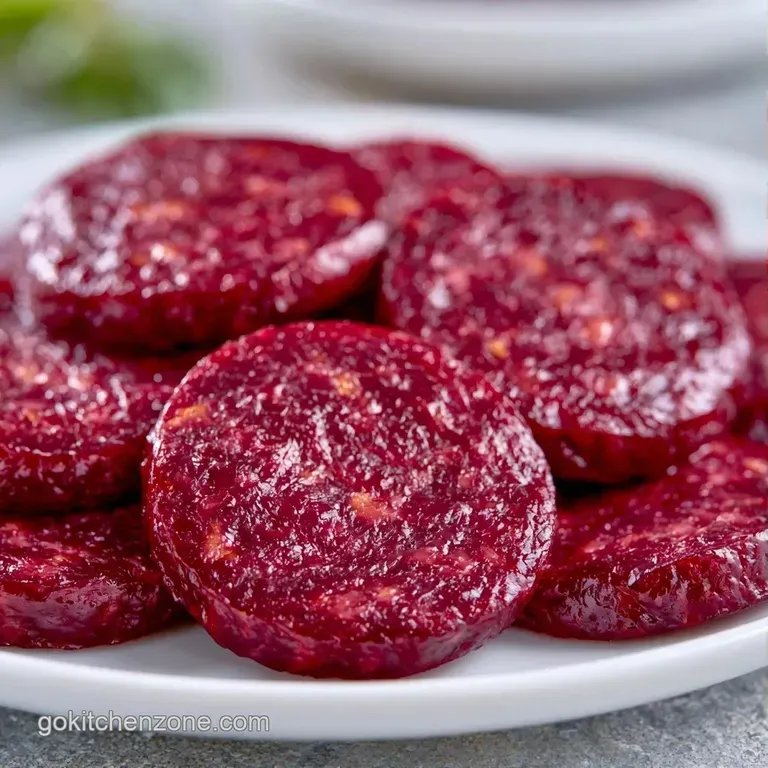
Phase 1: The Bind and Cure
- Combine ground venison and pork fat in a large mixing bowl. Sprinkle the curing salt, kosher salt, and all dry seasonings over the meat.
- Stir in the liquid smoke. Mix vigorously by hand for 3 to 5 minutes until the meat becomes tacky and sticky. Note: This sticky consistency is essential for the proteins to bond, which ensures a sliceable texture.
- Seal the bowl tightly with plastic wrap and refrigerate for 24 to 72 hours.
- Stir the meat once every 24 hours to ensure the cure is evenly distributed.
Phase 2: Shaping and Setting
- Split the mixture into 4 equal portions. Roll each into a cylinder roughly 2 inches thick.
- Wrap each log tightly in aluminum foil, twisting the ends like a candy wrapper. Note: This tight wrap mimics a casing and forces the meat to remain dense.
- Let the wrapped logs chill in the refrigerator for 1 hour before baking.
Phase 3: The Low and Slow Bake
- Preheat your oven to 200°F (93°C).
- Position the foil-wrapped logs on a baking rack set over a sheet pan.
- Bake for 3 hours until the internal temperature reaches 160°F.
Pro Tip: If you are working with a very lean cut of venison, do not omit the pork fat. According to USDA FoodData, venison is significantly lower in fat than beef or pork; without that added fat, the sausage will feel like a dry sponge.
Pro Tips & Pitfalls
The most frequent problem is a "loose" consistency. This occurs because the meat wasn't processed long enough to develop a tacky feel. Simple stirring leads to a crumbly product; the meat requires thorough working.
Oven temperature is another common pitfall. Excessive heat causes fat to render too rapidly, resulting in a grease-filled foil tray and dry meat. A dedicated oven thermometer can verify accuracy.
Correcting a Crumbly Texture
If the sausage falls apart, it's likely a binding problem. Continue mixing until the meat provides resistance against your hand.
Controlling Grease Loss
Excessive liquid in the foil suggests your oven is running too hot. Maintain a strict temperature of 200°F.
Addressing Color Changes
A greyish hue instead of pink indicates the Prague powder was omitted or the curing period was too short.
| Problem | Root Cause | Solution |
|---|---|---|
| Crumbly texture | Lack of mixing | Mix 3-5 mins until tacky |
| Greasy logs | Excess heat | Lower temp to 200°F |
| Grey color | Poor curing | Cure 24-72 hours |
Variations & Substitutions
To add more heat, double the cayenne or stir in a tablespoon of crushed red pepper flakes. For a more nuanced taste, try incorporating a teaspoon of allspice or ground cloves.
Another great way to use ground wild game is in this meat sauce recipe, which blends venison with a bit of pork for a hearty pasta topping.
Easy tweaks for different results:
- For a firmer set: chill for 2 hours instead of 1 hour before baking.
- For a smokier flavor: add 1 tbsp of smoked salt.
- For a milder taste: substitute the cayenne with sweet paprika.
Make-ahead and Leftover Tips
Keep these logs refrigerated for up to 2 weeks, ensuring they are wrapped in foil or stored in an airtight container to stay moist. In the freezer, they will last roughly 3 months.
To reheat, slice the logs and brown them in a skillet, cooking each side for 2 minutes. This restores their original "snap" and makes them taste fresh again.
To minimize waste, you can shape any leftover raw mixture into tiny meatballs and fry them up for breakfast. They taste just like mini summer sausages.
What to Serve This With
This sausage has a bold profile, so it pairs best with tangy, bright flavors. I recommend serving it alongside sharp cheddar cheese, cornichons, and a dollop of spicy brown mustard.
For an extra treat, pair slices with a creamy ranch dip to cut through the salt and smoke. It's a fantastic addition to any charcuterie platter or a simple snack after a long day.
Common Misconceptions
You don't actually need a smoker to achieve a "smoked" taste. Using smoked paprika and liquid smoke provides the aromatic notes necessary to mimic the flavor of a pit.
Searing the sausage prior to baking doesn't "lock in" the juices. Instead, the foil wrap is what preserves moisture during the slow, low-temperature cook. Searing is simply for the final presentation.
Recipe FAQs
What temperature should venison summer sausage be cooked at?
Bake the logs at 200°F (93°C).
Tip: Use a baking rack over a sheet pan for even airflow around the foil.
How long do venison sausages take to cook in the oven?
Cook them until the internal temperature reaches 160°F, which usually takes about 180 minutes.
Tip: Use a digital probe thermometer to ensure accuracy without unwrapping the logs.
How to cook venison sausage?
Mix ground venison and pork fat with curing salt and seasonings, then bake foil-wrapped logs at 200°F.
Tip: Knead the meat vigorously for 3–5 minutes until it becomes sticky to ensure a firm bind.
Is it true that baking sausage at 350 or 400 degrees is better?
No, and here's why. High temperatures cause the fat to render out too quickly, leaving the sausage dry and crumbly.
Tip: Low and slow cooking preserves the succulent texture of the wild game.
Which meat works best for making sausages?
A combination of lean game meat and ground pork fat provides the ideal balance of flavor and moisture.
Tip: Use pork butt for a higher fat content if your venison is exceptionally lean.
What spices work best in game sausages?
Garlic powder, smoked paprika, and mustard seed create a classic savory profile.
Tip: Double the cayenne pepper if you prefer a spicier finish.
Why is pork fat added to the venison?
Pork fat prevents the lean venison from drying out during the long baking process.
Tip: Refrigerate the mixed meat for 24 to 72 hours to allow the curing salts to fully penetrate.
Which side dishes pair well with summer sausage?
Serve slices with sharp cheddar cheese, crackers, and a hearty side like a loaded potato soup.
Tip: Slice the logs thinly against the grain for the best mouthfeel.
Oven Baked Venison Summer Sausage: Meal Prep