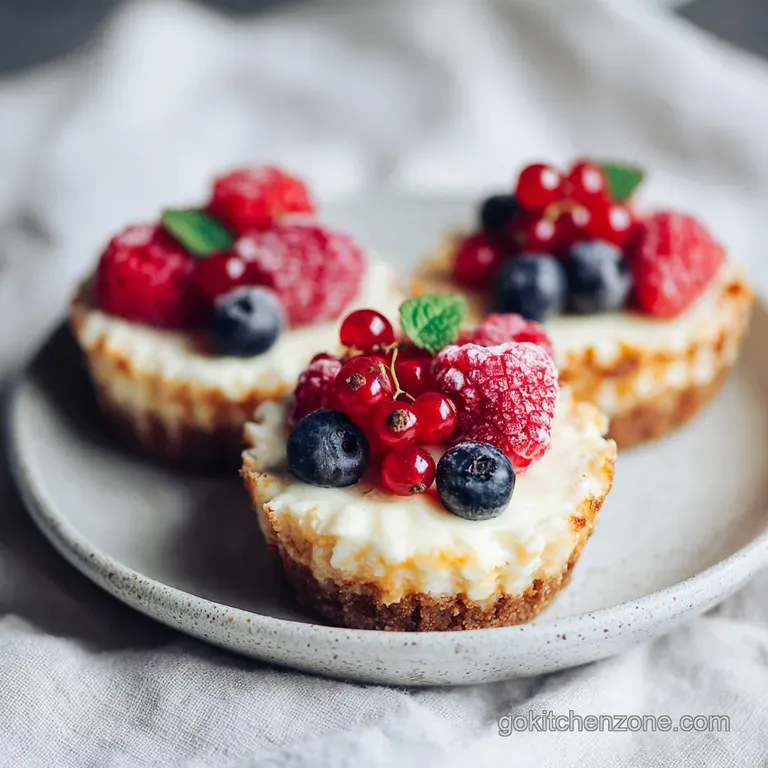
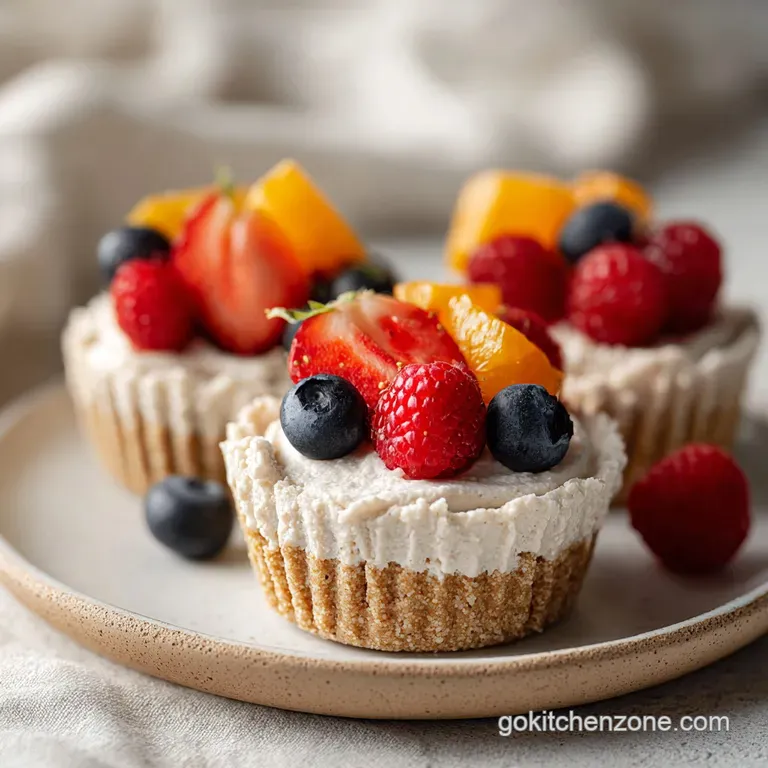
Easy Cheesecake Cups: Velvety No Bake Treat
- Time: Active 20 minutes, Passive 2 hours, Total 2 hours 20 mins
- Flavor/Texture Hook: Velvety smooth filling with a buttery, honey kissed crunch
- Perfect for: Stress free hosting, summer parties, or beginner meal prep
- Making These Easy Cheesecake Cups Successfully
- Success Factors for This Recipe
- Necessary Recipe Specifications and Data
- Detailed Ingredient Analysis and Roles
- Essential Kitchen Tools for Success
- Clear Step-by-Step Preparation Guide
- Common Issues and Easy Fixes
- Smart Diet and Allergy Swaps
- Storage and Best Freshness Practices
- Creative Topping and Presentation Ideas
- Myths About No Bake Desserts
- Recipe FAQs
- 📝 Recipe Card
Making These Easy Cheesecake Cups Successfully
I still remember the first time I tried to make a "real" cheesecake for a dinner party. I spent a fortune on ingredients, babied it in a water bath like it was a newborn, and it still came out with a crack down the middle that looked like a tectonic plate shift.
It was frustrating, expensive, and honestly, a bit of a letdown. That’s when I realized that for most weeknights or casual get togethers, we don't need the drama of a springform pan and a prayer.
These easy cheesecake cups are my answer to that kitchen trauma. There is no baking, no cracking, and no worrying if the center is "jiggly but firm." You get that specific, tang heavy flavor we all crave, but in a format that’s ready in a fraction of the time.
The secret lies in the temperature of your ingredients and the way we build the base to stay crisp even under a heavy layer of cream.
We’ve all seen those pre packaged versions at the store, but they usually taste like whipped vegetable oil and artificial "birthday cake" scent. Making these from scratch allows us to use real honey, fresh lemon, and actual cream cheese. The result is something that feels expensive but costs less than a fancy coffee. If you're planning a big brunch spread, these go great alongside my Homemade Cinnamon Rolls recipe.
Success Factors for This Recipe
Protein Reinforcement: The Greek yogurt adds a specific type of protein (casein) that bonds with the cream cheese fats to create a structure that holds its shape at room temperature.
Acidic Tightening: Fresh lemon juice does more than just add a bright note; it physically tightens the dairy proteins, helping the "cups" set without the rubbery texture of gelatin.
Moisture Control: Sifting the powdered sugar prevents tiny clumps from acting as moisture magnets, ensuring the filling stays silky rather than grainy or weeping over time.
Fat Saturation: Using full fat dairy is non negotiable here because the saturated fats are what provide the physical stability once they are chilled back to fridge temperatures.
| Method Type | Time Investment | Final Texture | Best For |
|---|---|---|---|
| No Bake (This) | 2 hours 20 mins | Silk like, airy | Quick prep, hot days |
| Traditional Oven | 4 hours + | Dense, custard like | Formal holidays |
| Stovetop Set | 3 hours | Gel like, heavy | Dense fruit fillings |
Choosing the no bake route isn't just a shortcut; it's a stylistic choice. While a baked cheesecake is a custard, this is closer to a stabilized mousse. It feels lighter on the palate, which is exactly what you want after a heavy meal or during a backyard BBQ. If you are looking for more quick party snacks, you might enjoy my Charcuterie Cups for recipe which follow a similar individual serving logic.
Necessary Recipe Specifications and Data
When we talk about "yield," we're looking at exactly 12 standard sized muffin tin liners. This isn't a "maybe 10, maybe 14" situation. If you use a standard scoop, you'll hit that dozen every single time. It's the kind of reliability that saves you from the mid prep panic of running out of crust.
The timing is the most critical part of the data here. While the active work is a quick 20 minutes, the "Cook Time" listed in the schema refers to the essential chilling phase. Do not try to cheat this.
If you pull these out at the one hour mark, they will be delicious, but they’ll be more like a dip than a cup. They need those full 120 minutes for the fats to re solidify into a structure that can support a spoon.
Detailed Ingredient Analysis and Roles
| Ingredient | Science Role | Pro Secret |
|---|---|---|
| Cream Cheese | Primary Structural Fat | Use bricks, not the "whipped" tub version |
| Greek Yogurt | Emulsifier and Acid | Strain it for 5 mins to remove excess whey |
| Powdered Sugar | Sweetener and Stabilizer | Sift it twice to ensure zero grit |
| Graham Crumbs | Structural Foundation | Pulse your own for larger, crunchier shards |
Using the right components is half the battle. For the crust, 1.5 cups of graham cracker crumbs provides the perfect thickness for 12 cups. We mix this with 4 tbsp of melted unsalted butter and 1 tbsp of honey. The honey acts as a secondary binder that keeps the crumbs from shattering too easily when you take a bite.
The filling relies on 16 oz of full fat cream cheese. I cannot stress this enough: do not use the low-fat "Neufchatel" or the stuff that comes in a tub. Those have higher water content and will result in a soupy mess.
Combined with 0.5 cup of Greek yogurt and 0.5 cup of sifted powdered sugar, you get a balance that is sweet but sophisticated.
Essential Kitchen Tools for Success
You don't need a professional pastry kitchen to pull this off, but a few specific items make it much easier. A standard 12 cup muffin tin is the foundation. I highly recommend using foil liners rather than paper; the foil peels away cleanly without taking half the cheesecake with it.
A hand mixer or a stand mixer (like a KitchenAid) is pretty much required. You are trying to aerate the cream cheese while incorporating the yogurt, and doing that by hand is a workout that usually results in lumps.
A small offset spatula or even just the back of a spoon will help you smooth the tops for that professional finish.
Clear step-by-step Preparation Guide
- Prep the tin. Line a 12 cup muffin tin with foil liners. Note: This ensures easy removal later.
- Mix the base. Combine 1.5 cups graham cracker crumbs, 4 tbsp melted butter, 0.25 tsp sea salt, and 1 tbsp honey until it looks like wet sand.
- Press the crust. Divide the crumb mixture evenly across the 12 liners and press down firmly with the bottom of a small glass. Note: Packing it tight prevents crumbling.
- Cream the cheese. Beat 16 oz room temperature cream cheese for 3 minutes until smooth and slightly fluffy.
- Add the liquids. Mix in 0.5 cup Greek yogurt, 1 tsp vanilla extract, and 1 tbsp fresh lemon juice until fully combined.
- Incorporate sugar. Gradually add 0.5 cup sifted powdered sugar on low speed until the filling is velvety.
- Fill the cups. Spoon or pipe the mixture into the prepared liners, filling them nearly to the top.
- Level the tops. Use a small spoon to smooth the surface of each cup until they are flat and even.
- Chill to set. Refrigerate for at least 2 hours until the centers feel firm to a light touch.
Chef's Tip: Before you start, put your mixing bowl and beaters in the freezer for 10 minutes. This keeps the fat in the cream cheese from overheating during the long beating process, resulting in a much loftier, cloud like texture.
Common Issues and Easy Fixes
Fixing Lumpy or Grainy Filling
This is the most common heartbreak in cheesecake making. Usually, it happens because the cream cheese was too cold when you started. If you try to beat cold cheese, it just breaks into little beads that refuse to melt into the other ingredients.
| Problem | Root Cause | Solution |
|---|---|---|
| Visible Lumps | Cold cream cheese | Microwave the bowl for 10 seconds and beat again |
| Soggy Crust | Warm filling | Let the butter crumb base sit in the fridge for 10 mins before filling |
| Filling Too Soft | Not enough chill time | Move to the freezer for 20 minutes to jump start the set |
Common Mistakes Checklist
- ✓ Use brick style cream cheese only (tub versions have too much air and water).
- ✓ Ensure the cheese is truly at room temperature (about 2 hours on the counter).
- ✓ Sift your powdered sugar even if it looks fine in the bag.
- ✓ Press the crust harder than you think you need to.
- ✓ Don't skip the lemon juice; the acid is a functional ingredient for the set.
Smart Diet and Allergy Swaps
| Original Ingredient | Substitute | Why It Works |
|---|---|---|
| Graham Crumbs | Almond Flour (1.5 cups) | Keeps the base gluten-free. Note: Texture will be softer |
| Greek Yogurt | Sour Cream (0.5 cup) | Provides similar acidity. Note: Adds a richer, heavier mouthfeel |
| Honey | Maple Syrup (1 tbsp) | Maintains the sticky bind. Note: Adds a distinct woody flavor |
If you need to make these for a crowd with mixed needs, the almond flour swap is brilliant. Just toast the almond flour in a dry pan for 2 minutes first to give it that "baked" flavor that graham crackers naturally have. For a festive twist during the holidays, check out my Pumpkin Pie Crescents recipe which also uses a cream cheese base but in a warm, baked format.
Storage and Best Freshness Practices
These easy cheesecake cups are meal prep champions. You can keep them in the fridge in an airtight container for up to 5 days. In fact, I think they taste even better on day two because the vanilla and lemon have more time to mingle.
If you are stacking them, put a layer of parchment paper between the rows so the bottoms don't stick to the tops.
For long term storage, these freeze beautifully. Place the tin in the freezer for an hour to firm them up, then pop them out of the tin and into a freezer bag. They’ll stay fresh for 2 months.
To eat, just move them to the fridge for an hour or eat them semi frozen for a texture that’s almost like high end ice cream. To reduce waste, if you have leftover graham cracker crumbs, toss them with a little extra butter and cinnamon and store them in a jar to sprinkle over morning yogurt.
Creative Topping and Presentation Ideas
The beauty of these individual servings is the customization. I like to set out a "topping bar" if I'm having friends over. Fresh raspberries, a dollop of lemon curd, or even a drizzle of salted caramel can change the entire profile of the dish.
Because the base recipe is balanced, it can handle very sweet or very tart additions.
- The Classic: A single fresh strawberry and a tiny mint leaf.
- The Crunch: Toasted crushed pecans and a drizzle of honey.
- The Zest: Extra lemon zest and a pinch of flaky sea salt.
If you want something more indulgent, you can even top these with a chocolate ganache, similar to the one I use in my Peanut Butter Pie recipe. Just make sure the ganache has cooled to room temperature before pouring it on, or you'll melt your hard earned cheesecake structure.
Myths About No Bake Desserts
"No bake cheesecake is just whipped cream." This is a total misconception. While some recipes use whipped topping (like Cool Whip), a true no bake cheesecake like this one relies on the high fat content and protein structure of the cheese and yogurt. It is much denser and more authentic than a "mousse" style dessert.
"You need gelatin to make it stand up." Many people think that without eggs and heat, you need a chemical stabilizer. That's simply not true if your ratios are correct. By keeping the moisture low and the fat content high, the natural solidification of the cream cheese at cold temperatures is more than enough to hold a clean edge when bitten.
"Room temperature ingredients don't matter for no bake." Actually, they matter more. In a baked version, the oven heat will eventually melt any lumps. In this version, what you see in the bowl is exactly what you’ll get in the cup. If it’s lumpy in the mixer, it’ll be lumpy on the plate.
Trust the process and let that cheese soften!

Recipe FAQs
Can I substitute Greek yogurt with regular plain yogurt?
No, you should stick to Greek yogurt. Regular yogurt contains significantly more water (whey), which will compromise the firmness of the filling.
How long must these cheesecake cups chill before serving?
Refrigerate for a minimum of 2 hours. This chilling time allows the high fat content in the cream cheese to re-solidify, ensuring a stable, sliceable texture rather than a soft dip.
How to ensure the graham cracker crust stays crisp and doesn't get soggy?
Press the crumb mixture firmly into the bottom of the liner and avoid letting the filling sit on the crust mixture at room temperature for long. If you master the firm pressing here, you'll find the same principle of density control applies when learning our Brown Gravy From Scratch recipe.
Is it true that I must use full fat cream cheese or the cups will collapse?
Yes, full fat bricks are essential for structure. Lower fat versions contain too much moisture and do not have enough saturated fat to hold the shape once chilled, resulting in a texture closer to pudding.
How do I prevent the cream cheese from becoming lumpy when mixing?
Beat the cream cheese alone on medium speed for 3 minutes until light. Ensure your cream cheese is completely at room temperature before you start mixing to achieve a perfectly aerated base.
Can I make these ahead of time and freeze them for later?
Yes, they freeze exceptionally well for up to two months. For best results, freeze them uncovered until solid, then transfer them to an airtight bag. Thaw them in the refrigerator for an hour before serving.
What is the best swap if I need a gluten-free crust base?
Substitute the graham crumbs with an equal amount of almond flour. Toast the almond flour lightly in a dry pan first to mimic the inherent flavor profile of baked graham crackers.
Easy No Bake Cheesecake Cups

Ingredients:
Instructions:
Nutrition Facts:
| Calories | 251 kcal |
|---|---|
| Protein | 4.0 g |
| Fat | 18.6 g |
| Carbs | 17.5 g |
| Fiber | 0.3 g |
| Sugar | 11.0 g |
| Sodium | 235 mg |
