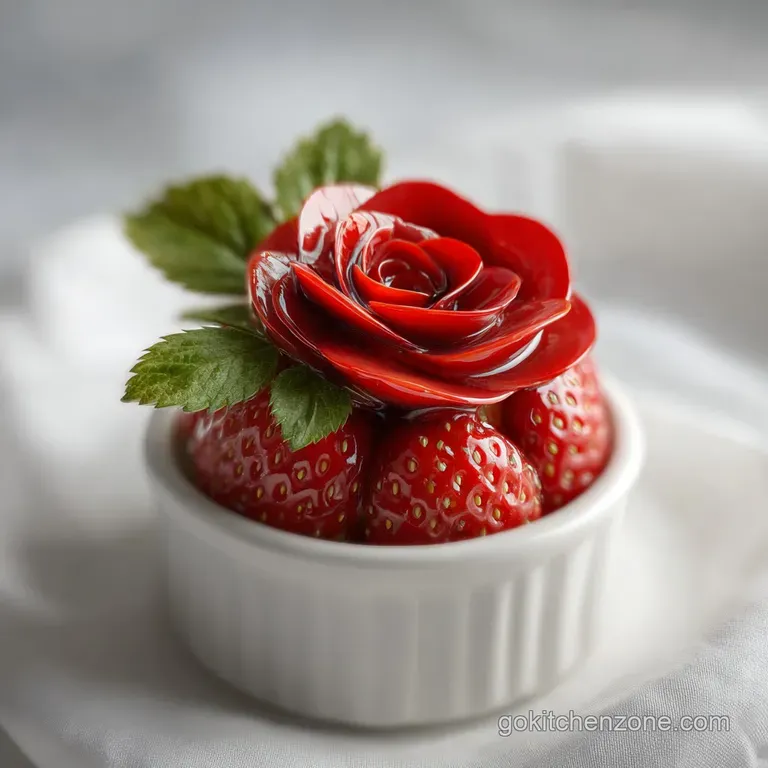
Strawberry Roses: Edible Fruit Flowers
- Time: Active 15 minutes, Passive 0 minutes, Total 15 minutes
- Flavor/Texture Hook: Juicy, fragrant fruit meets a velvety, dark chocolate snap
- Perfect for: Anniversary brunch, summer party platters, or beginner friendly food art
- Master the Art of Gorgeous Strawberry Roses
- Key Carving Techniques for Success
- Essential Recipe Specs and Yield
- Simple Ingredient and Shopping Breakdown
- Necessary Tools for Precision Carving
- Step-by-Step Strawberry Rose Construction
- Troubleshooting Common Carving Mistakes
- Creative Variations and Flavor Substitutions
- Best Practices for Storage
- Serving Ideas for Dessert Platters
- Recipe FAQs
- 📝 Recipe Card
Master the Art of Gorgeous Strawberry Roses
The first time I tried to make strawberry roses, it was a total disaster. I was getting ready for a friend's bridal shower and thought, "How hard could it be?" I ended up with a pile of mangled red mush that looked more like a crime scene than a garden.
But then I realized the secret wasn't in the strength of the cut, but in the angle of the blade and the temperature of the fruit. When you get it right, that first scent of fresh, pierced berries hits you, and you see the petals flare out like a real bloom. It's incredibly satisfying.
You're going to love how these look on a dessert table. There's something about the way the light catches the juicy interior of the fruit once it's carved. It's vibrant, colorful, and honestly, way more impressive than a standard fruit salad.
We're going to layer the flavors here by pairing the natural sweetness of the berry with a thin, velvety drizzle of dark chocolate and the herbal punch of fresh mint. It's a total feel good treat that feels fancy without the fancy price tag.
But what about the fruit getting too soft while you work? Or the petals just falling off? Don't worry, I've made all those mistakes so you don't have to. We'll walk through the exact pressure you need to apply and why your choice of knife makes or breaks the whole project.
Let's get into the "how to make strawberry roses" technique that actually works every single time.
Key Carving Techniques for Success
Thermal Resistance: Keeping your 12 large fresh strawberries chilled until the very moment of carving is essential. Cold fruit has a firmer cellular structure, which allows the knife to glide through the flesh without tearing the delicate fibers.
If the fruit is at room temperature, the sugar and water content make the walls too soft to stand up as petals.
Mechanical Tension: When you use a small paring knife to create the staggered cuts, you are essentially creating "memory" in the fruit's flesh. By gently pushing the blade outward after each cut, you create a permanent flare.
This works because the fibrous core of the strawberry acts as an anchor while the outer flesh is flexible enough to bend without snapping.
Viscosity Control: The addition of 15ml neutral vegetable oil to your 100g dark chocolate melting wafers is a trick I learned for a smoother finish. The oil lowers the surface tension of the chocolate, allowing it to flow into a thinner, more professional looking drizzle that won't overwhelm the delicate carving.
| Method | Prep Time | Skill Level | Visual Result |
|---|---|---|---|
| Fast Method | 5 minutes | Beginner | Simple, rustic flares with thicker petals |
| Classic Method | 15 minutes | Intermediate | Detailed, multi layered realistic blooms |
| Bouquet Style | 20 minutes | Intermediate | Full floral arrangement with skewer stems |
Using the classic method ensures that the "make strawberry roses" process results in a look that truly mimics nature. The thinner you can safely make the cuts, the more "shatter" you get in the texture when you bite into the berry, especially once the chocolate has set. For more inspiration on fruit based treats, you might enjoy my Chocolate Covered Strawberries recipe.
Essential Recipe Specs and Yield
| Component | Science Role | Pro Secret |
|---|---|---|
| Large Strawberries | Structural Base | Use heart shaped berries for the most symmetrical "blooms." |
| Dark Chocolate | Flavor Contrast | High cocoa solids provide a "snap" that contrasts the soft fruit. |
| Neutral Oil | Emulsifier | Prevents the chocolate from seizing if a drop of juice hits it. |
| Mint Leaves | Aromatic Layer | Slap the leaves between your palms to release the oils before plating. |
When you are looking to make strawberry roses, the size of the berry dictates the number of petal rows you can achieve. A jumbo berry can handle three or four tiers of cuts, whereas a smaller one might only manage two. This recipe yield is for 12 servings, which is perfect for a medium sized party platter.
The 100g dark chocolate melting wafers are specifically chosen because they contain stabilizers that help the chocolate stay glossy at room temperature. If you use a regular chocolate bar, you might find it loses its luster or melts too quickly on the warm fruit.
This balance of ingredients ensures your strawberry rose decoration stays looking sharp for the duration of your event.
Simple Ingredient and Shopping Breakdown
- 12 large fresh strawberries: Look for berries that are firm to the touch and deep red all the way to the top. Why this? Firmness is required for carving stability and clean petal lines. (Substitute: Large firm plums for a different "stone fruit" rose)
- 100g dark chocolate melting wafers: These are easier to work with than chips. Why this? They melt smoothly without the need for complex tempering. (Substitute: Semi sweet chocolate chips with a teaspoon of shortening)
- 15ml neutral vegetable oil: Use canola or grapeseed. Why this? It thins the chocolate without adding a heavy flavor. (Substitute: Refined coconut oil for a slight tropical hint)
- 12 bamboo skewers: Standard grilling skewers work best. Why this? They provide a sturdy "stem" for the carving process. (Substitute: Sturdy plastic cake pop sticks)
- 5g fresh mint leaves: Vibrant green leaves for the "sepals." Why this? Adds a fresh aroma and completes the floral look. (Substitute: Small basil leaves for a sophisticated fusion twist)
For a different take on strawberry desserts that also uses these fresh ingredients, check out my Strawberry Pretzel Salad Recipe. It's another great way to use a bulk buy of berries while they are in season!
Necessary Tools for Precision Carving
You don't need a massive kit to "to make strawberry roses" effectively, but you do need the right edge. A dull knife is your worst enemy here. It will crush the cells of the strawberry rather than slicing them, leading to a soggy rose. I always use a sharp 3 inch paring knife.
The small blade allows for the tight curves needed for the inner petals.
Beyond the knife, you'll want a microwave safe bowl for your chocolate and a piece of floral foam or a tall glass filled with rice. This serves as a "stand" to hold the skewers while the chocolate drizzle sets.
Trust me, trying to lay a freshly carved and drizzled rose down on a plate is a recipe for a flat, sad looking flower.
Chef Tip: Keep a damp paper towel nearby. Strawberry juice is sticky and can make your knife handle slippery, which is dangerous when doing fine detail work. Wipe the blade every 3-4 berries for the cleanest cuts.
step-by-step Strawberry Rose Construction
- Wash and dry the 12 large fresh strawberries thoroughly. Note: Moisture prevents chocolate from sticking and makes the berry slippery.
- Insert one bamboo skewer into the green leafy end of each berry, pushing about halfway through. until the berry feels secure and doesn't wobble.
- Hold the skewer at a 45 degree angle and make a small cut about 1cm from the base. until you feel the knife reach the core.
- Gently push the blade outward to flare the petal. until the petal stays open on its own.
- Repeat the base cuts four times around the bottom of the strawberry, staggering them like real rose petals.
- Move up the berry and create a second row of cuts between the first row's petals. until the berry looks full and layered.
- Carve the very top by making two deep vertical cuts to form the "bud" of the rose.
- Melt the 100g dark chocolate with 15ml neutral vegetable oil in 30 second bursts. until the mixture is velvety and fluid.
- Drizzle the chocolate over the petals using a spoon. until the edges are lightly coated and glistening.
- Tuck the 5g fresh mint leaves around the base of the skewer until the rose looks like it has natural greenery.
Troubleshooting Common Carving Mistakes
Petals Flopping or Drooping
This usually happens because the cuts were made too deep into the white core of the strawberry. The core is the "skeleton" of the fruit; if you cut into it, the petal loses its structural support. Another reason is using berries that are too ripe.
Overripe fruit has weakened cell walls that can't hold the "flare" of the rose.
Chocolate Seizing and Clumping
If even a tiny drop of juice or water gets into your melting wafers, the chocolate will turn into a grainy paste. This is why drying the berries is the most important prep step. If it does seize, you can sometimes save it by adding another teaspoon of oil and whisking vigorously, but it's better to prevent it entirely.
| Problem | Root Cause | Solution |
|---|---|---|
| Petals snapping off | Cuts are too thin at the base | Leave a thicker "hinge" of flesh at the bottom of each cut. |
| Berry spinning on skewer | Skewer is too thin for the berry | Use two skewers or a thicker bamboo stick for better grip. |
| Dull looking petals | Berry has dried out | Carve just before serving or brush lightly with a simple syrup. |
Common Mistakes Checklist
- ✓ Never use room temperature berries; they must be cold from the fridge for a clean "snap" in the flesh.
- ✓ Avoid serrated knives; a smooth, sharp paring blade is the only way to get "velvety" petal edges.
- ✓ Don't skip the oil in the chocolate; it provides the flow needed to reach the inner petals.
- ✓ Pat the berries dry with a lint free towel to ensure the chocolate adheres perfectly.
- ✓ Work from the base up; trying to carve the top first makes the berry unstable.
Creative Variations and Flavor Substitutions
If you want to deviate from the classic "make strawberry roses" look, there are plenty of fusion options. I love using white chocolate tinted with a drop of beet juice for a soft pink ombre effect.
You can also dip the edges of the carved petals into crushed pistachios or gold leaf for a high end "crave worthy" aesthetic that looks incredible on social media.
- If you want a tropical twist: Replace the dark chocolate with white chocolate and dip the edges in toasted coconut shreds.
- If you want a spicy kick: Add a tiny pinch of ancho chili powder to the dark chocolate for a Mexican fusion flavor profile.
- If you want a "boozy" version: Soak the uncarved berries in champagne for 30 minutes, then pat dry and carve as usual.
Downscaling for Two
To make a small batch for a date night, use 4 berries and 35g of chocolate. Reduce the oil to 5ml. Since you're working with a smaller amount of chocolate, use a very narrow, deep cup for melting so you have enough depth to dip or drizzle effectively.
Upscaling for a Crowd
When making 48 or more roses, work in batches. Carve 12 berries, place them in the fridge to stay firm, then move on to the next set. Only melt the chocolate when all the carving is finished to ensure it stays at the optimal temperature for drizzling.
You can increase the spices to 1.5x, but keep the oil ratio consistent to maintain the right snap.
Best Practices for Storage
Strawberry roses are best enjoyed within 2 to 3 hours of being carved. Because the internal flesh is exposed to the air, the fruit will naturally start to release its juices (macerate), which can make the petals look "sad" and wilted after a while.
If you must store them, place them in a single layer in an airtight container lined with dry paper towels and keep them in the coldest part of the fridge.
Do not freeze these. The water inside the strawberry cells will expand and turn to ice; when it thaws, the cell walls will collapse, and your beautiful rose will turn into a puddle of mush.
If you have leftover carved berries that are looking a bit tired, pull them off the skewers and blend them into a smoothie or use them as a topping for oatmeal. The "zero waste" approach means those flavor layers never go to waste!
Serving Ideas for Dessert Platters
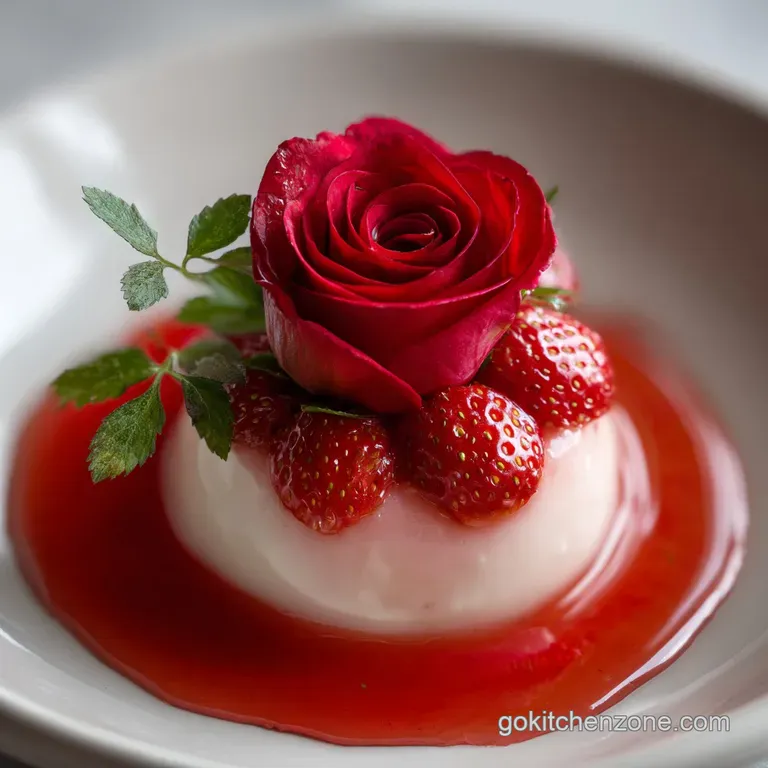
When it comes to the "strawberry rose tutorial" finale, presentation is everything. I like to arrange these on a dark slate board to make the red and green pop. You can stand them up in a beautiful vase for a "strawberry roses bouquet" effect, or lay them flat on a bed of chocolate "soil" made from crushed Oreos.
These roses pair beautifully with my Cheesecake Cups recipe. Simply place one rose on top of each cup for a professional bakery finish. They are also a "feel good" addition to a Valentine's Day brunch, served alongside some Greek yogurt and a drizzle of honey. The contrast between the cold, juicy fruit and the rich chocolate is a flavor layer that never fails to impress.
Strawberry Rose Myths
Myth: You need a special "V shaped" carving tool to get the rose look. Truth: A standard paring knife actually gives you more control and a more natural, organic petal shape than a rigid metal tool.
Myth: Soaking berries in sugar water makes them easier to carve. Truth: Sugar draws moisture out of the fruit (osmosis), which will make your berries soft and impossible to carve with precision. Keep them plain and cold!

Recipe FAQs
Can I make strawberry roses at home?
Yes, you absolutely can make them at home. This technique requires a very sharp paring knife and chilling your berries, but it relies only on basic slicing motions, not specialized equipment.
How to cut a rose in a strawberry?
Insert a skewer, hold the berry at a 45 degree angle, and make shallow cuts from the base upwards. Gently push the blade outward after each cut to flare the petal, repeating this motion around the berry.
How to cut a strawberry into a flower shape?
Start by slicing the bottom third of the berry into individual, staggered petals. Make your cuts thin but not deep, stopping before you hit the center core, which acts as the support structure.
How are rose strawberries made?
They are made by using precise, shallow knife cuts to create layered petals on a chilled strawberry. The final steps involve drizzling the carved fruit with tempered dark chocolate for contrast and flavor.
Is it true I must use fresh, large strawberries for the best results?
Yes, large, firm, cold strawberries are mandatory for clean carving. Smaller or room temperature berries lack the structural integrity to hold a sharp petal shape after cutting.
What is the critical element for achieving the perfect petal flare?
Gently pushing the knife blade outward after each cut creates the flare. This mechanical tension sets the flesh into the desired open position without tearing the fibers away from the core anchor.
Can I make these ahead of time and store them?
No, they should be consumed within 3 hours for peak appearance. Storing them longer causes the exposed flesh to release moisture, resulting in wilted or soggy petals.
Strawberry Roses Tutorial
Ingredients:
Instructions:
Nutrition Facts:
| Calories | 65 kcal |
|---|---|
| Protein | 0.6 g |
| Fat | 3.8 g |
| Carbs | 7.2 g |
| Fiber | 0.6 g |
| Sugar | 5.1 g |
| Sodium | 2 mg |
