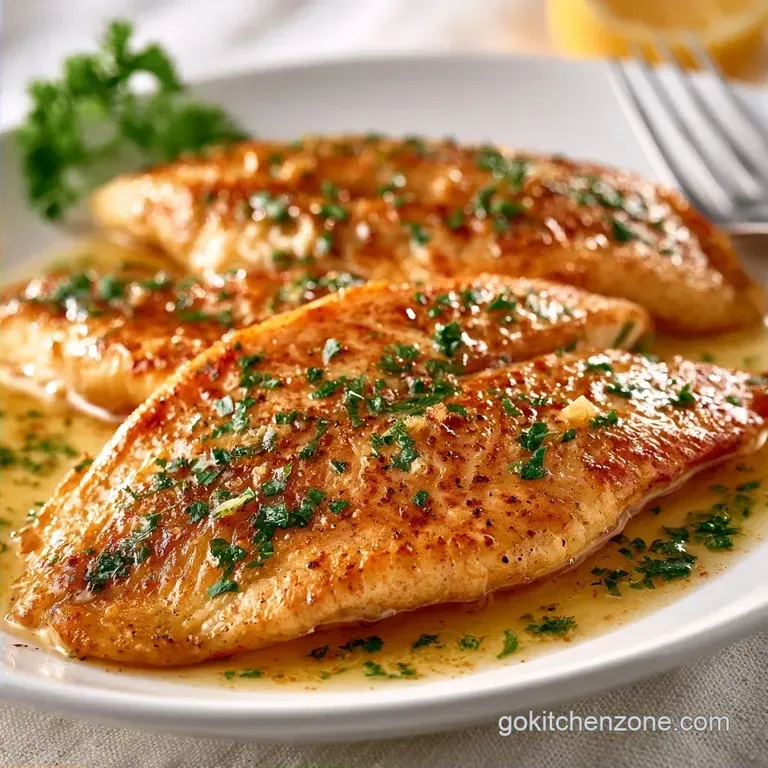
Sautéed Garlic Butter Tilapia in 17 Minutes
- Time: 5 min active + 12 min cook
- Flavor/Texture Hook: Mahogany crust with a silky butter glaze
- Perfect for: Weeknight dinner struggle, low carb meals, beginner cooks
That specific sound of fish hitting a hot pan is where the magic starts. It's a loud, aggressive sizzle that tells you the crust is forming. If you don't hear that, you're just steaming your fish, and nobody wants a grey, mushy fillet on a Tuesday night.
I remember the first few times I tried this, I'd move the fish too early, and it would just stick and tear.
The goal here is a quick, over high heat sear followed by a gentle butter bath. Sautéed Garlic Butter Tilapia is the kind of meal that feels fancy but actually takes almost zero effort. It's the ultimate "I have nothing in the fridge" win because you probably have these ingredients on hand.
You can expect a fillet that flakes easily with a fork and a sauce that's bright and punchy. This isn't about gourmet technique. It's about using a few basic rules to make sure the fish stays juicy while the garlic gets golden.
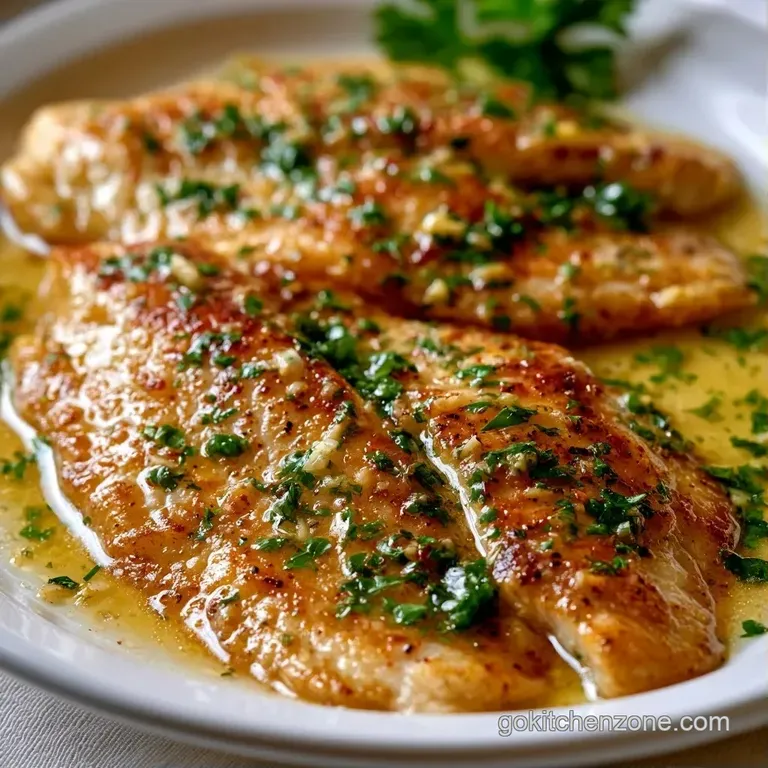
Sautéed Garlic Butter Tilapia
Right then, let's get into why this works. Most people overcook tilapia because it's a lean fish. It doesn't have the fat of a salmon fillet, so it dries out in a heartbeat. The trick is the sequence of the fat. We use olive oil for the over high heat sear, then drop the heat and add butter for the flavor.
Why the Flavors Pop
- The Dry Pat: Water on the surface of the fish creates steam, which prevents browning. Patting it bone dry lets the proteins brown quickly.
- Late Garlic: Garlic burns in seconds at high heat. Adding it after the fish is mostly cooked ensures it stays fragrant and pale gold.
- Acid Balance: The lemon juice cuts through the heavy butter, brightening the whole dish.
The difference between a rushed pan fry and a proper baste is mainly the texture of the sauce. In a classic method, you might make a separate sauce and pour it over. Here, we build the sauce in the pan, using the leftover fish juices to create a cohesive glaze.
| Method | Time | Texture | Best For |
|---|---|---|---|
| Quick Pan Sear | 8 mins | Crispy edge, leaner | Fast lunches |
| Butter Basting | 12 mins | Richer, moist interior | Dinner parties |
| Oven Baked | 15 mins | Uniform, softer | Large batches |
Essential Recipe Specs
When you're dealing with lean white fish, timing is everything. Tilapia is mild, which makes it a blank canvas for the garlic and lemon. According to USDA FoodData, tilapia is a great source of lean protein, but it requires precision to avoid the "rubber" texture.
For the best results, use fillets that are roughly the same thickness. If one is thin and one is thick, the thin one will be overcooked by the time the thick one is done. I usually buy the frozen fillets and thaw them in the fridge overnight, but if you're in a rush, a quick cold water bath works too.
The Ingredient Breakdown
Not every ingredient is just for taste. Some are there to manage the heat or the moisture. For example, the olive oil has a higher smoke point than butter, which is why we start with it. If you tried to sear the fish in butter alone, the milk solids would burn and turn bitter before the fish even browned.
What Each Ingredient Does
| Ingredient | What It Does | Best Swap |
|---|---|---|
| Tilapia Fillets | Lean protein base | Cod or Halibut |
| Unsalted Butter | Adds richness and carries garlic flavor | Ghee (for higher heat) |
| Fresh Lemon Juice | Cuts fat and adds brightness | White wine or Apple cider vinegar |
| Garlic | Provides the savory aromatic base | Garlic powder (use 1/4 tsp) |
If you're looking for a similar vibe but want to change the base, this flavor profile works for almost any white fish. I've used this same logic for my Homemade Garlic Butter Sauce when I'm doing shrimp or scallops.
Necessary Kitchen Tools
You don't need a professional kitchen for this. A simple non stick skillet or a stainless steel pan works. If you use stainless steel, you'll get a better crust, but you have to be more careful about the fish sticking.
A fish spatula is a lifesaver here because it's thin and flexible, allowing you to get under the fillet without breaking it.
Keep a pair of tongs handy for the basting phase. You'll want to tilt the pan slightly so the butter pools at the bottom, then spoon that liquid gold over the fish. It's a simple move that makes a huge difference in how the fish finishes.
Cooking the Fillets
Let's get to the actual work. Remember, the pan needs to be hot before the fish touches it. If you put the fish in a cold pan, it'll just stick and boil in its own juices.
Phase 1: Preparing the Fillets
- Pat the tilapia fillets completely dry with paper towels. Note: Any moisture will steam the fish instead of searing it.
- Season both sides evenly with ½ tsp sea salt and ¼ tsp cracked black pepper.
Phase 2: The Pan Sear
- Heat 1 tbsp olive oil in a skillet over medium high heat until it shimmers.
- Place the fillets in the pan and sear for 3-4 minutes without moving them until the bottom is mahogany colored.
- Flip the fillets and sear the other side for another 2-3 minutes.
Phase 3: The Garlic Butter Baste
- Reduce the heat to medium. Add 3 tbsp unsalted butter to the center of the pan.
- Once the butter foams, stir in 4 cloves minced garlic and sauté for 60 seconds until fragrant and pale gold.
- Stir in 1 tbsp fresh lemon juice and 1 tbsp chopped fresh parsley.
- Spoon the bubbling butter over the fillets continuously for 1 minute to glaze the fish and finish the cooking process.
Chef's Note: Don't let the garlic turn dark brown. If it happens, it'll taste bitter. If the pan looks too hot, pull it off the heat for 10 seconds before adding the butter.
Fixing Common Issues
Even with a simple recipe, things can go sideways. Usually, it comes down to heat management or moisture. If your fish is sticking, it's likely because you didn't let the sear develop or the pan wasn't hot enough.
Why Your Fish Sticks
The fish creates a natural bond with the pan until the proteins caramelize. If you try to flip it too soon, it'll tear. Be patient. When the crust is ready, the fish will practically release itself from the pan.
To Avoid Burnt Garlic
Garlic has a low burn point. By adding it at the end and reducing the heat to medium, we protect the delicate flavor. If you're using pre minced garlic from a jar, it tends to burn even faster, so watch it like a hawk.
For Maximum Moisture
Overcooking is the biggest risk with Sautéed Garlic Butter Tilapia. Use a meat thermometer if you're unsure. You want the internal temperature to hit 145°F. Once it's opaque and flakes easily, take it off the heat immediately.
| Problem | Root Cause | Solution |
|---|---|---|
| Fish is mushy | Not patted dry | Use more paper towels next time |
| Garlic tastes bitter | Heat was too high | Add butter/garlic at medium heat |
| Fillet breaks apart | Flipped too early | Wait for mahogany crust to form |
Easy Taste Swaps
Depending on what's in your pantry, you can tweak this. If you want something with a bit more kick, add a pinch of red pepper flakes when you add the garlic. It doesn't overpower the fish but gives it a nice warmth.
For those who can't do dairy, you can swap the butter for a high-quality vegan butter or even a bit more olive oil with a splash of soy sauce for depth. It won't have that same creamy richness, but the garlic and lemon still carry the dish.
| Original Ingredient | Substitute | Why It Works |
|---|---|---|
| Unsalted Butter | Vegan Butter | Similar fat content. Note: Check for salt content in the brand |
| Fresh Parsley | Fresh Cilantro | Adds a brighter, more herbal note |
| Lemon Juice | Lime Juice | More tropical flavor, still provides necessary acid |
| Tilapia | Cod | Similar mild flavor but slightly firmer texture |
If you're serving this for a crowd, it pairs great with something light. I usually throw together a Pasta Primavera recipe to add some veg and carbs to the plate.
Storing and Reheating
Fish is tricky to store. Sautéed Garlic Butter Tilapia is best eaten immediately, but if you have leftovers, you can keep them in an airtight container in the fridge for up to 2 days.
Fridge Storage
Store the fillets with as much of the garlic butter sauce as possible. This keeps the fish from drying out in the cold air of the fridge.
Reheating for Quality
Avoid the microwave if you can. It'll turn the fish into rubber. Instead, put the fillets in a pan over medium low heat with a tiny bit of extra butter. Heat just until warmed through, maybe 2-3 minutes per side.
Freezing
I don't recommend freezing this after it's been cooked. The texture of the fish changes, and the butter sauce can separate and become greasy. It's better to freeze the fillets raw and cook them fresh.
To keep things zero waste, don't toss the lemon rinds. You can zest them into a salad or freeze them in an ice cube tray with olive oil to use for future sautés.
Plating Your Fish
Presentation doesn't have to be complicated. Start with a clean white plate to make the golden brown of the fish pop. Place the fillets slightly overlapping in the center.
Spoon the remaining garlic butter from the pan directly over the top. The sauce should be glossy and cling to the fish. Garnish with an extra sprinkle of fresh parsley and a wedge of lemon on the side.
The bright yellow of the lemon and the green of the parsley make the Sautéed Garlic Butter Tilapia look like it came from a bistro.
For a hearty balance, serve it over a bed of wilted spinach or steamed asparagus. The greens soak up the extra butter sauce, so nothing goes to waste.
Quick Decision Guide:
- If you want it crispier → Increase sear time by 1 minute per side.
- If you want it zestier → Add a teaspoon of lemon zest to the butter.
- If you want it richer → Add a tablespoon of heavy cream at the very end.
Sautéed Garlic Butter Tilapia is a reliable winner for any night of the week. It's fast, uses one pan, and tastes like you spent way more time on it than you actually did. Trust the sizzle, don't move the fish too early, and enjoy the result.
Recipe FAQs
Is it better to cook tilapia in the oven or pan?
The pan is superior for flavor. Searing creates a mahogany colored crust that the oven cannot replicate. This pairs well with a side like broccoli rice for a complete meal.
How to prevent tilapia from sticking to the pan?
Pat the fillets completely dry with paper towels before seasoning. Ensure the olive oil shimmers over medium high heat before adding the fish to create a non-stick sear.
Why is my tilapia rubbery?
You likely overcooked the fillets. Fish continues to cook after leaving the pan, so remove it as soon as the flesh is opaque and flakes easily.
How to reheat leftover tilapia?
Place fillets in a low-temperature oven or a skillet over medium low heat. Add a small pat of butter to restore moisture without toughening the proteins.
Is it true that tilapia must be baked to be healthy?
No, this is a common misconception. Sautéing in olive oil and butter provides essential fats and intense flavor while remaining a lean protein option.
How to cook tilapia fillets in an oven?
Preheat your oven and place seasoned fillets on a lined baking sheet. Bake until the fish reaches 145°F or is opaque throughout.
Is tilapia good for hypertension?
Yes, it is a lean protein source. When prepared with a moderate amount of salt, it fits well into heart healthy diets.
Sauteed Garlic Butter Tilapia

