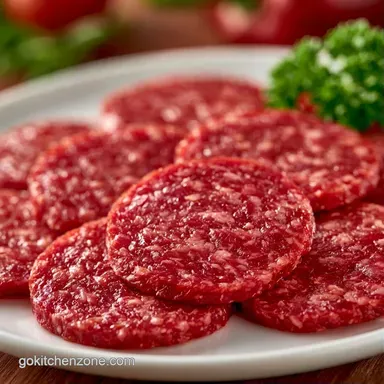
Old Fashioned Beef Summer Sausage Recipe
- Time: 20 min active + 1 hr cooking + 4 hr chilling
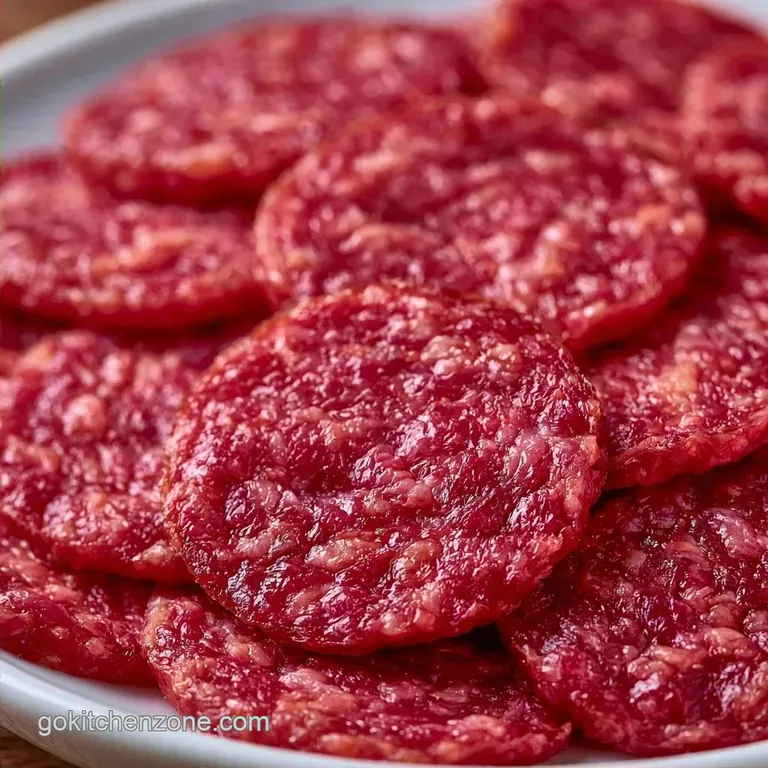
- Flavor/Texture Hook: Tangy, smoky, and firm with a clean slice
- Perfect for: Desk lunches, charcuterie boards, or high protein meal prep
- Making Homemade Beef Summer Sausage
- Recipe Specs and Time
- Shopping List Breakdown
- Essential Gear for the Job
- Step by Step Assembly
- Why the Method Works
- Fixing Common Cooking Issues
- Troubleshooting Common Issues
- Adjusting the Batch Size
- Common Misconceptions
- Storage and Waste Tips
- Flavor Variations to Try
- Serving and Pairing Ideas
- Recipe FAQs
- 📝 Recipe Card
Forget everything you've heard about needing a professional smokehouse or expensive equipment to make a proper summer sausage. Most people think you need an actual casing and a 12 hour smoke to get that signature bite. You don't.
I used to think the casing was the only way to hold the shape, but that's just a legacy habit. By using a pressurized foil wrap and a specific mixing technique, you can get the same result in your own oven. It saves hours of work and removes the stress of dealing with slippery membranes.
This Beef Summer Sausage is built for a practical lifestyle. It's a lean, protein heavy addition to your fridge that keeps your mid week lunches interesting without needing a microwave.
Making Homemade Beef Summer Sausage
The first thing to understand is that this isn't a burger. If you just mix the ingredients and bake them, you'll end up with a meatloaf. You need the meat to become "tacky." This happens when you mix the salt and water into the beef vigorously, which changes the protein structure.
I've found that using a frozen bowl makes a massive difference. If the beef warms up during the mixing phase, the fat smears instead of emulsifying. This leads to a grainy texture that feels wrong in your mouth. Keep everything ice cold to ensure the sausage stays tight and snappy.
Once you've got the consistency right, the foil wrap does the heavy lifting. It mimics the pressure of a casing, forcing the meat to compress as it cooks. This is how you achieve that dense, sliceable texture that defines a great Beef Summer Sausage.
Recipe Specs and Time
Planning the flow is the only way to make this work for a busy week. You can't rush the chill time, so I usually prep this on a Sunday evening.
- Prep time:20 minutes
- Cook time: 1 hour
- Total time:5 hours 20 minutes
- Internal Temp Goal:160°F (71°C)
- Oven Temp:250°F (121°C)
Shopping List Breakdown
Stick to the 80/20 beef ratio. If you go too lean, the sausage becomes dry and crumbly. If you go too fatty, it leaks out of the foil and leaves you with a shrunken log.
| Original Ingredient | Substitute | Why It Works |
|---|---|---|
| Ground Beef (80/20) | Ground Pork | Similar fat content. Note: Changes flavor profile to a traditional pork sausage |
| Brown Sugar | Maple Syrup | Provides the same sweetness and color. Note: Adds a distinct maple aroma |
| Smoked Paprika | Chili Powder | Adds a similar earthiness. Note: May increase the heat level |
| Kosher Salt | Table Salt | Pure sodium. Note: Use 50% less volume as table salt is denser |
Key Components: 2 lbs ground beef (80/20) 1/2 cup ice cold water Why this? Helps dissolve salt and binds proteins 2 tbsp kosher salt 1 tsp Prague powder #1 Why this? Essential for color and safety in cured meats 2 tbsp brown sugar 1 tbsp
Smoked paprika 1 tsp garlic powder 1 tsp onion powder 1 tsp coarsely ground black pepper 1/2 tsp ground coriander
Essential Gear for the Job
You don't need a fancy kitchen, but a few specific items make the process smarter. A stand mixer with a paddle attachment is the most efficient way to hit that tacky consistency, though your hands work if you have the patience.
The most important "tool" is actually a frozen mixing bowl. Putting your bowl in the freezer for 30 minutes before you start prevents the beef from hitting the danger zone during the mix. You'll also need heavy duty aluminum foil.
Standard foil can tear under the pressure of the expanding meat, which would let the juices escape.
Finally, a digital meat thermometer is non negotiable. Since we are cooking at a low temperature, you can't rely on a timer. You need to know exactly when the center hits 160°F to ensure the meat is safe and the texture is set.
Step by step Assembly
- Chill the bowl. Place your mixing bowl in the freezer for 30 mins. Note: This keeps the fat from melting during the mix.
- Combine ingredients. Add the chilled ground beef, ice cold water, salt, Prague powder #1, and all spices to the bowl.
- Mix vigorously. Use a paddle attachment on medium speed or your hands to mix for 3-5 minutes until the meat feels sticky and tacky.
- Shape the log. Scoop the beef onto parchment paper and form a cylinder about 3 inches in diameter.
- Seal the meat. Wrap the parchment tightly around the log, then wrap it in heavy duty foil. Twist the ends tightly to create a pressurized seal.
- Bake the roast. Place in a 250°F (121°C) oven. Bake for 60 to 90 minutes until the internal temperature hits 160°F.
- Air cool. Remove from the oven and let the log sit at room temperature for 30 minutes.
- Set the proteins. Wrap the cooled log in plastic wrap and refrigerate for at least 4 hours. Note: This is where the final "snap" develops.
Why the Method Works
This recipe relies on protein binding rather than just cooking meat. If you've ever made a Meat Sauce Recipe, you know that beef usually just browns and crumbles. Here, we are creating a stable emulsion.
- Cold Emulsion: The ice water and salt break down myosin proteins, allowing them to bond together into a solid mass.
- Pressure Cooking: The tight foil wrap prevents the sausage from expanding, which keeps the density high and the texture firm.
- Low Heat: Baking at 250°F prevents the fat from rendering out too quickly, which would leave the Beef Summer Sausage dry.
According to guidelines from Serious Eats, curing salts like Prague powder #1 are what give cured meats their characteristic pink color and prevent spoilage during the chilling process.
Method Comparison
| Feature | Oven Method (This Recipe) | Stovetop/Poach Method |
|---|---|---|
| Time | 60-90 mins (Passive) | 45 mins (Active) |
| Texture | Uniform and dense | Softer, more like a bratwurst |
| Effort | Set and forget | Constant temp monitoring |
| Best For | Slicing and meal prep | Immediate eating |
Fixing Common Cooking Issues

Most issues with homemade sausage come down to temperature. If the meat gets too warm, the fat separates from the protein. You'll see this as a pool of oil in your foil after baking.
Troubleshooting Common Issues
| Issue | Solution |
|---|---|
| Why Your Sausage is Crumbly | This usually means the meat wasn't mixed long enough. If you don't hit that "tacky" stage, the proteins don't bond. The result is a texture closer to a burger than a sausage. |
| Why the Log is Leaking | Leaking happens if the foil isn't twisted tightly enough at the ends. The pressure inside the log increases as it heats. If there's a gap, the juices escape, and you lose that moist interior. |
| Why the Color is Gray | If you skipped the Prague powder or didn't let the sausage chill long enough, the color won't be the classic pink. The curing process takes time and the right chemistry to stabilize the color. |
Adjusting the Batch Size
If you're making a smaller batch, like 1 lb, you can reduce the cook time by about 20%. However, always rely on the internal temperature of 160°F rather than the clock. Use a smaller loaf pan to support the log so it doesn't flatten out.
For larger batches (4 lbs+), don't just double the spices. Salt and smoked paprika can become overpowering. Increase spices to 1.5x the original amount and work in separate logs. Trying to make one giant 4 lb log will result in the outside overcooking before the center reaches 160°F.
When using a Casing Beef Summer Sausage approach for larger quantities, make sure you have enough fridge space. These logs need plenty of room to chill without touching, or they won't set evenly.
Common Misconceptions
Searing the outside of the sausage before baking doesn't "lock in juices." It adds flavor, but the moisture is actually held in by the protein bond we created during the mixing phase.
Some believe you need a smoker for a "smoky" taste. While a real smoker is great, high-quality smoked paprika provides a very similar flavor profile without the need for a backyard setup or 10 hours of waiting.
Many think you can skip the chilling phase to save time. You can't. The refrigeration period allows the fats to re solidify and the proteins to tighten. If you slice it while warm, it will fall apart.
Storage and Waste Tips
Keep your Beef Summer Sausage wrapped tightly in foil or plastic wrap in the fridge for up to 2 weeks. For longer storage, it freezes beautifully for 3 months. Slice it before freezing if you want to grab a few pieces for a snack without thawing the whole log.
To reheat, avoid the microwave, which can make the fat rubbery. Instead, sear slices in a pan for 2 minutes per side. If you have leftover scraps or "ends" of the log, chop them up and stir them into a Garlic Butter Sauce for a savory pasta topping.
Flavor Variations to Try
Once you've nailed the base, you can play with the spice profile. For a "Spicy Texan" version, add 1 tsp of cayenne pepper and 1 tbsp of chopped pickled jalapeños during the mixing phase.
If you prefer something a bit sweeter, the "Maple Smoke" version replaces the brown sugar with 2 tbsp of pure maple syrup. This works especially well if you're using a Casing Beef Summer Sausage for a more traditional look.
For those watching their sodium, you can swap half the kosher salt for a potassium based salt substitute. Just be aware that this might slightly alter the "snap" of the meat, as sodium is key to the protein binding process.
Serving and Pairing Ideas
This is the center piece of any smart charcuterie board. Pair it with sharp cheddar, cornichons, and a grainy Dijon mustard. Because the flavor is so concentrated, it pairs well with acidic elements like pickled red onions or Granny Smith apple slices.
For a more substantial meal, slice the sausage thin and add it to a hearty breakfast hash with potatoes and peppers. It also makes a great addition to a gourmet game day wrap with arugula, Swiss cheese, and a swipe of horseradish mayo.
Since it's a No Casing Beef Summer Sausage, it's incredibly easy to slice thin without the skin getting in the way. Trust me, once you've had this on a cracker with a bit of cream cheese, you'll never go back to the store-bought stuff.
Recipe FAQs
How to make summer sausage without casing?
Shape the seasoned meat into a cylinder on parchment paper. Wrap the meat tightly in parchment and then heavy duty aluminum foil, twisting the ends to create a pressurized seal.
Do you need to cook summer sausage before eating it?
Yes, this homemade version must be cooked. Bake the wrapped log at 250°F until the internal temperature reaches 160°F to ensure it is safe for consumption.
Can you cook summer sausage after it's been chilled?
Yes, searing slices in a pan for 2 minutes per side is the best method. Avoid using a microwave, as high heat can make the beef fat rubbery.
Is it true that summer sausage requires a professional casing?
No, this is a common misconception. You can achieve the same dense shape and professional texture using only parchment paper and tightly twisted aluminum foil.
What makes summer sausage unique from other meats?
The specific protein bonding created during vigorous mixing. Mixing the beef and ice-cold water for 3-5 minutes until tacky creates a sliceable, dense texture rather than a crumbly one.
Do you remove the casing on summer sausage?
No, because this recipe does not use a traditional casing. Simply remove the parchment and foil wrapping after the log has chilled in the refrigerator for at least 4 hours.
What are some good dishes to make with summer sausages?
Serve it on a charcuterie board or sliced in a savory sandwich. For a hearty meal, these salty slices pair perfectly with a French Dip Sandwich.
No Casing Beef Summer Sausage