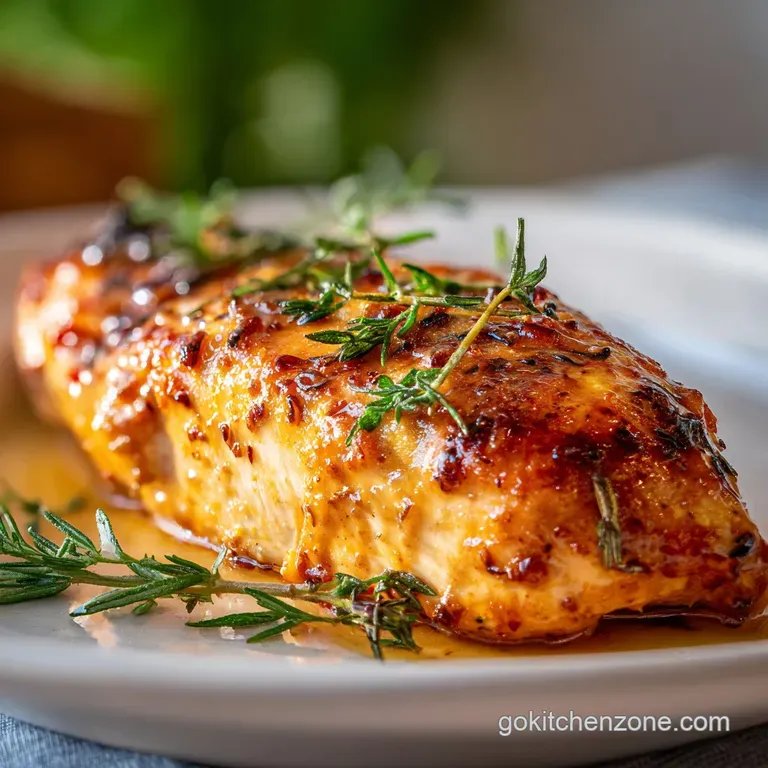
Juicy Baked Chicken Breast Recipe
- Time: Active 5 minutes, Passive 20 minutes, Total 25 minutes
- Flavor/Texture Hook: Savory, spiced crust with a velvety, tender interior
- Perfect for: Rapid weeknight dinners, high protein meal prep, and kitchen beginners
- The Secret to Juicy Baked Chicken Breast
- Why This High Heat Method Works
- Essential Components for Flavorful Results
- Minimal Tools for Best Results
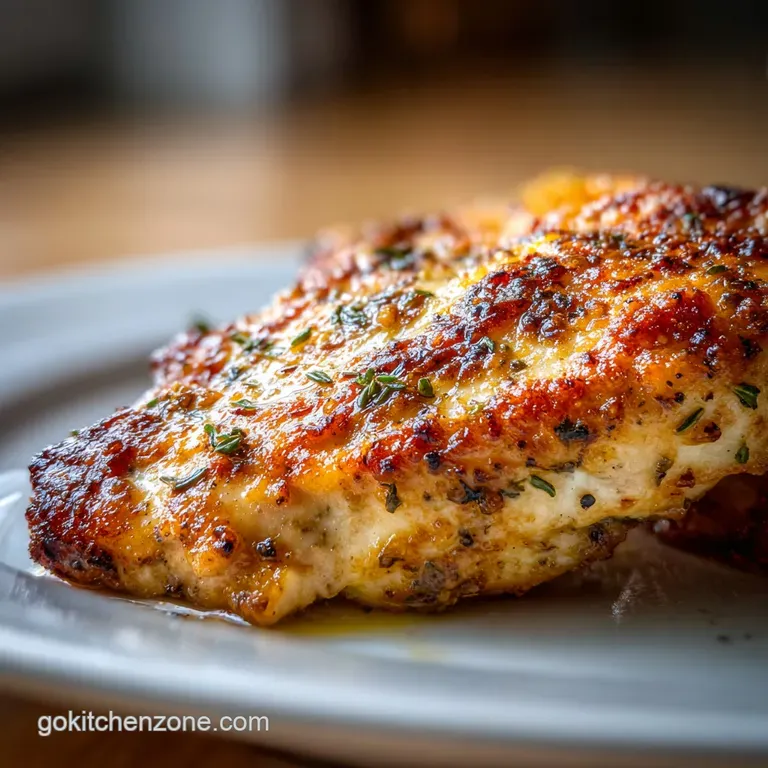
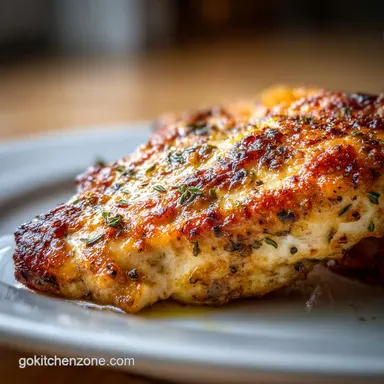
- Steps for Golden Brown Chicken
- Solving Common Texture Problems
- Creative Flavor and Diet Variations
- Storing and Repurposing Your Leftovers
- Best Sides for Your Meal
- Recipe FAQs
- 📝 Recipe Card
The Secret to Juicy Baked Chicken Breast
I still remember the "Cardboard Incident" of 2018. I had friends coming over, and I thought I was being healthy by tossing some plain breasts into the oven at a low temperature for an hour. I wanted them "thoroughly cooked," right?
What I ended up serving was so dry it practically required a glass of water for every single bite. It was embarrassing, and honestly, we ended up ordering pizza while the chicken sat untouched, looking like pale, sad yoga mats.
That failure sent me on a mission to figure out how to make a Baked Chicken Breast that people actually want to eat. I stopped listening to the old school advice of "low and slow" for lean meat. It turns out, that's the fastest way to turn your dinner into a desert.
Since then, I've made this specific version at least once a week, and it never fails to be the juiciest thing on the plate.
We've all been there with the dinner struggle, staring at a pack of raw meat at 6:00 PM with zero plan. This recipe is my "break in case of emergency" move because it's so fast. You don't need to be a chef or have a pantry full of rare spices.
You just need a hot oven and the right ratio of salt to sugar to make the magic happen.
Why This High Heat Method Works
- The Maillard Reaction: High heat at 200°C (400°F) triggers a chemical reaction between amino acids and reducing sugars, creating that savory, browned crust that adds deep flavor without frying.
- Surface Tension Management: Patting the meat dry removes surface moisture that would otherwise turn into steam, allowing the oil and spices to "grab" the meat and form a seal.
- Osmotic Pressure: The salt in the rub draws a tiny bit of moisture to the surface, dissolves the sugar and spices, and then gets reabsorbed, seasoning the meat deep inside the fibers.
- Carryover Thermodynamics: Resting the meat allows the internal temperature to rise naturally by 2-3 degrees as the outer heat moves inward, preventing the fibers from seizing and squeezing out the juice.
| Thickness | Internal Temp | Rest Time | Visual Cue |
|---|---|---|---|
| 1.5 cm (Thin) | 74°C (165°F) | 3 mins | Opaque throughout, clear juice |
| 2.5 cm (Standard) | 74°C (165°F) | 5 mins | Firm to touch, golden exterior |
| 4 cm (Thick) | 74°C (165°F) | 8 mins | Spices darkened, no pink center |
The key to success here is understanding that chicken breast is extremely lean. Unlike a ribeye or a chicken thigh, there isn't enough fat to protect the meat from overcooking. That is why we use the "Fast and Hot" philosophy.
By blasting the outside, we get color and flavor before the center has a chance to turn into rubber. It’s a race against the clock that you’ll win every time if you follow the temperature guide above.
Essential Components for Flavorful Results
When you're working with minimal tools, the ingredients have to do the heavy lifting. I've tested a dozen rub combinations, and this specific blend of smoked paprika and light brown sugar is the winner. The sugar doesn't make it "sweet" it just helps with the browning and balances the salt. It's a technique similar to what I use in my Chicken Mac and Cheese recipe to keep the protein from getting lost in the sauce.
| Ingredient | Science Role | Pro Secret |
|---|---|---|
| Kosher Salt | Denatures proteins | Use coarse salt; it sticks better than fine table salt and seasons more evenly. |
| Light Brown Sugar | Caramelization agent | The molasses content helps the crust "cling" to the meat at high temperatures. |
| Smoked Paprika | Color and depth | Provides a "charred" flavor without a grill. Smoked is better than "sweet" paprika here. |
| Extra Virgin Olive Oil | Heat conductor | Acts as a bridge between the hot air and the meat, ensuring even cooking. |
- 4 boneless, skinless chicken breasts (approx. 200g each): Try to find pieces that are similar in thickness so they finish at the same time. Why this? Even thickness prevents the small ones from drying out while the big ones cook.
- 30 ml (2 tbsp) extra virgin olive oil: You can use avocado oil too. Why this? Fat carries the flavor of the spices and prevents sticking to the pan.
- 5g (1 tsp) kosher salt: Essential for moisture retention. Why this? Salt breaks down the tough muscle fibers so they stay tender.
- 2.5g (1/2 tsp) freshly cracked black pepper: Provides a bit of back end heat. Why this? Pre ground pepper is dusty; fresh cracked has oils that pop in the heat.
- 5g (1 tsp) smoked paprika: The secret for that "oven fried" look. Why this? It gives a deep red hue that looks much more appetizing than pale chicken.
- 5g (1 tsp) garlic powder: For an aromatic punch. Why this? Fresh garlic burns at 200°C, but powder toasts beautifully.
- 5g (1 tsp) onion powder: Adds savory "umami" notes. Why this? It rounds out the sharp edges of the garlic and salt.
- 2.5g (1/2 tsp) dried oregano: A touch of earthiness. Why this? Oregano holds up better to high heat than delicate herbs like parsley.
- 5g (1 tsp) light brown sugar: This is your browning agent. Why this? It creates a slight "glaze" effect that traps internal moisture.
Minimal Tools for Best Results
You really don't need much to get this done. I'm a big fan of the one pan approach because nobody wants to do a mountain of dishes on a Tuesday night. A simple rimmed baking sheet (like a Nordic Ware half sheet) is perfect.
If you have a cast iron skillet, that's even better because it holds heat so well, but a standard pan works just fine.
The one "non negotiable" tool in my kitchen is a digital meat thermometer. Seriously, stop trying to guess by poking it with your finger or, heaven forbid, cutting into it while it's in the oven. Cutting it lets all the juice run out, which is exactly what we’re trying to avoid.
A cheap $15 digital probe will change your life. It's the difference between "I hope this is done" and "I know this is perfect."
Steps for Golden Brown Chicken
- Prep the oven. Preheat to 200°C (400°F). Note: A hot oven is crucial for that immediate sizzle when the chicken goes in.
- Dry the meat. Pat the 4 chicken breasts dry with paper towels. Until the surface is matte and not shiny.
- Mix the rub. Combine salt, pepper, paprika, garlic powder, onion powder, oregano, and brown sugar in a small bowl. Note: Mixing first ensures you don't get a "salty spot" on one breast.
- Oil the chicken. Place chicken on the baking sheet and drizzle with 30 ml of olive oil. Coating every inch of the meat.
- Apply the spice armor. Sprinkle the rub generously over both sides of each breast. Note: Use your hands to press the spices into the meat so they don't fall off.
- Arrange for airflow. Space the breasts at least 5 cm apart on the tray. Avoid crowding to prevent steaming.
- Bake the chicken. Place in the center of the oven for 18 to 22 minutes. Until the edges are slightly golden and crackling.
- Check the temp. Insert your thermometer into the thickest part. It must hit 74°C (165°F).
- The essential rest. Remove from the oven and transfer to a plate or cutting board. Note: This allows the juices to redistribute through the fibers.
- Wait five minutes. Let the chicken rest before slicing. To ensure a velvety texture in every bite.
Solving Common Texture Problems
One of the biggest issues people have with a Baked Chicken Breast is the dreaded "white and rubbery" look. If your chicken looks like it was boiled rather than baked, the problem is almost always moisture.
If you don't pat that meat dry, the heat of the oven has to evaporate that surface water before it can start browning the meat. By the time the water is gone, the inside is already overcooked.
Then there's the temperature debate. Some people swear by 175°C (350°F), but I find that the longer it sits in that moderate heat, the more the moisture leaches out. It's like sitting in a sauna for 40 minutes versus a quick, hot steam.
The 200°C (400°F) setting is the sweet spot for a 200g breast.
| Problem | Root Cause | Solution |
|---|---|---|
| Rubbery/Tough texture | Overcooked center | Use a thermometer; pull at 73°C and let it carry over to 74°C. |
| Pale/Soggy exterior | Excess surface moisture | Pat dry with paper towels and don't skip the oil. |
| Dry/Fiberous meat | Slicing too early | Wait 5 full minutes before cutting to let juices settle. |
Common Mistakes Checklist
- ✓ Skipping the pat dry step: This is the number one reason for boring, steamed looking chicken.
- ✓ Overcrowding the pan: If the breasts are touching, they will steam each other instead of roasting.
- ✓ Using cold chicken: Let the meat sit on the counter for 15 minutes before baking to ensure even cooking.
- ✓ Not using a thermometer: Even a 2 minute difference in the oven can be the difference between juicy and dry.
- ✓ Skipping the sugar: You need that tiny bit of sugar to help the spices caramelize at high heat.
Creative Flavor and Diet Variations
If you're making this for meal prep, you might get bored of the same rub every day. You can easily swap the spices while keeping the method exactly the same. For a Mediterranean vibe, swap the paprika for dried lemon peel and extra oregano. If you want something with more of a "crunch," you might enjoy my Parmesan Crusted Chicken recipe which adds a cheesy layer to the outside.
Diet Swaps
| Original Ingredient | Substitute | Why It Works |
|---|---|---|
| Light Brown Sugar | Monk Fruit Sweetener | Keeps it Keto/Low Carb. Note: Won't caramelize as deeply as real sugar. |
| Olive Oil | Ghee (Melted) | Adds a rich, buttery flavor and has a very high smoke point. |
| Smoked Paprika | Chili Powder | Changes the profile to a taco style spice. Note: Adds a bit more heat. |
When it comes to scaling this recipe, it's pretty straightforward. If you're cooking for one or two, just use two breasts and keep the spice ratios the same. If you're doubling it for a big family dinner, use two separate baking sheets.
Do not try to cram 8 breasts onto one sheet, or the oven temperature will drop too much, and you'll end up with that "steamed" problem we talked about. For the spices, I find that you don't need to quite double the salt maybe 1.5x the amount of salt and spices is enough for 8 breasts.
Storing and Repurposing Your Leftovers
Leftover Baked Chicken Breast is a goldmine for the rest of the week. It stays good in an airtight container in the fridge for up to 4 days. When you go to reheat it, don't just blast it in the microwave on high power. That will turn the protein fibers into tiny rubber bands.
Instead, use 50% power or, better yet, slice it cold and throw it into a hot pan for 60 seconds just to warm it through.
If you want to freeze it, I recommend slicing it first. It thaws faster and is ready to be tossed into a salad or a soup. It'll stay fresh in the freezer for about 3 months. For a zero waste tip: if you have leftover rub that didn't touch the raw meat, keep it in a jar! It’s fantastic on roasted chickpeas or even popcorn. If you have those little bits of chicken left that aren't enough for a full meal, chop them up and use them as a topping for my Chicken Tortilla Soup recipe.
Best Sides for Your Meal
Since the oven is already at 200°C, take advantage of it! You can roast some broccoli or asparagus on a second tray at the same time. They usually take about 12-15 minutes, so just pop them in when the chicken has about 10 minutes left.
It's a total one pan-dinner win.
- The "If you want X, do Y" Decision Shortcut:
- If you want a crispier skin, place a wire rack on top of your baking sheet and put the chicken on the rack.
- If you want a saucy finish, brush the chicken with your favorite BBQ sauce during the last 3 minutes of baking.
- If you want it extra tender, use a meat tenderizer (the hammer kind) to pound the thickest part of the breast until it's even with the rest.
One final myth to bust: people often say you need to sear the meat in a pan first to "seal in the juices." Science tells us that's just not true. Searing creates flavor (the Maillard reaction), but it doesn't create a physical seal.
This over high heat baking method achieves that same flavor without the extra step of stovetop searing, saving you time and a messy, oil splattered stove. Trust the process, watch that thermometer, and you'll never have "cardboard" chicken again.

Recipe FAQs
How long does chicken breast in the oven at 400 take?
Approximately 18 to 22 minutes for a standard 200g breast. Baking at 400°F (200°C) uses high heat to create a crust quickly, locking in moisture. Always check the internal temperature to ensure it reaches 165°F (74°C).
Is it better to bake a chicken at 350 or 400?
400°F (200°C) is generally better for lean chicken breast. Baking at a higher temperature cooks the outside faster, minimizing the time the interior spends drying out. Lower temperatures risk slowly drawing out moisture before a good crust can form.
How long does it take to cook a chicken breast on 350?
Expect 25 to 35 minutes when baking at 350°F (175°C), depending heavily on thickness. If you are looking for a rapid, high flavor result, I recommend switching to the 400°F method, which is much faster, similar to the heat management we use in our Creamy Herb Chicken recipe.
How long do you cook chicken breast in the oven?
Target 18 to 22 minutes at 400°F (200°C) for an average thickness breast. The internal temperature is the only reliable indicator, so check for 165°F (74°C) at the thickest point.
What is the secret to keeping baked chicken breast juicy?
The secret is a hot oven and proper resting. Baking at high heat quickly sets the proteins, and using a rub with a small amount of sugar aids caramelization rather than searing first. Do not slice the chicken until it has rested for a full five minutes to allow the juices to redistribute.
Should I pound chicken breast before baking to ensure even cooking?
Yes, gently pound the thickest part until the entire breast is uniform in thickness. This is a crucial technique for thermal consistency; if you enjoyed mastering that consistent flattening technique here, apply the same precision when preparing fillings for Chicken Lettuce Wraps recipe.
Can I bake frozen chicken breast at 400 degrees?
No, you should thaw it first or use a significantly lower temperature (like 350°F) for much longer, which risks drying it out. Baking from frozen at 400°F will result in a burnt exterior and a raw, unsafe center.
Juicy Baked Chicken Breast Recipe
Ingredients:
Instructions:
Nutrition Facts:
| Calories | 302 calories |
|---|---|
| Protein | 45.8 g |
| Fat | 12.2 g |
| Carbs | 1.4 g |
| Fiber | 0.3 g |
| Sugar | 1.1 g |
| Sodium | 615 mg |
