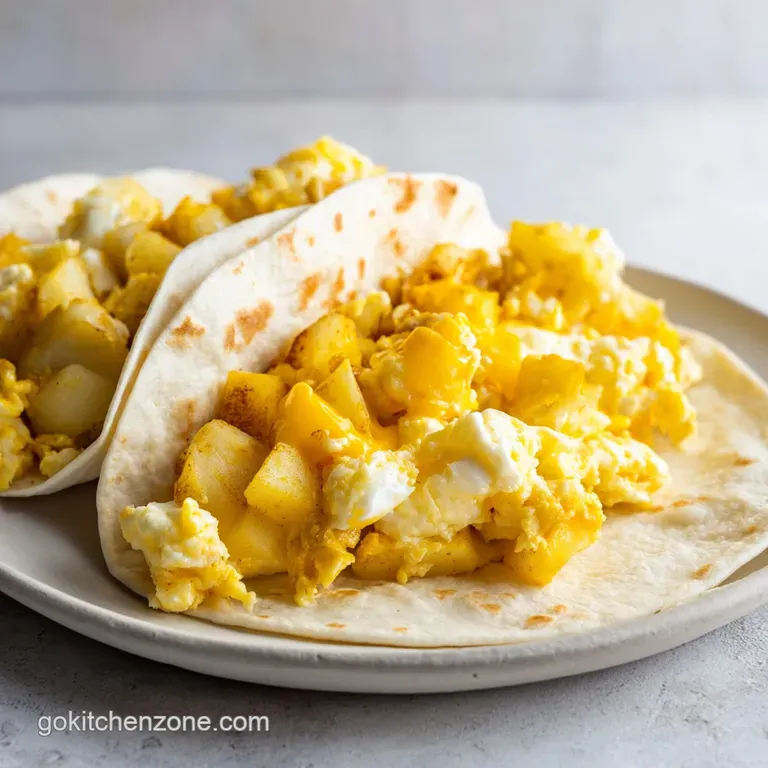
Potato Egg and Cheese Breakfast Tacos: Crispy and Golden
- Time:15 minutes active + 20 minutes cooking = Total 35 minutes
- Flavor/Texture Hook: Crispy, golden edges with velvety scrambled eggs
- Perfect for: Tight budgets, lazy Sunday mornings, or quick meal prep
That aggressive sizzle when the potatoes hit the hot oil is the sound of a morning winning. I used to make these and end up with something that felt more like a wet mash than a taco. I'd crowd the pan, the potatoes would steam instead of sear, and the tortillas would turn into soggy wraps within two minutes.
It was a total disaster every single time.
The fix was actually pretty simple: patience and space. I stopped stirring the potatoes every ten seconds and just let them sit there and get a dark, golden crust. Once I figured out that the heat needs to be medium high and the potatoes need to be undisturbed, everything changed.
Now, these potato egg and cheese breakfast tacos are my go to when I need something that feels substantial but doesn't cost much. We're talking about cheap pantry staples transformed into something that actually tastes like you put in effort. Let's crack on and get this sorted.
Potato Egg and Cheese Breakfast Tacos
The secret to making these work on a budget is using Yukon Golds. They have just the right amount of starch to get those crispy edges but stay creamy inside. If you've ever had those rubbery, overcooked eggs that taste like sulfur, you're probably cooking them too hot for too long.
We're going for a soft scramble that folds around the potatoes, creating a cohesive filling that doesn't fall out of the taco.
Most people make the mistake of mixing everything in a bowl first. Don't do that. We want the potatoes to be the stars of the show, seared and seasoned, with the eggs acting as the velvety binder.
When you add the cheese at the very end and cover the pan, you create a little steam sauna that melts the cheddar perfectly without overcooking the eggs.
If you're looking for more ideas on what to add to your spread, this fun article has some great suggestions for toppings. Personally, I keep it simple because the smoked paprika does most of the heavy lifting here.
The Secret to Texture
Searing Process: Letting the potatoes sit undisturbed creates a crust that prevents them from absorbing too much egg liquid.
Dairy Buffer: Adding a splash of almond milk to the eggs slows down the protein coagulation, keeping them soft.
Residual Heat: Covering the pan for the final 60 seconds uses trapped steam to melt cheese without drying out the filling.
Starch Control: Small, uniform dicing ensures every piece of potato cooks at the same rate, avoiding the "raw center, burnt edge" tragedy.
| Method | Time | Texture | Best For |
|---|---|---|---|
| Fast Sear | 20 mins | Crispy edges, soft center | Weekdays |
| Slow Roast | 45 mins | Uniformly tender, mild | Meal Prep |
| Deep Fry | 30 mins | Shatter crisp, rich | Cheat Days |
Component Analysis
| Ingredient | Science Role | Pro Secret |
|---|---|---|
| Yukon Gold | Structure | Higher wax content prevents them from falling apart |
| Smoked Paprika | Depth | Add after searing to prevent the spice from burning |
| Almond Milk | Texture | Keeps eggs velvety and light on the budget |
| Sharp Cheddar | Binding | Higher fat content leads to a smoother melt |
Gathering Your Essentials
For the potatoes, we're using Yukon Golds because they're the most reliable. You can use Russets, but they tend to get a bit grainier. I've found that dicing them into small, even cubes is the only way to ensure they finish at the same time. If some are huge and some are tiny, you'll have a mix of mush and raw potato.
For the eggs, a simple whisk with some almond milk does the trick. I use almond milk because it's often cheaper in bulk and doesn't change the flavor, but it provides that necessary moisture. Honestly, don't even bother with low-fat cheese here.
You need the fat in the sharp cheddar to get that silky pull that holds the taco together.
The Shopping List:
- 2 lbs Yukon Gold potatoes, small dicedWhy this? Best balance of creamy and crispy
- 2 tbsp extra virgin olive oilWhy this? High smoke point for searing
- 1 tsp smoked paprikaWhy this? Adds a wood fired aroma
- 1/2 tsp garlic powderWhy this? Even distribution of flavor
- 1/2 tsp sea saltWhy this? Enhances natural potato flavor
- 1/4 tsp black pepperWhy this? Subtle heat
- 6 large eggsWhy this? Standard protein base
- 2 tbsp unsweetened almond milkWhy this? Keeps eggs tender
- 1/4 tsp saltWhy this? Basic seasoning
- 8 small flour tortillasWhy this? Pliable and easy to fold
- 1 cup shredded sharp cheddar cheeseWhy this? Strong flavor, great melt
| Original Ingredient | Substitute | Why It Works |
|---|---|---|
| Yukon Gold Potatoes | Russet Potatoes | More starchy. Note: Will be crispier but less creamy |
| Almond Milk | Whole Milk | Similar fat content. Note: Classic flavor, slightly richer |
| Sharp Cheddar | Monterey Jack | Melts faster. Note: Milder taste, very creamy |
| Flour Tortillas | Corn Tortillas | gluten-free option. Note: Must be toasted well to avoid breaking |
Right then, before we start, make sure your pan is actually hot. If the oil isn't shimmering, your potatoes will just soak up the grease and get soggy. I prefer a cast iron skillet because it holds heat like a beast, but any non stick pan will do if you're worried about the eggs sticking.
The Cooking Process

Searing the Potatoes
- Heat the olive oil over medium high heat in a 12 inch cast iron skillet or non stick pan. Note: Wait until the oil shimmers but isn't smoking.
- Add the diced potatoes in a single layer and let them sit undisturbed for 4-5 minutes until the bottoms are golden brown.
- Stir in the smoked paprika, garlic powder, sea salt, and black pepper, continuing to cook until the edges are crisp and the centers are tender.
Soft Scrambling the Eggs
- Lower the heat to medium low. Note: This prevents the eggs from toughening up.
- Whisk the eggs and almond milk in a bowl until combined, then pour the mixture directly over the potatoes.
- Gently fold the eggs from the edges to the center using a spatula until thickened but still moist.
Melting the Cheese
- Sprinkle the shredded cheddar cheese over the mixture and cover the pan with a lid for 60 seconds until the cheese is melted and bubbly.
Toasting and Filling
- Warm the tortillas in a separate dry pan or over an open flame until pliable and slightly charred.
- Spoon a generous portion of the potato egg-cheese mixture into each tortilla shell.
Chef's Note: If you want an extra layer of flavor, rub a halved garlic clove on the tortillas after you char them. It's a cheap hack that makes the whole thing smell like a professional kitchen.
What Can Go Wrong (and How to Fix It)
Why Your Potatoes Stay Soggy
This usually happens because the pan was too crowded. When potatoes are piled on top of each other, they release steam, which boils the potatoes instead of searing them. If you have a huge batch, cook the potatoes in two turns.
Preventing Overcooked Eggs
Eggs continue to cook even after you take them off the heat. If they look "done" in the pan, they'll be dry by the time they hit the tortilla. Pull them when they still look slightly wet.
Stopping Tortillas from Tearing
Cold tortillas are brittle. If you don't heat them up, they'll crack the moment you add the filling. A quick 30 seconds over a gas flame or in a hot skillet makes them stretchy and fragrant.
| Problem | Root Cause | Solution |
|---|---|---|
| Potatoes are raw inside | Heat too high, seared too fast | Lower heat, cover pan for 2 mins |
| Eggs are rubbery | Overcooked or heat too high | Remove from heat while still moist |
| Tortilla is soggy | Filling was too wet/steamy | Let filling sit for 1 min before filling |
Common Mistakes Checklist:
- ✓ Did you let the potatoes sit undisturbed for 5 minutes?
- ✓ Is the heat lowered before adding the eggs?
- ✓ Are the tortillas warm and pliable?
- ✓ Did you avoid over stirring the eggs?
- ✓ Did you use small, uniform potato cubes?
Adjusting the Batch Size
If you're just cooking for yourself, you can easily scale this down. For a half batch, use 1 lb of potatoes and 3 eggs. Since you'll have more room in the pan, your potatoes will likely crisp up faster, so reduce the searing time by about 20%.
When dealing with a single egg, it's easier to whisk one egg and then just eyeball the almond milk (about 1 tbsp).
For a crowd, don't try to quadruple the recipe in one pan. You'll end up with a potato stew. Work in batches. If you're making a double batch, increase the salt and spices to only 1.5x the original amount, as flavors can intensify when cooked in larger volumes.
For the eggs, I recommend whisking them in a large pitcher and pouring them in stages.
If you find yourself making these often, you can prep the potatoes the night before. Dice them and keep them in a bowl of cold water in the fridge. Just make sure to pat them bone dry with a paper towel before they hit the oil, or they'll splatter everywhere.
Common Breakfast Myths
Some people think you need to parboil potatoes before frying them. While that works for huge chunks, with small dices, it's a waste of time. The direct to pan method gives you a much better crust and saves a pot from being washed.
Another myth is that adding milk to eggs makes them "fluffier." In reality, the milk just dilutes the protein, which prevents the eggs from bonding too tightly. This results in a velvety texture rather than a "fluffy" one.
Finally,, don't believe the idea that you need expensive "breakfast blends" of oil. Basic extra virgin olive oil is cheap and handles the heat of a breakfast taco just fine.
Storage Guidelines
You can store these potato egg and cheese breakfast tacos in the fridge for up to 3 days. Store the filling in an airtight container and keep the tortillas separate. If you store them already assembled, the tortillas will inevitably get soggy.
For freezing, I only recommend freezing the potato and egg filling. Spread it in a freezer safe bag and flatten it out. It'll stay good for about 2 months. When you're ready to eat, thaw it in the fridge overnight and reheat it in a skillet to bring back some of that crispness.
To reheat, avoid the microwave if you can. Put the filling back in a pan with a tiny bit of butter or oil over medium heat. This refreshes the texture. If you must use a microwave, do it in 30 second bursts to avoid turning the eggs into rubber.
Zero Waste Tip: If you have leftover potato cubes that didn't make it into a taco, toss them into an omelet the next morning or use them as a side for a quick dinner. Even the leftover almond milk from the egg mixture can be stirred into your morning coffee.
Serving and Enjoyment
These tacos are best served immediately while the cheese is still stretchy. For a bit of contrast, add something acidic like pickled red onions or a squeeze of fresh lime. The brightness cuts through the richness of the cheddar and eggs.
If you want to turn these into a full feast, pair them with some sliced avocado or a dollop of sour cream. If you're in the mood for something even creamier on the side, you might like my homemade alfredo sauce if you're doing a brunch pasta hybrid (don't judge me, it's a weekend!).
For those who love a bit of heat, a drizzle of Cholula or a few slices of fresh jalapeño make these potato egg and cheese breakfast tacos pop. Trust me, the smoked paprika and the char on the tortillas provide a great base, but a little acidity or spice is what takes it from "good home cooking" to "I can't believe I made this at home."
Whether you're eating these on the go or sitting down for a slow morning, the key is the contrast between the shatter crisp potatoes and the velvety eggs. It's a budget friendly win that proves you don't need fancy ingredients to make a meal that feels like a treat. Enjoy!
Recipe FAQs
How to get the potatoes crispy?
Heat olive oil over medium high and leave diced potatoes undisturbed for 4-5 minutes. This initial sear creates a golden brown crust before you stir in the seasonings.
Can I freeze these assembled tacos?
No, freeze only the filling. Freezing assembled tacos makes the tortillas soggy; instead, flatten the potato and egg mixture in a freezer bag for up to 2 months.
How to reheat the tacos?
Reheat the filling in a skillet. This method restores the crispness of the potatoes, which is often lost in the microwave.
Is it true I must stir the potatoes constantly to ensure they cook evenly?
No, this is a common misconception. Stirring too often prevents the potatoes from browning; they need to sit undisturbed to develop a proper crust.
How to prevent the eggs from overcooking?
Lower heat to medium low and gently fold the eggs from the edges to the center. Remove the pan from heat while the eggs are still slightly moist to avoid a rubbery texture.
Can I use a different potato filling?
Yes, any diced potato works. If you enjoyed the savory profile of a potato and cheese filling, you will appreciate the smoked paprika and garlic notes in this version.
How to warm the tortillas?
Place them in a dry pan or over an open flame. Heat until they are pliable and slightly charred for the best texture.
Potato Egg Cheese Breakfast Tacos