Best Peanut Butter Cookies Recipe
- Time: Active 15 minutes, Passive 40 minutes, Total 55 minutes
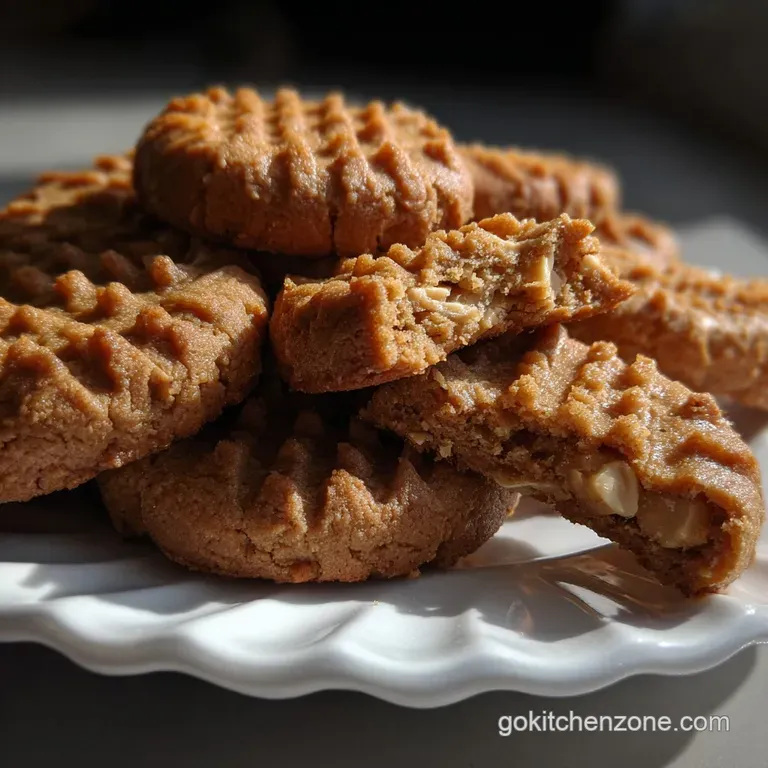
- Flavor/Texture Hook: Shatter crisp edges with a velvety, melt in-your mouth center
- Perfect for: After school snacks, holiday cookie swaps, or beginner friendly weekend baking
- The Secret Behind Soft and Chewy Peanut Butter Cookies
- Vital Stats for Baking Success
- Deep Dive into Cookie Component Science
- Selecting Ingredients for Deep Nutty Flavor
- Must Have Tools for Every Baker
- Perfect Steps for Shaping and Baking
- Solving Common Cookie Baking Problems
- Creative Twists for Unique Flavors
- Storing Treats for Future Snacking
- Best Ways to Enjoy Cookies
- Clearing Up Old Baking Myths
- Recipe FAQs
- 📝 Recipe Card
Is there anything that hits the spot quite like the aroma of roasted peanuts and caramelized sugar swirling through your kitchen? I remember my grandmother standing over her yellow Formica countertops, pressing that signature fork cross pattern into little rounds of dough.
It felt like magic then, and honestly, it still feels a bit like magic now. We are looking for that specific crave worthy balance where the salt enhances the sugar, and the fat from the peanut butter creates a texture so tender it almost feels like a cloud.
This recipe is designed to be your reliable go to. Whether you are a seasoned pro or just picking up a spatula for the first time, these peanut butter cookies are practically foolproof.
We are skipping the complicated techniques and focusing on what matters: high-quality fats, the right ratio of sugars, and a bit of patience during the chilling phase. You can expect a cookie that doesn't spread into a flat puddle but instead holds its beautiful, ridged texture.
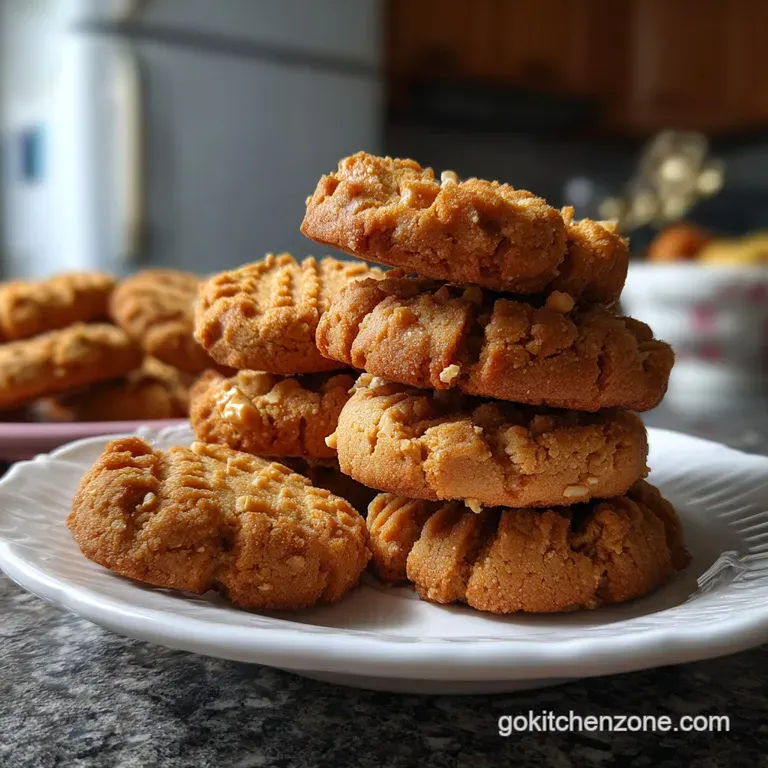
By the time you pull that tray out of the oven, you’ll have 24 golden, fragrant treats ready to be dunked in a cold glass of milk. We are going for a feel good vibe here, something colorful and vibrant that brings people together.
Let’s get the oven preheated and talk about why this specific method works so well every single time. Trust me, once you try this version, the store-bought ones just won't cut it anymore.
The Secret Behind Soft and Chewy Peanut Butter Cookies
The magic happens when we understand how ingredients interact under heat. Creating the best peanut butter cookies isn't just about mixing things in a bowl, it is about managing moisture and protein.
- Protein Scaffolding: Peanut butter adds extra protein and fat compared to standard butter cookies, which creates a more dense, fudge like structure that resists crumbling.
- Hygroscopic Sugars: Using light brown sugar allows the cookies to pull moisture from the air, ensuring they stay soft for days rather than turning into dry pucks.
- Aeration Control: Creaming the Land O'Lakes butter and Jif peanut butter together traps tiny air bubbles, which expand in the oven to give the cookie its lift.
- Maillard Reaction: The combination of proteins in the nuts and the sugars causes browning at high temperatures, creating those complex, toasted flavor notes we crave.
I used to think that more peanut butter meant a better cookie, but that is a mistake I once made. Too much fat actually breaks the emulsion, leaving you with a greasy mess. This recipe hits the sweet spot where the crumb is tight but tender. If you love this flavor profile, you might also enjoy making a batch of my Peanut Butter Balls recipe for a no bake alternative.
Vital Stats for Baking Success
| Metric | Measurement | Checkpoint |
|---|---|---|
| Yield | 24 Cookies | 1.5 inch dough balls |
| Prep Time | 15 minutes | Active mixing |
| Chill Time | 30 minutes | Essential for structure |
| Bake Temp | 375°F (190°C) | High heat for crisp edges |
| Bake Time | 10 minutes | Center should look slightly underdone |
Deep Dive into Cookie Component Science
Understanding your ingredients is the first step toward becoming a better baker. These classic peanut butter cookies rely on a specific chemistry to achieve their signature look and feel.
| Ingredient | Science Role | Pro Secret |
|---|---|---|
| Unsalted Butter | Provides steam for lift and a rich mouthfeel. | Use room temp butter to ensure a stable emulsion with sugars. |
| Creamy Peanut Butter | Supplies structural proteins and essential nut oils. | Jif or Skippy works better than "natural" oils for consistent spread. |
| Light Brown Sugar | Adds glucose for chewiness and acidity for leavening. | Pack it firmly to ensure the correct volume of moisture is added. |
| Baking Soda | Reacts with brown sugar to create carbon dioxide. | Ensure it is fresh (less than 6 months old) for a proper rise. |
Selecting Ingredients for Deep Nutty Flavor
To get that authentic, homemade peanut butter cookies taste, the quality of your staples matters. I always reach for King Arthur All Purpose Flour because the consistent protein content means my cookies never turn out tough.
- 1/2 cup (115g) unsalted butter, room temperature
- Substitute: Salted butter (reduce added kosher salt to a pinch).
- Why this? Provides the fat base for a melt in-your mouth texture.
- 3/4 cup (190g) creamy peanut butter
- Substitute: SunButter for a nut free version (flavor will be earthier).
- Why this? The primary flavor driver and structural binder.
- 1/2 cup (100g) granulated white sugar
- Substitute: Organic cane sugar (adds a slight crunch).
- Why this? Creates the crisp edges and aids in browning.
- 1/2 cup (100g) packed light brown sugar
- Substitute: Dark brown sugar (for a deeper, molasses like flavor).
- Why this? Keeps the center soft and chewy.
- 1 large egg, room temperature
- Substitute: 1/4 cup unsweetened applesauce (yields a denser cookie).
- Why this? Binds the fats and dry ingredients together.
- 1 tsp vanilla extract
- Substitute: Almond extract (use only 1/4 tsp as it is very strong).
- Why this? Rounds out the nuttiness with floral notes.
- 1 1/4 cups (160g) all purpose flour
- Substitute: 1:1 gluten-free baking flour (like Cup4Cup).
- Why this? The foundation that provides structure and bulk.
- 3/4 tsp baking soda
- Substitute: 2 tsp baking powder (texture will be puffier and cake like).
- Why this? Essential for the Maillard reaction and lift.
- 1/2 tsp kosher salt
- Substitute: Sea salt (use slightly less as grains are finer).
- Why this? Balances the sweetness and intensifies the peanut flavor.
- 2 tbsp granulated sugar (for coating)
- Substitute: Turbinado sugar (for a chunky, sparkling finish).
- Why this? Adds a classic sparkle and a hit of crunch.
Must Have Tools for Every Baker
You don't need a professional kitchen, but a few specific items make this simple peanut butter cookies recipe much easier.
- KitchenAid Stand Mixer: This is my workhorse. Using the paddle attachment allows you to cream the butter and sugars without over incorporating air, which can cause the cookies to collapse.
- Nordic Ware Baking Sheets: Heavy duty aluminum sheets prevent the bottoms of your cookies from scorching before the middles are set.
- Silpat Silicone Mat: This ensures a non stick surface and helps the cookies spread evenly. If you don't have one, parchment paper is a fine alternative.
- Cookie Scoop (1.5 tablespoon): Consistency is everything. Using a scoop ensures every cookie is the same size, so they all finish baking at the exact same moment.
Chef's Tip: Freeze your butter for just 10 minutes before you start if your kitchen is warm. This prevents the fats from melting too quickly during the creaming process, which is a common reason for "flat" cookies.
Perfect Steps for Shaping and Baking
Right then, let's crack on with the actual making. Follow these steps closely to ensure your easy peanut butter cookies come out looking like they belong in a bakery window.
Preparing the Cookie Dough
- Cream the fats. Place your room temperature Land O'Lakes butter and Jif creamy peanut butter in the bowl of your mixer. Beat on medium high speed for 2 minutes until the mixture looks pale and fluffy. Note: This aeration is vital for a light crumb.
- Add the sugars. Pour in the granulated white sugar and the packed light brown sugar. Continue beating for another 2 minutes. The texture should look like wet sand.
- Incorporate the egg. Add your room temperature egg and the Nielsen Massey vanilla extract. Mix on medium speed until the yellow of the egg is completely streaks free.
- Whisk dry ingredients. In a separate bowl, whisk together the King Arthur flour, baking soda, and Diamond Crystal kosher salt. Note: Sifting isn't necessary, but whisking removes lumps.
- Combine the mixtures. Turn your mixer to the lowest setting and gradually add the flour mixture. Mix only until you no longer see white flour streaks. Over mixing at this stage will make the cookies tough.
Creating the Signature Coating
- Chill the dough. Cover the bowl and place it in the fridge for 30 minutes. Wait until the dough feels firm to the touch. Note: Chilling prevents the cookies from spreading too thin in the oven.
- Shape the balls. Scoop roughly 1.5 tablespoons of dough and roll them into smooth balls between your palms. They should be about the size of a golf ball.
- Sugar coating. Roll each ball in the extra 2 tablespoons of granulated sugar until they are fully sparkled. This adds that nostalgic crunch we love.
- The fork pattern. Place the balls on your Nordic Ware sheet, spaced 2 inches apart. Use a fork to press down firmly in a "criss cross" pattern. This flattens the cookie slightly and creates those beautiful ridges.
- Bake to finish. Slide the tray into a preheated 375°F oven. Bake for exactly 10 minutes until the edges are golden and the centers look slightly soft. Let them cool on the pan for 5 minutes before moving to a wire rack.
Solving Common Cookie Baking Problems
Even with a simple peanut butter cookie recipe, things can go sideways. Here is how to fix the most frequent issues I see in the kitchen.
Preventing Excessive Spread
If your cookies look like flat pancakes, the most likely culprit is warm dough or butter that was too soft. If the fat is already oily before it hits the oven, it won't hold the air bubbles we worked so hard to create. Always ensure your dough is chilled.
Fixing Dry Crumbly Texture
This usually happens if you measure your flour using the "scoop" method rather than the "spoon and level" method. Packing flour into a measuring cup can result in 20% more flour than required. Use a kitchen scale for the most accurate results.
Rescuing Stuck Cookies
If you forgot the parchment paper and your cookies are fused to the tray, don't panic. Put the tray back in the warm oven for 30 seconds. This softens the sugar at the bottom just enough for you to slide a thin spatula underneath.
| Problem | Cause | Fix | Pro Tip |
|---|---|---|---|
| Flat Cookies | Butter was too warm | Chill dough for 60 mins | Use cold eggs to help lower dough temp |
| Burnt Bottoms | Dark baking sheets | Use light colored aluminum | Double up your baking sheets to insulate |
| Tough Crumb | Over mixed flour | Mix only until combined | Add flour by hand with a spatula |
Creative Twists for Unique Flavors
While I love a classic peanut butter cookie, sometimes you want to shake things up. Here are three ways to vary this recipe:
- Infusing Semi Sweet Chocolate: Fold in 1/2 cup of chocolate chips after the flour is incorporated. The salt in the peanut butter makes the chocolate taste even richer. It’s a similar vibe to a Chocolate Chip Cookies recipe but with a nutty base.
- Swapping for Crunchy Texture: Use extra crunchy peanut butter instead of creamy. You will get little bursts of toasted peanuts in every bite, which adds a great contrast to the soft dough.
- The "Fluffernutter" Twist: After pressing the fork pattern, place a mini marshmallow in the center of each cookie for the last 2 minutes of baking. It will melt into a gooey, sweet topping.
If you want a specific outcome:
- Crispier Cookies: Bake at 350°F for 14 minutes instead of 375°F for 10. The lower temp dries them out more.
- Chewier Cookies: Replace the white sugar entirely with more brown sugar.
- Saltier Bite: Sprinkle a tiny pinch of flaky Maldon salt on top immediately after they come out of the oven.
Storing Treats for Future Snacking
These soft peanut butter cookies stay fresh at room temperature for up to 5 days if kept in an airtight Tupperware container. To keep them extra soft, toss a slice of white bread into the container; the cookies will absorb the moisture from the bread.
For long term storage, these freeze beautifully. You can freeze the baked cookies for up to 3 months. I actually prefer freezing the raw dough balls (after the fork press). When you're ready for a snack, just pop a frozen dough ball directly into the oven and add 2 minutes to the baking time.
Zero Waste Tip: If you have leftover peanut butter at the bottom of the jar that you can't quite scrape out, pour a little warm milk into the jar, shake it up, and use that "peanut milk" in your morning coffee or oatmeal. It's a colorful way to use every bit of flavor!
Best Ways to Enjoy Cookies
Presentation is half the fun! I love serving these on a colorful ceramic platter with a side of fresh berries to cut through the richness. If you are feeling indulgent, use two cookies to make an ice cream sandwich with vanilla bean or chocolate gelato.
If you are hosting a gathering, these pair perfectly with other nut based treats. You might consider setting out a tray with these cookies alongside my Peanut Butter Blossom Cookies recipe for a variety of textures and shapes. The contrast between the sugared crust of these cookies and the soft chocolate center of the blossoms is always a crowd pleaser.
Clearing Up Old Baking Myths
Myth: You must use a fork to make the criss cross pattern for them to bake correctly. Truth: While the pattern is iconic for peanut butter cookies, it is mostly aesthetic. The real reason for the press is that peanut butter dough is very dense and doesn't spread much on its own.
Pressing them down ensures the middle cooks at the same rate as the edges.
Myth: Natural peanut butter makes "healthier" cookies with the same texture. Truth: Natural peanut butter (the kind you have to stir) often lacks the stabilizers found in brands like Jif. This can lead to a gritty texture and unpredictable spreading.
For this specific recipe, the "no stir" variety is your best friend for a velvety finish.
Comparison: Fresh vs. Shortcut
| Feature | Homemade Dough | Refrigerated store-bought |
|---|---|---|
| Flavor Depth | Intense roasted nut flavor | Often overly sweet/artificial |
| Texture Control | Adjustable (chewy vs crisp) | Usually one note/soft |
| Ingredients | Real butter and vanilla | Often contains palm oils |
Honestly, don't even bother with the pre made tubs of dough. The effort to make these from scratch is minimal, but the flavor payoff is massive. When you control the quality of the butter and the salt, you create a crave worthy treat that feels good to share.
Enjoy every bite of these homemade peanut butter cookies!

Recipe FAQs
Why must I chill the dough before baking peanut butter cookies?
Yes, chilling is essential. Chilling solidifies the high fat content from the peanut butter and butter, which prevents the cookies from spreading too thinly in the oven before the structure sets.
Can I substitute natural, oil-separated peanut butter for creamy Jif?
No, stick with stabilized creamy peanut butter. Natural peanut butter lacks the necessary stabilizers, which often results in a greasy texture and unpredictable spreading due to excess oil.
What is the purpose of pressing the criss cross pattern with a fork?
It is necessary for even baking. Peanut butter dough is dense and resists spreading naturally, so pressing it down ensures the thick center cooks through at the same rate as the edges.
How can I guarantee the cookies stay soft for several days?
Use light brown sugar liberally. Brown sugar is hygroscopic, meaning it attracts and retains moisture from the air, keeping the crumb tender and preventing the cookies from becoming dry pucks.
My cookie bottoms keep burning; what should I adjust?
Lower the baking temperature slightly or insulate the pan. Darker pans absorb more heat; try using light colored aluminum sheets or even double stacking your baking sheets to insulate the bottom.
Can I make these cookies ahead of time?
Yes, the dough freezes well. You can prepare the dough balls, press the pattern, and freeze them; just add about two extra minutes to the total baking time when cooking from frozen.
What is the best way to measure flour for this recipe?
Spoon the flour into the measuring cup, then level it off. Scooping directly with the cup packs the flour too tightly, leading to too much flour and resulting in a dry, crumbly cookie.
Peanut Butter Cookies Recipe

Ingredients:
Instructions:
Nutrition Facts:
| Calories | 145 kcal |
|---|---|
| Protein | 2.7 g |
| Fat | 8.1 g |
| Carbs | 16.2 g |
| Fiber | 0.6 g |
| Sugar | 10.2 g |
| Sodium | 129 mg |
