Peanut Butter Pie with Chocolate Ganache
- Time: Active 20 minutes, Passive 4 hours, Total 4 hours 20 minutes
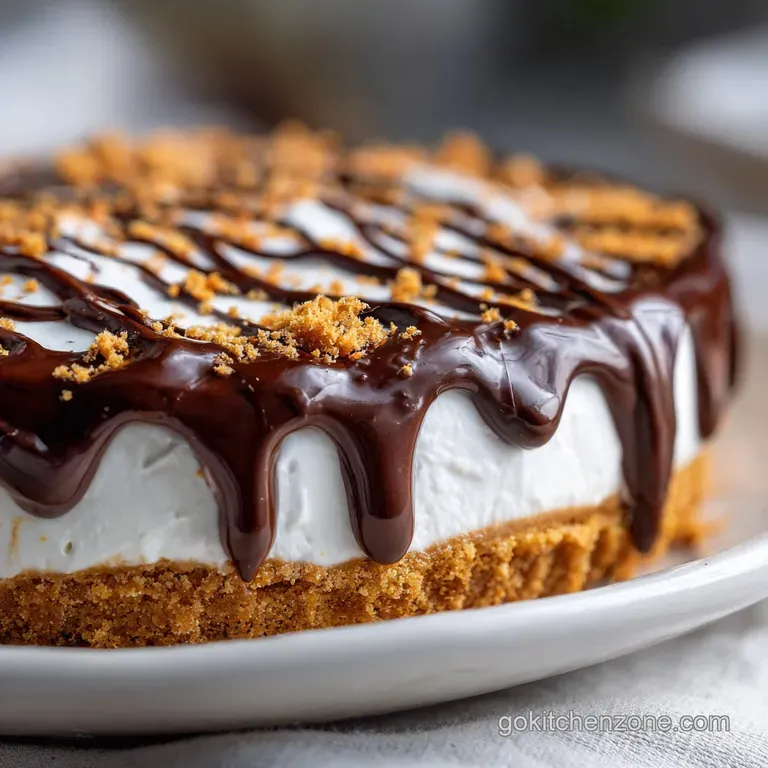
- Flavor/Texture Hook: Velvety peanut butter filling with a shatter crisp graham cracker crust
- Perfect for: Summer cookouts, beginner bakers, or a low stress holiday dessert
- Creating the Most Indulgent and Silky Peanut Butter Pie
- Engineering the Perfect Balance of Salt and Sweet
- Comparing Prep Methods for Fast Results
- Analyzing the Elements of the Filling
- Essential Components and Smart Substitutions
- Necessary Tools for Success
- Step-by-Step Construction Guide
- Solutions for Common Pie Problems
- Adjusting for Different Batch Sizes
- Debunking Common Kitchen Beliefs
- Storage Guidelines and Zero Waste Tips
- Creative Ways to Serve Your Pie
- Recipe FAQs
- 📝 Recipe Card
Creating the Most Indulgent and Silky Peanut Butter Pie
The first time I pulled this Peanut Butter Pie out of the fridge, the aroma of toasted graham crackers and roasted nuts filled the whole kitchen. I remember the sound of the knife hitting the crust - it gave that satisfying "shatter" that tells you the butter to crumb ratio is spot on.
I’d spent all afternoon dreading a complex bake, only to realize that the best desserts usually happen when you stop overthinking and let the ingredients do the heavy lifting.
Honestly, I used to think a no bake pie was a bit of a cop out until I served this to my most "gourmet" friends. They didn't care that I didn't turn on the oven for more than five minutes; they were too busy scraping every last smear of velvety filling off their plates.
It’s the kind of dish that saves you during the dinner struggle when you realize you promised dessert but the main course took up all your energy.
We have all been there, staring at a box of crackers and a jar of peanut butter wondering if we can turn it into something company worthy. Trust me, this is it. It is rich, it is thick, and it has that perfect balance of salt that keeps it from being cloying.
If you are looking for a reliable win that works every single time, you have found it.
Engineering the Perfect Balance of Salt and Sweet
Building a stable no bake filling requires understanding how fats interact at different temperatures. This isn't just about mixing things in a bowl; it is about creating a structural matrix that holds air while remaining firm enough to slice cleanly.
- Fat Emulsification: Combining the peanut butter and cream cheese creates a dense base where the fat solids provide the primary structure.
- Sugar Starch Stabilization: The cornstarch found in powdered sugar helps absorb excess moisture from the cream cheese, preventing the filling from weeping.
- Aeration Retention: Folding in the whipped topping introduces tiny air bubbles that are trapped by the cold fat, giving the pie its characteristic light, mousse like feel.
- Thermal Setting: Chilling for 4 hours allows the saturated fats in the butter and peanut butter to solidify, "locking" the crust and filling into a single cohesive unit.
Achieving Structural Stability
To ensure your pie doesn't slump when you cut it, the cream cheese must be truly softened to room temperature before you start. If it's even slightly cold, you'll end up with tiny lumps of plain cheese that ruin the silky mouthfeel.
Balancing the Palate with Salt
Most people forget that salt is the most important ingredient in a dessert like this. The 0.5 tsp fine sea salt in the crust isn't just a suggestion; it is what cuts through the richness of the 1 cup of peanut butter and makes the flavor pop.
Mastering the Instant Set
The chocolate ganache uses a specific ratio of heavy cream to chips. By pouring hot cream over the chocolate and letting it sit, you create a stable emulsion that stays shiny and soft even after it’s been in the fridge for hours.
Comparing Prep Methods for Fast Results
| Method | Total Time | Texture | Effort Level |
|---|---|---|---|
| Fast Method | 15 minutes | Light and airy | Minimal (using store-bought crust) |
| Classic Method | 4 hours 20 mins | Dense and velvety | Moderate (homemade crust + ganache) |
| Frozen Variation | 6 hours | Ice cream like | Minimal (just extra chill time) |
This comparison shows that while the "fast" way works in a pinch, taking the extra time for the homemade crust and the 4 hour chill truly transforms the texture into something special.
Analyzing the Elements of the Filling
| Component | Science Role | Pro Secret |
|---|---|---|
| Creamy Peanut Butter | Primary fat and flavor | Use a shelf stable brand, not "natural" oil separating types |
| Cream Cheese | Structural binder | Whip it alone first to ensure zero lumps remain |
| Powdered Sugar | Sweetener and thickener | Sift it twice to keep the filling from feeling grainy |
| Whipped Topping | Aeration agent | Fold it by hand; a mixer will deflate the air bubbles |
Essential Components and Smart Substitutions
This recipe uses straightforward pantry staples, but knowing which ones you can swap without ruining the set is key to being a budget smart cook.
- 1.5 cups graham cracker crumbs: These provide the toasted, honey sweet base.
- Substitute: Digestive biscuits or vanilla wafers. Why this? They have a similar dry, crumbly texture that absorbs butter well.
- 6 tbsp unsalted butter, melted: The "glue" for your crust.
- Substitute: Salted butter (just omit the extra sea salt). Why this? The fat content is identical, keeping the crust firm.
- 1 cup creamy peanut butter: Provides the heart of the pie.
- Substitute: Almond butter (smooth). Why this? Offers a similar fat to protein ratio, though the flavor will change significantly.
- 8 oz cream cheese, softened: The brick style cheese is necessary for height.
- Substitute: Mascarpone. Why this? It is even creamier, though slightly less tangy than traditional cream cheese.
- 8 oz whipped topping, thawed: This gives the pie its lift.
- Substitute: 1.5 cups heavy cream whipped to stiff peaks. Why this? It provides a richer flavor but is less stable over 48 hours.
- 1 tsp vanilla extract: Rounds out the nutty notes.
- 0.5 cup semi sweet chocolate chips: For the ganache topper.
- 0.33 cup heavy cream: To melt the chips into a pourable sauce.
Similar to the technique used in our Peanut Butter Fudge recipe, the goal here is a smooth, grit free finish that holds its shape at room temperature.
Necessary Tools for Success
You don't need a professional kitchen, but a few specific items make this much easier. A 9 inch pie plate is the standard, though a springform pan also works if you want to serve it like a cheesecake.
- Electric Hand Mixer: Essential for getting the cream cheese and peanut butter fully incorporated.
- Large Rubber Spatula: You need this for the "folding" step to keep the air in the whipped topping.
- Sifter or Fine Mesh Strainer: Don't skip sifting the powdered sugar; it’s the difference between grainy and velvety.
- Microwave Safe Bowl: For melting the butter and making the quick ganache.
step-by-step Construction Guide
Following the order of operations is vital here. We want to build the crust first so it can begin to set while we whip the filling.
1. Constructing the Foundation
Combine 1.5 cups graham cracker crumbs, 6 tbsp melted butter, 1/4 cup sugar, and 0.5 tsp sea salt in a bowl. Press the mixture firmly into a 9 inch pie plate until the bottom and sides are evenly coated and compacted.
Note: Using the bottom of a measuring cup helps get a tight, even pack.
2. Par Baking (Optional)
Bake the crust at 350°F for 8 minutes until it smells like toasted honey and looks slightly golden. Let it cool completely. Note: This step is optional but makes the crust much crispier.
3. Creaming the Base
In a large bowl, beat 8 oz softened cream cheese and 1 cup creamy peanut butter until the mixture is one solid, pale tan color with no white streaks.
4. Incorporating the Sugar
Add 1 cup sifted powdered sugar and 1 tsp vanilla extract to the bowl. Mix on low speed until the sugar is fully absorbed and the texture looks thick and glossy.
5. Whipping the Aerated Filling
Gently fold in 8 oz thawed whipped topping using a spatula. Use a "figure eight" motion until the filling is light, fluffy, and uniform. Note: Stop as soon as the streaks disappear to avoid deflating the pie.
6. Filling the Crust
Spoon the mixture into the cooled crust. Smooth the top with a spatula until it forms a slight dome or a flat, even surface.
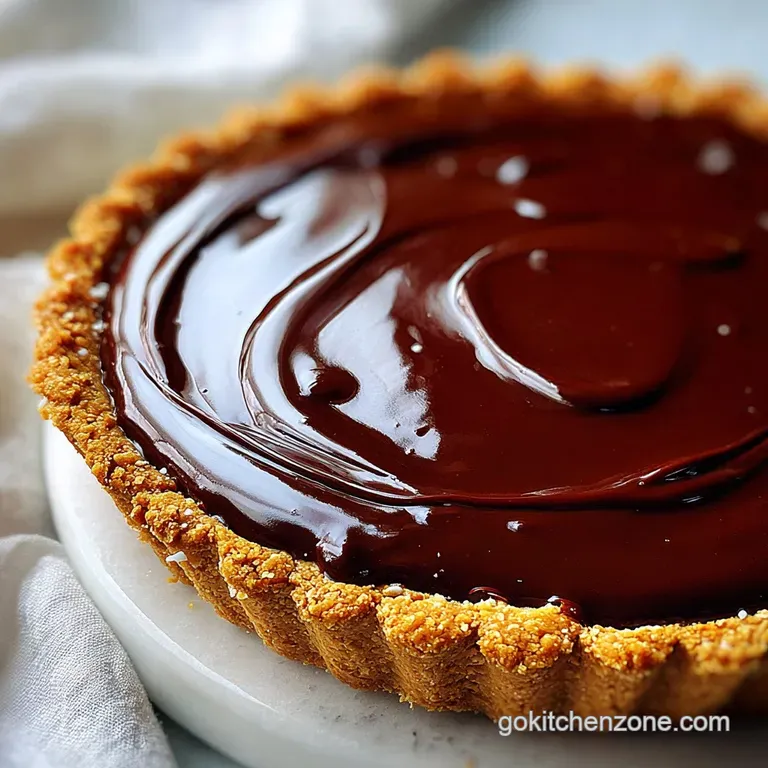
7. Preparing the Silky Chocolate Ganache
Heat 0.33 cup heavy cream in the microwave for 45 seconds until steaming. Pour it over 0.5 cup chocolate chips and let it sit for 2 minutes until the chips have softened into the liquid.
8. Final Glaze
Whisk the chocolate and cream together until shiny. Drizzle or spread over the top of the pie until the center is covered in a dark, glossy layer.
9. The Patience Phase (Chilling)
Place the pie in the refrigerator for at least 4 hours. Wait until the center feels firm to a light touch and the ganache has set.
Solutions for Common Pie Problems
No matter how simple a recipe seems, things can occasionally go sideways. Usually, it comes down to temperature or mixing technique.
Why Your Filling Is Lumpy
If your cream cheese was too cold, it won't emulsify with the peanut butter. You'll see tiny white dots throughout the filling. The only way to fix this once it has happened is to keep mixing at a higher speed before adding the sugar, but it's best to avoid it by letting the cheese sit out for 2 hours.
Handling a "Runny" Ganache
If your ganache is too thin to stay on top of the pie, your cream to chocolate ratio might be slightly off, or the cream was too hot. Let it sit on the counter for 10 minutes to thicken before pouring.
| Problem | Root Cause | Solution |
|---|---|---|
| Crust crumbles when sliced | Not enough butter or not pressed hard enough | Press firmly with a flat bottomed glass next time |
| Filling is too soft | Didn't chill long enough or used natural PB | Chill for a full 4 hours; avoid oily peanut butters |
| Ganache is dull/grey | Chocolate was overheated | Stir in a teaspoon of corn syrup for instant shine |
Common Mistakes Checklist
- ✓ Soften the cream cheese completely to prevent a grainy texture.
- ✓ Sift the powdered sugar to ensure it dissolves instantly into the fats.
- ✓ Avoid "Natural" peanut butter which can cause the oil to separate and make the pie greasy.
- ✓ Chill the pie for the full 4 hours; cutting it early will result in a messy slump.
- ✓ Wipe your knife with a warm towel between every slice for those clean, professional edges.
For a similar no bake experience that is even more portable, you might enjoy my Peanut Butter Balls recipe.
Adjusting for Different Batch Sizes
This recipe is fairly forgiving when it comes to scaling, but you need to watch your spice and liquid ratios.
- Cutting the recipe in half: Use a 6 inch mini pie pan. Reduce the chill time to 2 hours. Since you can't easily halve the whipped topping container, just use 4 oz and save the rest for coffee!
- Doubling for a crowd: Use two 9 inch pans rather than one deep dish. This ensures the center sets properly. When doubling the crust, only use 1.5x the salt to prevent it from becoming too briny.
- Baking for a crowd: If you use a 9x13 rectangular pan for a "potluck style" bar version, increase the crust by 50% to ensure it covers the larger surface area.
Debunking Common Kitchen Beliefs
There are a few myths about Peanut Butter Pie that I hear all the time, and it's time to set the record straight so you can cook with confidence.
Myth: You must use a mixer for the entire process. Actually, using a mixer for the final stage adding the whipped topping is a mistake. The high speed of the beaters will pop the air bubbles you need for that light texture. Always switch to a spatula for the final fold.
Myth: Natural peanut butter is "healthier" and works the same. While it might be great on toast, natural peanut butter (the kind you have to stir) is the enemy of a stable no bake pie. The lack of emulsifiers means the oil can seep out into the crust, making it soggy and the filling unstable.
Stick to the classic creamy brands for this one.
Storage Guidelines and Zero Waste Tips
Keeping your Peanut Butter Pie fresh is easy if you protect it from the air in the fridge.
- Fridge: Store in an airtight container or tightly wrapped in plastic for up to 5 days. The crust will eventually soften, but the flavor remains excellent.
- Freezer: This pie freezes beautifully! Wrap it in a double layer of foil. It will stay good for up to 3 months. You can even eat it straight from the freezer for a texture similar to a frozen candy bar.
- Zero Waste Tip: If you have leftover graham cracker crumbs, toss them with a little sugar and cinnamon and keep them in a jar. They are a fantastic "crunch" topping for yogurt or oatmeal the next morning. Leftover ganache can be reheated and poured over vanilla ice cream.
Creative Ways to Serve Your Pie
While a plain slice is a masterpiece on its own, a few small touches can make it feel like a restaurant dessert.
- The Salty Finish: Sprinkle a pinch of flaky Maldon salt over the chocolate ganache right before serving. It highlights the peanut butter in an incredible way.
- The Nutty Crunch: Chop up some honey roasted peanuts and press them into the ganache while it is still wet.
- The Fruit Pairing: Serve with a few fresh raspberries on the side. The tartness of the berries cuts right through the heavy, sweet filling.
If you find yourself with extra peanut butter after making this, don't let it go to waste. You can whip up a batch of my Peanut Butter Blossom Cookies recipe to keep the theme going!
Decision Shortcut: If you want a richer flavor, use a dark chocolate (70% cocoa) for the ganache instead of semi sweet. If you want a sturdier crust, bake it for 8 minutes at 350°F to "set" the sugar and butter.
If you want a lighter dessert, increase the whipped topping by 2 oz and reduce the cream cheese by 2 oz.

Recipe FAQs
What is the recipe for Dolly Parton's peanut butter pie?
Dolly Parton’s specific recipe is not widely published, but it is generally a no-bake style pie. Most famous versions use a graham cracker crust filled with a rich mixture of cream cheese, peanut butter, and whipped topping, topped with a chocolate glaze.
What do I need for a classic peanut butter pie?
You primarily need ingredients for a crust, a filling, and a topping. The essentials are graham cracker crumbs, melted butter, cream cheese, creamy peanut butter, powdered sugar, whipped topping, and chocolate chips for the ganache.
What was Jimmy Carter's favorite pie?
Yes, Jimmy Carter is famously associated with Georgia Pecan Pie. While he enjoyed many southern desserts, the classic pecan pie is his most documented favorite, often served at state functions.
What is Dolly Parton's favorite pie?
Dolly Parton has often stated her favorite dessert is the classic Southern Pecan Pie. While she also loves peanut butter variations, the traditional pecan pie holds the top spot for her.
How do I prevent my no-bake peanut butter pie filling from collapsing?
Ensure your cream cheese is fully softened and beat it vigorously with the peanut butter before adding sugar. This creates the initial fat emulsion needed for stability. Mastering this emulsion technique is key, similar to how you build stable fat layers in our Cheese Ball: Velvety Base & Crunchy Pecan Crust.
How long does peanut butter pie need to chill before serving?
Chill the finished pie for a minimum of four hours to achieve a sliceable, firm texture. While you can technically eat it sooner, the structure needs time for the fats to solidify around the air pockets.
Can I use natural, oil-separating peanut butter in this pie?
No, avoid natural peanut butter for this specific recipe. The excess oil will seep out during chilling, resulting in a greasy crust and a runny filling because the necessary emulsion cannot be formed.
No Bake Peanut Butter Pie

Ingredients:
Instructions:
Nutrition Facts:
| Calories | 532 kcal |
|---|---|
| Protein | 9.3 g |
| Fat | 38.2 g |
| Carbs | 41.6 g |
| Fiber | 2.5 g |
| Sugar | 30.1 g |
| Sodium | 294 mg |
