Creamy Rice Pudding Recipe
- Time: Active 10 minutes, Passive 40 minutes, Total 50 minutes
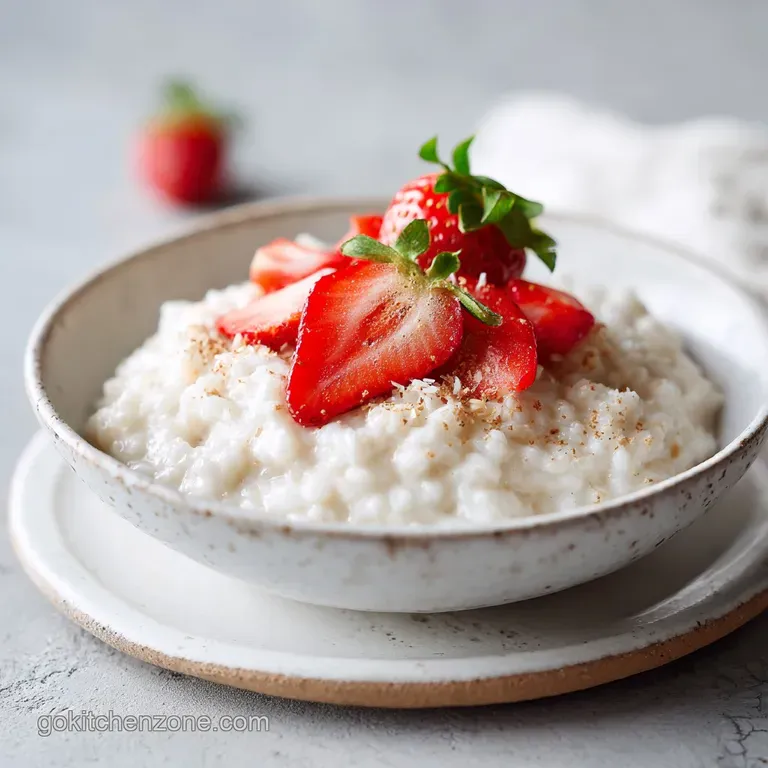
- Flavor/Texture Hook: Silky, velvety custard with tender grains
- Perfect for: Cozy Sunday nights or utilizing pantry staples
Crafting the Best Rice Pudding Recipe
The smell of vanilla and warm cinnamon hitting a pot of simmering milk is a sensory trigger that takes me straight back to my grandmother's kitchen on rainy Tuesday afternoons. I remember watching her stand over a heavy pot, stirring with a wooden spoon as the thin milk transformed into something rich and comforting.
It felt like magic, but as I learned later, it was actually just a bit of clever chemistry.
We've all had that version of this dish that's either a gloopy mess or a bowl of sweet soup with hard grains floating in it. I spent years making those mistakes so you don't have to. The secret isn't some expensive ingredient; it's about how you treat the rice and when you introduce the fat.
We're going for a texture that's lush and velvety, not sticky or gummy.
This recipe is my absolute favorite because it's reliable. Whether you're a seasoned cook or just starting out, this method guarantees a result that feels like a warm hug. It's about patience and the right ratio of liquid to grain.
Trust me, once you see those first bubbles and smell that spicy aroma, you'll know exactly why this is a staple in my home.
The Science of Starch
Amylopectin Release: Medium grain rice contains a specific starch called amylopectin that breaks down during simmering, acting as a natural thickener for the milk base.
Fat Emulsification: The combination of whole milk and heavy cream creates a stable fat in-water emulsion that coats each grain, preventing them from clumping together.
Protein Coagulation: Adding an egg yolk at the very end introduces lecithin and proteins that set at low heat, providing a glossy, professional finish to the custard.
| Method | Total Time | Texture | Best For |
|---|---|---|---|
| Stovetop | 40 minutes | Ultra creamy and silky | Precise texture control |
| Oven Baked | 1 hours 15 mins | Thick with a golden skin | Hands off preparation |
| Instant Pot | 25 minutes | Soft and very consistent | Rapid weeknight cravings |
Choosing your method depends on the "skin" preference. Many traditionalists love the baked version because it forms a caramelized layer on top, but for a pure, velvety mouthfeel, the stovetop method wins every time.
It allows you to feel the resistance of the rice as it cooks, ensuring you never end up with a burnt bottom or undercooked center.
Essential Ingredient Analysis
| Ingredient | Science Role | Pro Secret |
|---|---|---|
| Medium grain Rice | Starch Provider | Don't rinse it; those surface starches are vital for the creamy "sauce" development. |
| Whole Milk | Liquid Base | Use full fat for the best structural integrity of the pudding's creamy suspension. |
| Egg Yolk | Emulsifier | Temper it carefully to avoid "scrambled egg" bits in your smooth dessert. |
| Vanilla Bean Paste | Flavor Depth | Paste offers those beautiful black specks and a more intense aroma than liquid extract. |
Elements for a Classic Recipe
To get started, gather these essentials. This rice pudding recipe relies on quality basics to shine.
- 150g Medium grain white rice: Arborio or Calrose work best because they release more starch than long grain varieties. Why this? Essential for that signature thick, creamy consistency without adding flour.
- Substitute: Short grain sushi rice works in a pinch but may be slightly stickier.
- 475ml Whole milk: Provides the bulk of the hydration. Why this? The protein content helps the pudding set correctly.
- Substitute: 2% milk is okay, but the result will be noticeably thinner.
- 240ml Heavy cream: Adds the necessary fat for a luxurious mouthfeel.
- Substitute: Full fat coconut milk for a subtle tropical twist and similar fat content.
- 65g Granulated sugar: Sweetens without distracting from the dairy.
- Substitute: Maple syrup, though it will darken the color of the final dish.
- 1/4 tsp salt: Balances the sweetness.
- 1 large egg yolk: The "finisher" that creates the custard.
- 1 tsp vanilla bean paste: For aromatic depth.
- 1/2 tsp ground cinnamon: The classic warming spice.
- 14g Unsalted butter: Adds a final gloss and richness.
Necessary Kitchen Equipment
You don't need a pantry full of gadgets, but a heavy bottomed saucepan is non negotiable here. Thin pots have "hot spots" that will scorch your milk before the rice is even tender. I prefer using a Dutch oven or a high-quality stainless steel pot like an All Clad.
You'll also need a sturdy whisk for tempering the egg and a silicone spatula to scrape the bottom of the pan constantly.
If you are scaling this up for a crowd, much like I do with my Chicken Broccoli Rice recipe, a larger pot is better than a crowded small one. Crowding leads to uneven cooking and rice that sticks together in hard lumps. A simple digital scale is also your best friend here to ensure you hit that 150g rice mark exactly.
step-by-step Method
1. Hydrating the Grains
Combine the 150g of rice, 475ml of milk, 240ml of cream, 65g of sugar, and salt in your saucepan. Note: Starting with cold milk allows the rice to hydrate slowly as the temperature rises.
2. Simmering for Texture
Bring the mixture to a gentle simmer over medium heat until small bubbles break the surface. Note: Never let it reach a rolling boil or the milk will curdle and the rice will shatter.
3. Monitoring the Cook
Reduce heat to low and cook for 25 minutes, stirring frequently with a spatula. Note: You are looking for the rice to be tender but still holding its shape.
4. Tempering the Enrichment
In a small bowl, whisk the egg yolk. Slowly drizzle in a half cup of the hot rice mixture while whisking constantly. Note: This raises the yolk's temperature slowly so it doesn't scramble.
5. Incorporating the Custard
Pour the tempered yolk back into the main pot and stir for 2 minutes until the mixture coats the back of a spoon. Note: The residual heat will finish the thickening process.
6. Finishing with Aromatics
Remove from heat and stir in the 14g of butter, vanilla bean paste, and cinnamon. Note: Adding these at the end preserves their volatile flavor compounds.
7. Cooling and Setting
Transfer the pudding to a bowl and press plastic wrap directly onto the surface. Note: This prevents a tough skin from forming as it cools.
8. Final Consistency Check
Let it sit for at least 15 minutes before serving. Note: The pudding will continue to thicken significantly as the starches cool and gel.
Fixing Common Errors
Remedying Overly Thick Pudding
If your pudding looks like a solid block after cooling, it's usually because the starches absorbed every drop of liquid. This is common if you overcooked it by even a few minutes. To fix this, simply whisk in a tablespoon of warm milk at a time until the velvety texture returns.
Don't use water, as it will dilute the flavor.
Preventing Scorched Bottoms
Milk contains sugars (lactose) that caramelize and burn quickly. If you smell even a hint of "toasted" milk, remove the pot from the heat immediately. Do not scrape the bottom of the pot if you think it has burnt, or you'll incorporate those bitter, black flakes into the entire batch.
Pour the "good" pudding into a fresh pot and continue.
| Problem | Root Cause | Solution |
|---|---|---|
| Grains are hard | Liquid evaporated too fast | Add 50ml milk, cover with a lid, and simmer on lowest heat for 5 mins. |
| Pudding is runny | Didn't reach high enough temp | Simmer for 3 more minutes; the egg yolk needs heat to thicken. |
| Curdled appearance | Heat was too high | Whisk vigorously to emulsify, or strain through a fine mesh sieve. |
Common Mistakes Checklist
- ✓ Never rinse the rice; you need that surface starch for the sauce.
- ✓ Avoid high heat; a "lazy bubble" is what you are looking for.
- ✓ Don't skip the tempering step for the egg yolk.
- ✓ Stir the bottom corners of the pan where rice likes to hide and burn.
- ✓ Use a heavy bottomed pot to ensure even heat distribution.
Scaling Your Portions
Downscaling (Making it for 2): Use a very small saucepan to prevent too much evaporation. Reduce the simmering time by about 5 minutes. Since you can't easily use half an egg yolk, use the whole yolk but reduce the butter slightly to balance the richness.
Upscaling (Feeding a Crowd): When doubling the recipe, do not double the salt or spices immediately. Use 1.5x the salt and cinnamon, then taste and adjust. You will need a much larger pot to allow for proper stirring.
The cooking time will likely increase by 10-15 minutes because of the larger thermal mass.
Baking Adjustment: If you decide to double this and bake it, use a large buttered casserole dish. Bake at 180°C for about 45 minutes, stirring once halfway through to keep the rice from settling at the bottom. Much like a Corn Pudding Casserole recipe, the edges will set first while the center remains slightly wobbly.
Myths and Facts
Rinsing Rice is Mandatory: This is a myth for pudding. While you rinse rice for fluffy pilaf to remove excess starch, for a pudding, that starch is your best friend. It creates the natural "gravy" that binds the grains together.
Leftover Rice Works Just as Well: This is a partial truth. While you can make a "quick" version with leftovers, the grains won't release the same amount of starch into the milk because they are already hydrated. The texture will be more like "rice in milk" rather than a cohesive pudding.
You Must Use Pudding Rice: Myth. While "pudding rice" is sold in some regions, it's usually just a short grain or medium grain variety. Arborio, typically used for risotto, is actually the superior choice for a high end rice pudding recipe.
Storage and Reheating
Store your rice pudding in an airtight container in the fridge for up to 4 days. I don't recommend freezing it, as the dairy can separate and the rice grains often become unpleasantly grainy or "mealy" upon thawing.
To reheat, put a portion in a small saucepan with two tablespoons of milk. Heat over low, stirring gently to break up the starch gel. If you're in a rush, the microwave works fine just do it in 30 second bursts and stir in between to avoid "hot spots" that can pop and mess up your microwave.
For a zero waste tip, if you have a tiny bit left over, stir it into your morning oatmeal for a decadent breakfast upgrade.
Serving Suggestions
I love serving this warm with a dusting of fresh nutmeg, but it's equally good cold with a dollop of whipped cream. If you want to get fancy, macerate some berries in a bit of sugar and lemon juice to cut through the richness. The acidity of the fruit balances the heavy cream perfectly.
Decision Shortcut If you want it like a classic diner: Serve warm with extra cinnamon and a few raisins stirred in at the end. If you want it as a sophisticated dessert: Serve cold in glass coupes with a drizzle of salted caramel and a pinch of flaky sea salt.
If you want a breakfast twist: Add toasted almonds and sliced bananas.
For those who love these types of creamy, grain based dishes, you might also enjoy the comforting texture found in a Cheesy Chicken Broccoli recipe, which uses similar principles of starch management to create a satisfying meal. Regardless of how you serve it, the key is the texture as long as it's silky and the rice is tender, you've succeeded.

Recipe FAQs
What are the 5 main ingredients needed for a standard stovetop rice pudding?
Medium grain rice, whole milk, heavy cream, granulated sugar, and an egg yolk. These form the core structure: starch, liquid base, fat content, sweetness, and final emulsification for custard texture.
How to make a simple rice pudding on the stovetop?
Simmer rice, milk, cream, and sugar gently for 25 minutes, stirring frequently. Temper one egg yolk with a ladle of hot liquid, then whisk it back into the pot until slightly thickened, finishing with vanilla and butter off the heat.
What is the most common mistake that leads to watery or lumpy rice pudding?
Using high heat or not stirring the bottom corners adequately. Boiling the milk causes the proteins to separate, leading to a curdled look, while insufficient stirring results in scorching on the bottom and hard, undercooked grains elsewhere.
Is it true that you should rinse the rice before using it for pudding?
No, this is a common misconception for this specific dish. Rinsing removes the surface starch, which is crucial for creating the natural, velvety sauce that defines a good rice pudding.
What is forbidden rice pudding, and how does the texture differ?
Forbidden rice pudding uses black glutinous rice (often called forbidden rice). The texture is significantly chewier and denser because this variety has a higher amylose content and a darker pigment, resulting in a richer, earthier pudding.
Should I temper the egg yolk when adding it to the hot mixture?
Yes, tempering is absolutely essential for a smooth result. Slowly whisking hot liquid into the yolk first prevents the egg proteins from coagulating instantly into scrambled bits, allowing for better emulsification into the base, similar to how you manage heat in a Brown Gravy Recipe.
How can I ensure my pudding has a glossy finish rather than a dry skin after cooling?
Press plastic wrap directly onto the surface of the pudding immediately after stirring in the butter. This contact layer prevents air exposure, which stops the drying and skin formation process. If you love mastering techniques for smooth finishes, apply this knowledge to stabilizing the broth in a White Chicken Chili Recipe.
Creamy Rice Pudding Recipe
Ingredients:
Instructions:
Nutrition Facts:
| Calories | 343 kcal |
|---|---|
| Protein | 5.8 g |
| Fat | 19.7 g |
| Carbs | 35.8 g |
| Fiber | 0.3 g |
| Sugar | 14.8 g |
| Sodium | 148 mg |
