Chili Cheese Dip: Silky and Scoopable
- Time: Active 5 minutes, Passive 15 minutes, Total 20 minutes
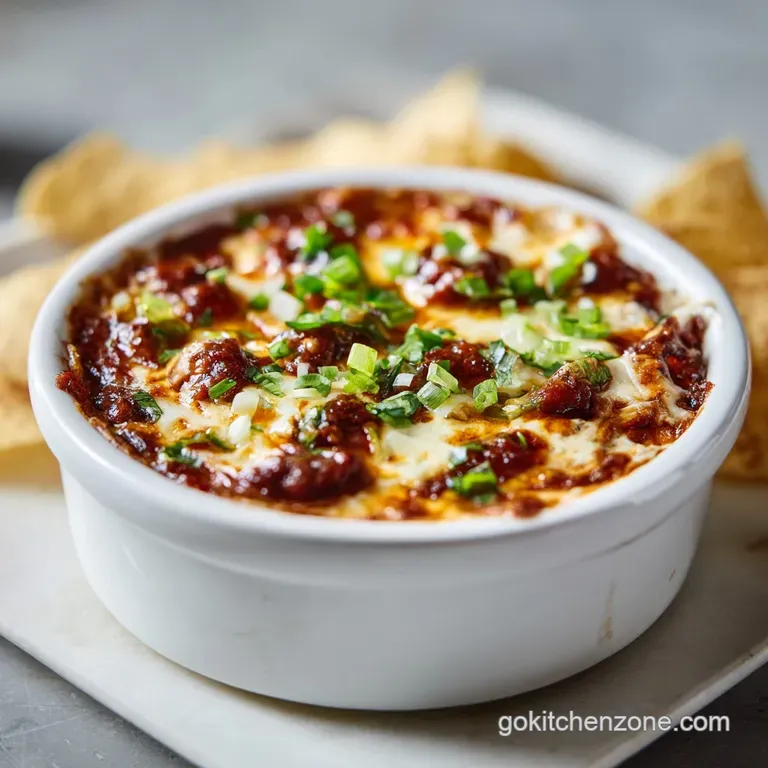
- Flavor/Texture Hook: Silky, smoky, and perfectly scoopable
- Perfect for: Last minute hosting or late night comfort cravings
- Mastering the Ultimate Chili Cheese Dip
- Why Most Chili Dip Recipes Fail
- Essential Recipe Specs and Timing
- Ingredients for the Perfect Melt
- Essential Equipment and Kitchen Tools
- The Step-by-Step Cooking Process
- Fixing Common Mistakes and Errors
- Tasty Variations and Ingredient Swaps
- Freezing and Proper Reheating Guide
- Serving Suggestions and Pairing Ideas
- Debunking Common Dip Myths
- Recipe FAQs
- 📝 Recipe Card
Mastering the Ultimate Chili Cheese Dip
We’ve all been there: you pull a dish of bubbly cheese out of the oven, and within ten minutes, it has transformed into a stubborn, rubbery block that requires a steak knife to navigate. Or worse, you’re left with a "lava lamp" situation where a layer of orange oil sits on top of a gritty, broken mess.
It’s the ultimate party foul, and it usually happens because the heat was too high or the cheese blend lacked the right structural support.
This Chili Cheese Dip is my targeted fix for those exact failures. I remember a specific Super Bowl party where my "fancy" cheddar dip separated into a puddle of grease before the first quarter was even over. It was embarrassing.
After that, I stopped trying to make this a gourmet project and started focusing on the chemistry of the melt. You don’t need a culinary degree; you just need to understand how these specific ingredients play together to stay smooth.
The secret lies in the humble block of processed cheese combined with the stabilizing power of full fat cream cheese. This isn't the time for low-fat alternatives or artisanal aged cheeses that don't like to melt.
We’re looking for that classic, nostalgic stadium style texture but with a much deeper flavor profile thanks to smoked paprika and a very specific splash of pickled jalapeño brine. It’s a 20 minute win that actually stays dip able until the bowl is scraped clean.
Why Most Chili Dip Recipes Fail
Most people treat this dip like a "dump and stir" project, but the order of operations matters more than you’d think. If you throw everything into a pot at once, the chili often scorches before the cheese is fully integrated, leading to bitter, burnt notes at the bottom of the pan.
Even an [easy 3 ingredient chili cheese dip] needs a little finesse to prevent that grainy texture that occurs when proteins in the cheese tighten up too quickly.
- Controlled Emulsification: Cream cheese acts as a bridge between the water based chili and the fat heavy Velveeta, preventing the fats from leaking out and creating an oil slick.
- Acidity Balance: The addition of jalapeño brine isn't just for heat; the vinegar breaks through the heavy fats, brightening the overall flavor and keeping the texture fluid.
- Staged Melting: Adding the shredded cheddar last ensures it melts into the already stable base, preventing it from clumping into strings.
- Gentle Heat: Maintaining a medium low simmer preserves the integrity of the proteins in the canned chili, keeping the meat tender rather than rubbery.
| Thickness | Internal Temp | Rest Time | Visual Cue |
|---|---|---|---|
| 2 cm (Thin) | 74°C | 2 mins | Glossy and flowing |
| 4 cm (Med) | 74°C | 5 mins | Bubbling at edges |
| 6 cm (Thick) | 74°C | 8 mins | Holds shape on spoon |
The visual cue is your best friend here. You are looking for a surface that looks like liquid satin. If it looks matte or dull, it likely needs another splash of brine or a bit more heat to fully incorporate.
Essential Recipe Specs and Timing
This recipe is designed for efficiency without sacrificing the final result. We are working with 9 servings, which is usually enough for a standard gathering, though I’ve found that four hungry adults can easily make it disappear during a movie.
Component Analysis
| Ingredient | Science Role | Pro Secret |
|---|---|---|
| Velveeta (225g) | Primary Emulsifier | Cube it small (1cm) to ensure it melts at the same rate as the cream cheese. |
| Cream Cheese (115g) | Texture Stabilizer | Must be room temperature; cold cream cheese creates "white polka dots" in your dip. |
| Chili (425g) | Flavor Base | Use "no bean" variety to keep the dipping surface smooth and prevent chip breakage. |
When you’re looking at your ingredient spread, think about the moisture content. Canned chili varies by brand, so if yours looks particularly thick, don't be afraid to add an extra tablespoon of that jalapeño brine.
It's the secret weapon that makes this [3 ingredient chili cheese dip] feel like it came from a professional kitchen rather than a can.
Ingredients for the Perfect Melt
The beauty of this dish is that you likely have most of this in the pantry, but the quality of your "processed" components actually matters.
- 15 oz chili, canned without beans: This provides the savory, meaty backbone. Beans can make the dip chunky and difficult to scoop.
- 8 oz Velveeta or processed cheese product: Essential for that "nacho" flow. Why this? It contains sodium citrate, which keeps the sauce from breaking or becoming oily.
- 4 oz full fat cream cheese: Softened is non negotiable. Why this? It adds a rich tang and prevents the dip from setting into a hard block.
- 0.5 cup sharp cheddar cheese: Freshly shredded from a block. Why this? Pre shredded cheese is coated in potato starch, which can make your dip feel gritty.
- 0.25 cup pickled jalapeño brine: The liquid from the jar. Why this? The acidity and salt balance the heavy dairy perfectly.
- 0.5 tsp smoked paprika: Adds a "cooked all day" smoky depth.
- 0.25 cup fresh cilantro or scallions: For a hit of freshness at the end.
If you find yourself making a lot of cheesy dishes, like a creamy macaroni casserole, you know that the blend of cheeses is what creates complexity. Don't be tempted to use all Velveeta; the sharp cheddar provides the "real" cheese flavor that processed blocks lack.
Essential Equipment and Kitchen Tools
You don't need a high tech kitchen for this, but the right pan makes a massive difference in how the heat is distributed.
- Heavy bottomed skillet or saucepan: A cast iron or heavy stainless steel pan prevents hot spots that cause the chili to burn.
- Silicone spatula: This is better than a spoon because it allows you to scrape the bottom and corners of the pan effectively, ensuring no cheese gets left behind to scorch.
- Whisk: Essential for getting that cream cheese to vanish into the chili.
- Cheese grater: For that sharp cheddar. Seriously, avoid the bagged stuff for this specific recipe.
The step-by-step Cooking Process

- Heat the base. Place the 425g (15 oz) of chili in your skillet over medium low heat. Cook until you see small bubbles around the edges, but don't let it reach a violent boil.
- Incorporate the cream cheese. Add the 115g (4 oz) of softened cream cheese in small dollops. Note: Adding it all at once makes it harder to whisk smooth.
- Whisk until smooth. Use your whisk to blend the cream cheese into the steaming chili until the white streaks disappear completely.
- Add the processed cheese. Drop in the 225g (8 oz) of cubed Velveeta. Stir constantly in a figure eight motion to ensure even melting and to prevent the cheese from sticking to the bottom.
- Monitor the gloss. Keep stirring until the mixture becomes glossy and the cubes are fully melted. This should take about 5-7 minutes.
- Season and sharpen. Fold in the 0.5 tsp of smoked paprika and the 60ml (0.25 cup) of pickled jalapeño brine.
- The final melt. Sprinkle in the 0.5 cup of freshly shredded sharp cheddar. Stir just until the cheddar has melted into the sauce. Do not overcook at this stage, or the cheddar may become stringy.
- Garnish and serve. Remove the pan from the heat immediately. Top with your 0.25 cup of chopped cilantro or scallions.
- Hold for service. If you aren't eating right away, transfer the dip to a small slow cooker on the 'warm' setting to keep it fluid.
Fixing Common Mistakes and Errors
The most common issue I see with this [3 ingredient chili cheese dip] is impatience. People crank the heat to high to get the cheese melting faster, but all that does is separate the fats. If you see oil pooling on top, you've likely gone too far with the temperature.
Why Your Dip Separates
If your dip looks like it has "broken" and there is a yellow liquid sitting on top, the emulsion has failed. This usually happens if the temperature exceeds 71°C for too long. To fix this, remove from heat and whisk in a tablespoon of cold milk or extra jalapeño brine.
The cold liquid and mechanical action of whisking can sometimes pull the emulsion back together.
Why the Texture is Grainy
This is almost always caused by using pre shredded bagged cheese or overcooking the dairy. Once the cheese is melted, stop applying heat. The residual warmth of the chili is enough to keep it melted for quite a while.
| Problem | Root Cause | Solution |
|---|---|---|
| Thick/Pasty | Too much evaporation | Whisk in 1 tbsp of milk or water |
| Gritty Feel | Pre shredded cheese used | Use a block of cheese and grate it fresh |
| Burnt Bottom | Heat was too high | Transfer to a fresh pan; do not scrape the burnt bits |
Common Mistakes Checklist
- ✓ Ensure cream cheese is truly at room temperature (prevents lumps).
- ✓ Grate your own cheddar to avoid anti caking starches.
- ✓ Use "No Bean" chili for a smoother dipping experience.
- ✓ Never let the dip reach a rolling boil once cheese is added.
- ✓ Stir in a figure eight pattern to reach every part of the pan.
Tasty Variations and Ingredient Swaps
While the [ingredient chili cheese dip] is a classic, you can easily pivot based on what's in your fridge. Just remember that changing the cheese type may change the viscosity.
| Original Ingredient | Substitute | Why It Works |
|---|---|---|
| Velveeta (8 oz) | American Cheese (8 oz) | Similar melting salts. Note: Result will be slightly less salty. |
| Chili w/o Beans | Lentil Chili | Great for vegetarians. Note: Texture will be heartier/chunkier. |
| Jalapeño Brine | Lime Juice | Provides necessary acidity. Note: Lacks the spicy kick of the brine. |
If you want a different experience, try the "Oven Method." You can layer the chili on the bottom of a baking dish, dollop the cheeses on top, and bake at 180°C for 15 minutes. It creates a different, more layered texture, though it isn't as homogeneous as the stovetop version.
Freezing and Proper Reheating Guide
Cheese dips can be finicky in the freezer because the fat molecules tend to crystalize and separate when thawed. However, because this [chili cheese dip recipe] uses processed cheese and cream cheese, it actually holds up better than most.
Storage: Keep leftovers in an airtight container in the fridge for up to 4 days. To reheat, do not just microwave it on high. Use 30 second intervals, stirring in between, or better yet, put it back in a small saucepan over low heat with a splash of milk to loosen it up.
Freezing: You can freeze this dip for up to 2 months. Thaw it overnight in the fridge before reheating. Note: You will almost certainly need to whisk it vigorously during the reheating process to bring the emulsion back together. It may look curdled at first don't panic!
Just keep whisking as it warms up.
Zero Waste Tip: If you have a small amount of leftover dip that isn't enough for a party, stir it into some cooked elbow macaroni the next day. It makes an incredible, instant chili mac that my kids absolutely love. You can even use it as a topping for baked potatoes.
Serving Suggestions and Pairing Ideas
This is the ultimate communal food. I always serve this straight out of the skillet or in a pre warmed ceramic bowl to retain as much heat as possible. If you're looking for a clever pairing, these go beautifully with a batch of Cheddar Bay Biscuit Mix hack — the garlic and herb notes in the biscuits are incredible for dipping into the smoky chili.
- Best Dipping Vessels: Thick cut corn chips are the gold standard because they won't snap under the weight of the dip. However, soft pretzel bites or even toasted baguette slices are fantastic.
- The Toppings: While I suggest cilantro and scallions, a dollop of cold sour cream right in the center can provide a nice temperature contrast.
- If you want it spicier: Don't just add hot sauce. Chop up some of the pickled jalapeños from that jar and fold them in at the very end.
- If you want it meatier: Brown 100g of ground chorizo and stir it in with the chili for a smoky, spicy upgrade.
Stovetop vs. Oven
| Method | Time | Texture | Best For |
|---|---|---|---|
| Stovetop | 15 mins | Perfectly smooth/emulsified | Quick service & consistency |
| Oven | 20 mins | Layered with "crusty" edges | Hands off prep for parties |
Debunking Common Dip Myths
One of the biggest myths in the kitchen is that processed cheese "isn't real food." While it’s true it’s a cheese product, it is specifically engineered with emulsifying salts that make recipes like this possible. Without those salts, your dip would require a complex roux or a lot of luck to stay smooth.
Another misconception is that you need to "sear" the chili. Canned chili is already fully cooked and processed. "Searing" it will only evaporate the moisture and leave you with a thick, salty paste.
You simply want to bring it to a temperature where it can effectively melt the cheese without breaking the proteins down further. Trust the gentle simmer it’s the difference between a dip that’s silky and one that’s a struggle to eat.
Finally,, many people think that more cheese always equals a better dip. In reality, too much cheese can make the dip so thick that it breaks chips. The ratio in this [easy chili cheese dip] is balanced to ensure it stays fluid enough to be a "dip" rather than a "spread." Stick to the measurements, and your chips will thank you.

Recipe FAQs
How to keep the dip from separating into an oily mess?
Stir constantly in a figure eight motion while incorporating the cheeses. This specific movement is essential to emulsify the fats into the protein matrix, preventing the greasy layer often seen in inferior dips.
Can I use low-fat cream cheese or processed cheese products?
No, avoid low-fat versions entirely. Full fat ingredients provide the necessary structural stability to maintain a silky, cohesive texture that stays smooth as it cools.
Is it true I can cook this at a high rolling boil to speed it up?
No, this is a common misconception. You must maintain a gentle simmer on medium low heat; a rolling boil will break the emulsion and make the proteins rubbery.
How to achieve the perfect cheese pull and texture?
Use freshly shredded sharp cheddar instead of pre-shredded bags. If you enjoyed learning how to manage heat for a smooth result here, see how that same silky sauce logic ensures a perfect consistency in our other recipes.
How to reheat leftovers without the dip breaking?
Reheat slowly over low heat on the stovetop. Stir consistently until the cheese returns to its original glossy state, ensuring you do not overheat the mixture.
How to serve this if I am hosting a long party?
Transfer the finished dip to a slow cooker set on the 'warm' setting. This maintains the ideal temperature, preventing the dip from hardening or breaking during the event.
Can I substitute the pickled jalapeño brine with vinegar?
No, stick to the brine. The brine provides a specific balance of acidity and salt that regular vinegar lacks, which is critical for cutting through the richness of the cheeses.
Silky Chili Cheese Dip

Ingredients:
Instructions:
Nutrition Facts:
| Calories | 186 kcal |
|---|---|
| Protein | 9.2 g |
| Fat | 14.1 g |
| Carbs | 6.6 g |
| Fiber | 0.8 g |
| Sugar | 2.4 g |
| Sodium | 685 mg |
