Creamy Peanut Butter Fudge
- Time: Active 10 minutes, Passive 5 minutes, Total 15 minutes
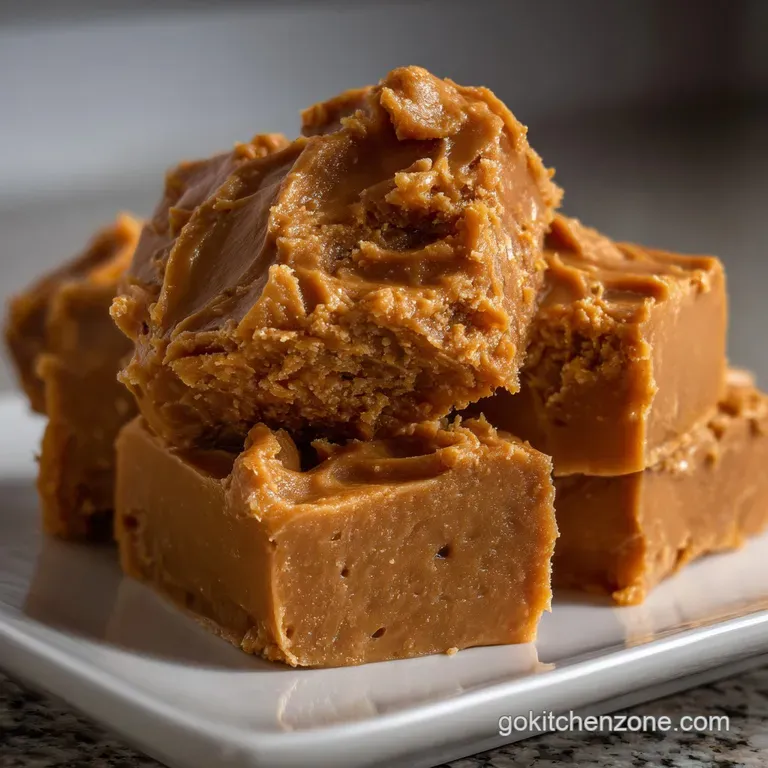
- Flavor/Texture Hook: Velvety, matte finish with a salty-sweet snap
- Perfect for: Holiday gifting, sudden cravings, or beginner-friendly dessert boards
- Master the Ultimate Peanut Butter Fudge
- The Quest for Flawless Texture
- Preparation Metrics and Batch Yield
- Chemistry of the Essential Elements
- Essential Tools for Confectionery Success
- Step-by-Step Culinary Execution Guide
- Troubleshooting Your Confectionery Errors
- Creative Fusion Flavor Variations
- Preservation and Serving Temperature Tips
- Serving Styles and Perfect Pairings
- The Mathematics of Multiplication
- Myths of the Fudge World
- Common Questions
- 📝 Recipe Card
Master the Ultimate Peanut Butter Fudge
Creating the perfect batch of peanut butter fudge is an exercise in temperature control and patience. I remember my first attempt; I rushed the cooling process, and what should have been a velvety block turned into a puddle of oily graininess.
It was a humble reminder that confectionery is a science of balance.
This version is designed for those who crave that classic, feel good nostalgic flavor but demand a professional, crave worthy texture. We are moving beyond the basic "melt and stir" method to ensure a stable emulsion that doesn't weep or crumble.
The result is a fusion of rich dairy fats and concentrated peanut protein. Whether you are serving this at a festive gathering or sneaking a square with your midnight tea, this this recipe delivers a silky mouthfeel that shatters slightly before dissolving on the tongue.
The Quest for Flawless Texture
Why do we often settle for mediocre fudge? Usually, it's because of inconsistent sugar dissolution. By using light brown sugar and powdered sugar in tandem, we leverage both moisture and fine particle suspension to create a structure that stays soft yet stable at room temperature.
The inclusion of whole milk provides the necessary aqueous phase for the sugar to dissolve, while the peanut butter fudge benefits from the high fat content of unsalted butter to inhibit large crystal growth. This isn't just candy; it's an edible architectural feat.
We are looking for a matte surface and a dense, "short" crumb where the fudge breaks cleanly when snapped. This contrast between the rich, oily peanut base and the crisp sugar matrix is what makes peanut butter fudge an enduring favorite in my kitchen.
Preparation Metrics and Batch Yield
Precision is the hallmark of a master cook. Ensure all components are weighed or measured before heat is applied to the peanut butter fudge to prevent over boiling during the critical transition phases.
| Metric | Detail |
|---|---|
| Yield | 24 servings |
| Active Prep | 10 minutes |
| Cook Duration | 5 minutes |
| Target Texture | Soft set, non-sticky |
| Flavor Profile | Intense peanut, caramelized sugar |
The Science of Why it Works
This peanut butter fudge relies on sugar crystal inhibition, where the fats from the creamy peanut butter and unsalted butter coat individual sucrose molecules. This prevents them from bonding into large, gritty clusters, resulting in a smooth, velvety finish.
On top of that,, the Maillard reaction between the proteins in the milk and the sugars in the brown sugar creates complex, toasty flavor notes that deepen the overall profile.
Chemistry of the Essential Elements
Understanding the "why" behind your ingredients turns a cook into a chef. Every element in this recipe serves a structural or chemical purpose beyond mere flavor.
| Ingredient | Chemical/Physical Role (Science) | The Pro Secret (Why This Matters) |
|---|---|---|
| Light Brown Sugar | Provides sucrose and glucose for structure; molasses adds acidity. | Why this? Moisture retention (hygroscopic) prevents the fudge from becoming brittle. |
| Unsalted Butter | Fat-based crystal inhibitor and emulsifier. | Why this? Pure fat content allows for a "short" texture that melts at body temperature. |
| Creamy Peanut Butter | Protein lipid matrix that provides the primary body. | Why this? High protein density ensures the fudge sets firmly without being rubbery. |
| Sifted Powdered Sugar | Fine particle suspension for instant thickening. | Why this? Micro crystals ensure a smooth mouthfeel without the need for over high heat candy stages. |
For the Fudge Base
The foundation of homemade peanut butter fudge starts with 1/2 cup (115g) Kerrygold Unsalted Butter and 3/4 cup (150g) C&H Light Brown Sugar. The butter must be unsalted to allow you to control the exact sodium levels later.
For Flavor and Structure
We incorporate 1/4 cup (60ml) Whole Milk to dissolve the sugar and 1 cup (250g) Skippy Creamy Peanut Butter for the iconic flavor. If you want to explore more peanut heavy textures, try pairing this with techniques from our Peanut Butter Balls recipe.
To Achieve a Perfectly Smooth Emulsion
The finishing touch involves 2 cups (240g) Sifted Powdered Sugar, 1 tsp Nielsen Massey Pure Vanilla Extract, and 1/4 tsp Fine Sea Salt. Sifting is non-negotiable; it prevents "sugar pockets" from ruining the creamy peanut butter fudge.
Essential Tools for Confectionery Success
Professional results require specific thermal and mechanical properties from your equipment.
- Le Creuset Heavy Bottomed Saucepan: Crucial for even heat distribution to prevent the milk from scorching.
- KitchenAid Hand Mixer: While whisking by hand works, a mixer provides the mechanical shear necessary for a perfect simple peanut butter fudge emulsion.
- USA Pan 8x8 Square Pan: A smaller pan creates the classic "thick" fudge profile.
- Parchment Paper: Essential for a clean release and sharp, straight edges when cutting.
Comparison: Stovetop vs. Microwave
| Method | Speed | Texture Quality | Risk Factor |
|---|---|---|---|
| Stovetop | Moderate (5 mins) | Superior; even sugar melt | Low if heat is controlled |
| Microwave | Rapid (2 mins) | Can be grainy or oily | High; easy to scorch fats |
step-by-step Culinary Execution Guide

Follow these atomic steps for a no bake peanut butter fudge that sets perfectly every time.
- Line the 8x8 pan with parchment paper, leaving a 2 inch overhang.
- Melt 1/2 cup (115g) unsalted butter in the saucepan over medium heat until liquid and bubbling slightly.
- Whisk in 3/4 cup (150g) light brown sugar and 1/4 cup (60ml) whole milk.
- Boil the mixture for exactly 2 minutes until the surface is covered in large, rhythmic bubbles and slightly darkens. Note: This triggers the initial sugar dissolution.
- Remove from heat immediately to prevent over evaporation.
- Stir in 1 cup (250g) creamy peanut butter and 1 tsp vanilla extract until the mixture is glossy and uniform.
- Add 1/4 tsp fine sea salt to balance the sweetness.
- Incorporate 2 cups (240g) sifted powdered sugar gradually.
- Beat the mixture until the gloss turns to a matte finish and the "trail" of the spoon stays visible for 3 seconds.
- Press into the pan and smooth the surface until flat and slightly reflective.
- Chill for at least 1 hour until the center feels firm to a light touch.
Chef's Tip: To get those "Instagram perfect" clean slices, dip a sharp knife in boiling water and wipe it dry between every single cut. This melts the outer fat layer of the fudge as you slice, preventing sticking.
Troubleshooting Your Confectionery Errors
If your easy peanut butter fudge isn't behaving, it's likely a matter of physics.
Why Your Fudge Is Gritty
Graininess occurs when sugar crystals "recrystallize." This happens if the mixture is agitated too much while cooling or if the powdered sugar wasn't sifted.
| Problem | Root Cause | The Fix | Pro Protocol |
|---|---|---|---|
| Oily Surface | Emulsion break | Stir in 1 tsp warm milk | Maintain low, steady heat |
| Too Soft | Excess moisture | Re-heat slightly with sugar | Weigh ingredients exactly |
| Crumbly | Over boiled | Add 1 tsp melted butter | Use a timer for the boil |
Why did my fudge turn out oily?
This is a classic case of lipid separation. When the butter or peanut butter is heated too rapidly, the fat molecules break away from the solids. To fix this, you must introduce a tiny amount of moisture (like a teaspoon of milk) and whisk vigorously to re-establish the emulsion.
Creative Fusion Flavor Variations
Once you master the base homemade peanut butter fudge, the creative possibilities are endless.
- Salted Chocolate Swirl: Melt 1/2 cup dark chocolate chips and swirl through the top before the fudge sets for a sophisticated look.
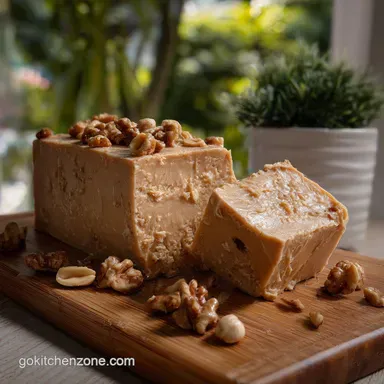
- Protein Packed Crunch: Fold in 1/2 cup of crushed roasted peanuts for a "texture bomb" experience.
- Keto Friendly Adaptation: Swap the sugars for an erythritol based powdered sweetener and use a high fat natural peanut butter (be sure to emulsify well!).
- Holiday Spice: Add 1/2 tsp of ground cinnamon and a pinch of nutmeg to the boil for a festive, warm flavor profile similar to my Monkey Bread recipe.
Flavor Map
- Sweet: Light Brown Sugar + Powdered Sugar
- Savory: Fine Sea Salt + Roasted Peanut Butter
- Rich: Unsalted Butter + Whole Milk
- Aromatic: Pure Vanilla Extract
Preservation and Serving Temperature Tips
This quick peanut butter fudge is stable but sensitive to humidity.
Storage: Store in an airtight container at room temperature for up to 7 days. For a firmer bite, refrigerate for up to 2 weeks. Ensure parchment paper separates layers to prevent sticking.
Freezing: Wrap individual squares in plastic wrap, then place in a freezer safe bag. They will keep for 3 months. To serve, thaw in the fridge for 2 hours to prevent "sweating" (condensation).
Zero Waste: Don't toss the butter wrapper; use the residual grease to help the parchment paper stick to the pan corners. If you have crumbs left over, freeze them and use them as a "crunch" topping for vanilla bean ice cream.
The high fat and sugar content make them an excellent flavor stabilizer in frozen desserts.
Serving Styles and Perfect Pairings
Fudge is incredibly rich, so it benefits from being served alongside contrasting textures and flavors.
- For a Sophisticated Dessert Board: Pair with tart Granny Smith apple slices or fresh raspberries to cut through the heavy lipids.
- To Enhance Your Morning Coffee: A small square of peanut butter fudge with brown sugar alongside a bitter espresso creates a world class flavor harmony.
- The Cookie Connection: For a themed dessert spread, serve this alongside a batch of my Peanut Butter Blossom Cookies recipe.
The Mathematics of Multiplication
Batch Expansion Logic
When doubling this best peanut butter fudge recipe, use a 9x13 pan. - Spices/Salt: Increase by 1.5x, not 2x, to avoid overpowering the palate. - Cooking Time: The boil may take 30 60 seconds longer due to the increased volume and thermal mass in the pan.
Proportional Adjustments
If you need to scale down (1/2 batch), use a loaf pan. - Surface Area: A smaller pan ensures the fudge remains at least 1 inch thick, which is vital for the correct moisture-to-texture ratio.
Myths of the Fudge World
Myth: You must use "Natural" peanut butter for the best flavor.Truth: Natural peanut butter (the kind with oil on top) often lacks the stabilizers (like palm oil or lecithin) necessary to keep a fudge set.
For a reliable, professional peanut butter fudge, use a standard creamy brand to ensure the emulsion holds.
Myth: Fudge needs to be boiled to a specific temperature on a candy thermometer.Truth: While "Hard Ball" or "Soft Ball" stages matter for traditional sugar work, this specific quick peanut butter fudge uses powdered sugar as a structural stabilizer, making the 2
minute timed boil sufficient for moisture evaporation without the need for a thermometer.

Common Questions
Should I use a candy thermometer for this recipe?
No, a thermometer is not required. This recipe relies on precise timing for the boil (2 minutes) to achieve proper sugar dissolution, not reaching a specific temperature phase.
What is the quickest way to ensure a non-grainy texture?
Sift all powdered sugar thoroughly before use. Sifting breaks up any pre-existing sugar clumps which would otherwise remain intact during mixing, leading to grittiness. This process ensures that the micro crystals integrate smoothly into the fat matrix, guaranteeing a velvety mouthfeel.
Is it better to use salted or unsalted butter?
Unsalted butter allows for precise sodium control. Commercial salted butters contain highly variable amounts of sodium, which can unbalance the flavor profile intended for this rich dessert. Unsalted butter provides a neutral lipid base so salt can be added deliberately via the fine sea salt component.
Why did my fudge end up oily and separated?
The emulsion failed due to excessive heat shock. Rapid heating causes the fat molecules to reject the aqueous sugar solution, breaking the creamy structure.
- Add 1 tsp warm milk gently
- Whisk very slowly until combined
- Avoid reintroducing direct heat
Can I substitute natural peanut butter for creamy peanut butter?
Natural peanut butter compromises structural stability. Stabilizers found in commercial brands prevent lipid separation when combined with boiled milk and sugar. Natural varieties often cause the fudge to weep oil because their fat content is inherently less emulsified.
Does this fudge need to be refrigerated for setting?
No, room temperature chilling is adequate. The high concentration of powdered sugar and peanut butter solids provides enough structure to set firmly at standard kitchen temperatures. Refrigeration can sometimes cause the sugar matrix to become too brittle or encourage condensation upon removal.
Myth: Fudge must be stirred continuously during the entire boil phase.
Myth: You must stir constantly during the 2-minute boil. Correction: Only light whisking is needed to integrate ingredients; constant stirring promotes large sugar crystal formation upon cooling, leading to graininess.
Peanut Butter Fudge Recipe
Ingredients:
Instructions:
Nutrition Facts:
| Calories | 161 kcal |
|---|---|
| Protein | 2.8 g |
| Fat | 9.2 g |
| Carbs | 18.4 g |
| Fiber | 0.6 g |
| Sugar | 17.3 g |
| Sodium | 75 mg |
