Peanut Butter Blossom Cookies Recipe
- Effort/Time: 30 minutes total (High-efficiency workflow)
- Flavor Hook: Nutty, salt-forward dough meets rich milk chocolate
- Perfect for: Holiday cookie swaps, weeknight cravings, and bake-ahead gifting
- The Molecular Synergy of Peanut Butter and Heat
- Quantifiable Metrics for the Perfect Yield
- The Atomic Ingredients of a Classic Blossom
- The Engineering Behind Your Baking Kit
- A Phase-Based Workflow for Precision Baking
- Diagnosing Structural Failures in the Dough
- Architectural Tweaks and Flavor Profiles
- Common Myths
- Preservation Strategies and Texture Recovery
- Creative Presentations and Ideal Pairings
- Recipe FAQs
- 📝 Recipe Card
Master the Ultimate Peanut Butter Blossom Cookies
There is nothing more frustrating than spending your evening in the kitchen only to pull out a tray of peanut butter blossom cookies that are as dry as sawdust and crumble the second you touch them.
I’ve been there watching $15 worth of quality ingredients turn into a heap of disappointment because the ratio of flour to fat was just slightly off. It’s a dinner struggle of the dessert world when you want a treat but end up with a mess.
I once destroyed three consecutive batches of this dough by trying to swap the creamy peanut butter for the "natural" oil-on-top variety without adjusting the binders. The result was a greasy puddle that never set. It was a humbling lesson in the physics of fat-loading in baking.
I learned that the stability of these peanut butter blossom cookies doesn't come from more flour, but from the specific way we emulsify the butter and sugars to create a flexible, moisture retaining matrix.
The secret to that signature "chewy snap" isn't magic; it's the Maillard reaction working in tandem with proper hydration. By allowing the egg and milk to fully penetrate the flour’s starch granules before hitting the oven, we ensure a tender crumb that supports the weight of a Hershey’s Kiss without collapsing.
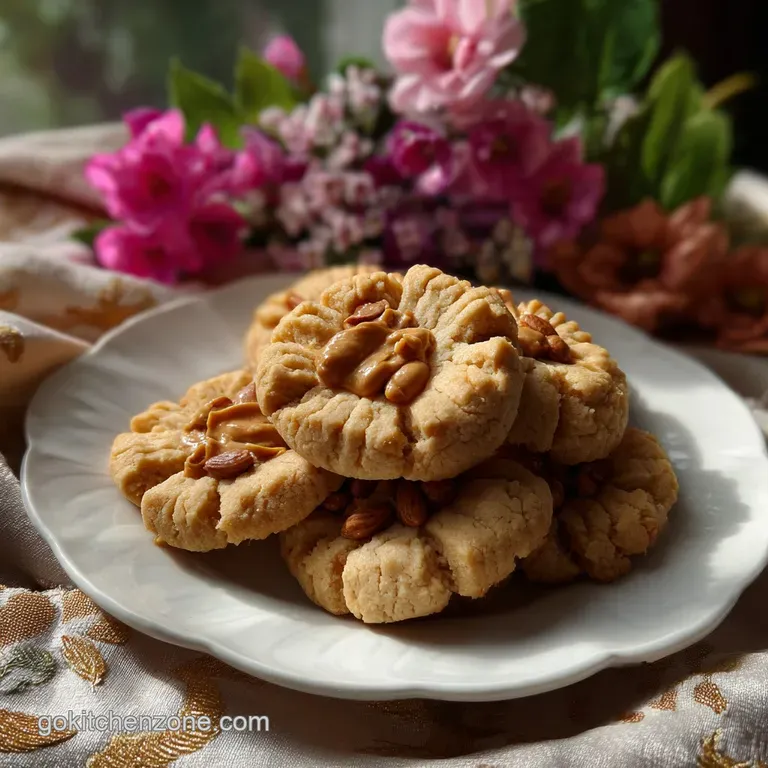
When you take that first bite, you get the auditory crunch of granulated sugar followed by a velvety, chocolatey finish that defines this classic peanut butter blossom cookie.
The Molecular Synergy of Peanut Butter and Heat
- Lipid Emulsification: Creaming the 1/2 cup unsalted butter with peanut butter creates a stable fat network that traps air, providing a soft lift without excess baking powder.
- Hygroscopic Retention: The 1/3 cup light brown sugar contains molasses, which attracts and holds moisture molecules, preventing the cookie from drying out during the bake.
- Protein Coagulation: The 1 large egg provides the structural "glue" that sets the crumb, ensuring the cookie can withstand the pressure of the chocolate kiss without shattering.
- Starch Gelatinization: As the 1 1/2 cups all-purpose flour heats, the starches absorb liquid from the milk and egg, expanding to create the cookie's final shape.
Ingredient Chemistry Breakdown
| Ingredient | Chemical/Physical Role (Science) | The Pro Secret (Why This Matters) |
|---|---|---|
| 1/2 cup Unsalted Butter | Fat-in-water emulsion for tenderizing | Use room temp butter to ensure air pockets form during the creaming phase. |
| 3/4 cup Creamy Peanut Butter | High protein and fat content for density | Avoid "natural" stir style; the stabilizers here prevent oil separation. |
| 1 tsp Baking Soda | Alkaline leavening agent | Reacts with the acidic brown sugar to create CO2 and promote browning. |
| 1/3 cup Light Brown Sugar | Humectant (moisture puller) | Essential for the chewy, soft center texture that lasts for days. |
Quantifiable Metrics for the Perfect Yield
To achieve consistent results, we must treat the baking process like a lab protocol. These metrics ensure that your 36 servings of peanut butter blossom cookies are identical in texture and doneness. If you find yourself in a weeknight rush, these benchmarks will keep you on track.
- Thermal Checkpoint: Preheated oven must reach exactly 375°F before the first tray enters to ensure immediate leavening.
- Weight Precision: Each dough ball should weigh approximately 0.75 ounces (21g) to ensure even cooking across all 36 cookies.
- Temporal Precision: The primary bake must last exactly 8 to 10 minutes; pulling them when the edges are barely set is the only way to avoid a sandy texture.
| Metric | Value | Note |
|---|---|---|
| Prep Time | 20 minutes | Includes unwrapping 36 chocolates |
| Cook Time | 10 minutes | Target for maximum chewiness |
| Total Time | 30 minutes | From pantry to cooling rack |
| Recipe Yield | 36 cookies | Perfect for a standard 12 cup cookie sheet in batches |
The Atomic Ingredients of a Classic Blossom
- 1/2 cup (115g) unsalted butter, softenedWhy this? Provides the fat base for a melt-in-the-mouth texture.
- 3/4 cup (190g) creamy peanut butterWhy this? Standard Jif or Skippy provides the necessary emulsifiers for stability.
- 1/3 cup (65g) granulated sugar
- 1/3 cup (70g) light brown sugar, packed
- 1 large egg, room temperature
- 2 tbsp (30ml) milkWhy this? Adds hydration to prevent the peanut butter from seizing the dough.
- 1 tsp (5ml) vanilla extract
- 1 1/2 cups (190g) all-purpose flour
- 1 tsp (5g) baking soda
- 1/2 tsp (3g) kosher saltWhy this? Diamond Crystal Kosher Salt balances the sweetness of the chocolate.
- 1/3 cup (65g) granulated sugar for rolling
- 36 pieces Hershey's Kisses, unwrapped
Substitution Protocol
| Original Ingredient | Substitute | Why It Works |
|---|---|---|
| Unsalted Butter | Salted Butter | Works fine; just reduce the added kosher salt to a pinch. |
| Creamy Peanut Butter | Almond Butter (No-stir) | Similar fat profile. Note: Results in a slightly grittier texture. |
| All-Purpose Flour | 1 to-1 gluten-free Flour | Xanthan gum in the blend mimics the gluten structure well. |
The Engineering Behind Your Baking Kit
To execute these peanut butter blossom cookies with precision, you need tools that manage heat distribution effectively. Using a heavy duty KitchenAid Stand Mixer allows for the aeration of fats that manual stirring simply cannot achieve.
This isn't about being fancy; it's about the physics of air incorporation.
I highly recommend using heavy gauge Nordic Ware Aluminum Baker's Sheets. Thin pans warp under heat and cause uneven bottom browning, leading to cookies that are burnt on one side and raw in the center.
A small cookie scoop (1 tablespoon size) is also vital for ensuring that every one of your peanut butter blossom cookies is the same mass, which is the only way to guarantee they all finish baking at the exact same second.
For a foolproof result every time, trust the process designed for these cookies.
For cooling, a tiered wire rack is essential. If you leave the cookies on the hot pan, the residual heat will continue to cook the bottoms, turning a soft cookie into a hard disc.
We want to stop the cooking process the moment they leave the oven to preserve that velvety crumb in your finished peanut butter blossom cookies.
A Phase Based Workflow for Precision Baking
- Preheat the oven to 375°F (190°C) until the internal thermometer confirms the temperature.
- Cream the butter, 3/4 cup creamy peanut butter, 1/3 cup granulated sugar, and 1/3 cup light brown sugar for 3 minutes until the mixture looks pale and fluffy. Note: This incorporates micro air bubbles for lift.
- Beat in the 1 large egg, 2 tbsp milk, and 1 tsp vanilla extractuntil the emulsion is smooth and glossy.
- Whisk the 1 1/2 cups all-purpose flour, 1 tsp baking soda, and 1/2 tsp kosher salt in a separate bowl until no clumps remain.
- Fold the dry ingredients into the wet base until just combined and no white streaks of flour are visible. Note: Overmixing will activate gluten and make the cookies tough.
- Shape the dough into 1 inch ballsuntil you have 36 uniform spheres.
- Roll each ball in the 1/3 cup granulated sugaruntil a thick, even coating is achieved. Note: This creates the crunch and prevents spreading.
- Place the balls 2 inches apart on a baking sheet until the tray is full.
- Bake for 8 to 10 minutes until the edges are firm and the tops are slightly cracked.
- Press a Hershey's Kiss into the center of each cookie immediately until the cookie cracks slightly around the edges.
- Transfer to a wire rack after 2 minutes until the chocolate sets and the cookie is cool to the touch.
When you're rolling the dough, it's very similar to the technique used in our Sugar Cookies Recipe, where the sugar coating acts as a moisture barrier. This step is what gives the peanut butter blossom cookies their iconic look. If you love the combination of chocolate and nut butter, you might also want to try this Peanut Butter Balls recipe for a no-bake alternative. Mastering this recipe ensures you always have perfect peanut butter blossom cookies ready to share.
Diagnosing Structural Failures in the Dough
Why Your Cookies Are Too Dry
If your dough is crumbling before it even hits the oven, you likely have a hydration imbalance. This usually happens when flour is measured by volume (cups) rather than weight (grams), leading to "packing" the flour.
The lack of moisture prevents the gluten from forming a cohesive network, resulting in a sandy mouthfeel.
Why Your Cookies Spread Too Much
Excessive spreading is a thermodynamic issue. If your butter was too warm (bordering on melted) when you started, or if you used a "natural" peanut butter with high oil content, the fats will liquefy before the flour starches can set the structure.
Getting the temperature right is key to success when making these cookies.
| Problem | Root Cause | The Fix | Pro Protocol |
|---|---|---|---|
| Flat Cookies | Warm dough/butter | Chill dough for 20 mins | Use cold-to-the-touch butter, not oily. |
| Chocolate Melts | Pressed too early | Wait 60 seconds post oven | Let the cookie stabilize before adding chocolate. |
| Bottoms Burnt | Dark baking sheet | Use parchment or silicone | Dark metal absorbs heat faster; reduce temp by 25°F. |
Architectural Tweaks and Flavor Profiles
While the classic peanut butter blossoms are a staple, you can manipulate the flavor architecture easily. If you’re looking for a deeper chocolate experience, similar to what you'd find in a Chocolate Chip Cookies recipe, try using dark chocolate stars instead of milk chocolate kisses for an elevated take on peanut butter blossom cookies.
- The Salted Caramel Twist: Sprinkle a tiny pinch of flaky sea salt on the chocolate kiss immediately after pressing.
- Christmas Blossom Cookies: Use red and green sanding sugar for rolling instead of plain granulated sugar to make them festive.
- Dark Chocolate Almond: Swap the peanut butter for almond butter and use a 70% dark chocolate disc in the center.
⚗️ The Scaling Lab
When doubling a batch of peanut butter blossom cookies, physics dictates we change our approach.
- Flavor Saturation: Scale the salt to 1.5x (not 2x). In a double batch, the saltiness can become overwhelming as it doesn't distribute linearly.
- Chemical Leavening: Scale the baking soda EXACTLY. Adding too much will result in a soapy, metallic aftertaste and cookies that rise then collapse.
- The Thermal Mass Factor: A double batch of dough in a single bowl has a high thermal mass. It will stay warm longer, which can lead to premature fat melting. Keep the half you aren't currently rolling in the fridge.
- Pan Crowding: Do not try to fit more cookies on one tray. This drops the oven temperature significantly (the "Massive Sink" effect), leading to steaming rather than baking. Batch your cooking.
Common Myths
Myth: You must use natural peanut butter for the best flavor. Truth: Natural peanut butter lacks the stabilizers (like palm oil or mono glycerides) needed to keep this specific dough from separating.
Use standard creamy peanut butter for the correct structural integrity required by the peanut butter blossom cookies structure.
Myth: The chocolate will stay hard if you put it on right away. Truth: The residual heat from the cookie will partially melt the base of the chocolate. This is actually good it "glues" the kiss to the cookie so it doesn't fall off later.
Preservation Strategies and Texture Recovery
Storage: Keep your blossom cookies in an airtight container at room temperature for up to 5 days. The sugar coating acts as a preservative by reducing surface moisture, but the brown sugar inside will eventually lose its humectant power.
Freezing: You can freeze the baked cookies for up to 3 months. To reheat, let them thaw at room temperature. Do not microwave them, or the chocolate kiss will bloom (turn gray) and lose its tempered snap.
💡 ZERO WASTE: Don't discard the leftover sugar from the rolling bowl. Transform: Use it in your morning coffee or as a base for a cinnamon sugar toast.
Science: The sugar has picked up trace amounts of peanut butter oils and salt, which adds a complex, savory sweet dimension to beverages.
Creative Presentations and Ideal Pairings
When serving peanut butter blossom cookies, timing is everything. For the best sensory experience, serve them about 30 minutes after baking. The chocolate will be "soft set" firm enough to hold its shape but yielding and velvety when bitten into.
These cookies happen to be the ultimate partner for a cold glass of whole milk. The high fat content in the milk cleanses the palate of the sticky peanut butter, allowing the saltiness of the dough to pop with every sip. If you're hosting a party, arrange them in a radial pattern on a mahogany wood board to contrast the sparkling sugar crust. Trust me, they will disappear before you can even get the milk out of the fridge. For a full dessert spread, pair these with some Monkey Bread for a mix of textures that will keep your guests coming back for more.
Making peanut butter blossom cookies is about more than just mixing ingredients; it’s about managing the physics of heat and fat to create something nostalgic. Whether it’s a weeknight treat or a holiday tradition, these cookies never fail to deliver that perfect nutty chocolate hit.
Now, let’s crack on and get baking!

Recipe FAQs
Should I chill the dough before baking for perfect shape?
Yes, chilling prevents excessive spread. Warming butter melts too fast before starches set, causing the cookie structure to collapse into a flat disc. Chill dough for 20 minutes to solidify fats before rolling.
Can I substitute creamy peanut butter with natural, oily style?
No, natural peanut butter destabilizes the structure. The high, unstable oil content causes grease puddles because the emulsifiers necessary for structure are absent.
- Avoid oil separation
- Measure weight, not volume
- Use stabilized commercial brands
What is the ideal oven temperature for immediate leavening?
375°F (190°C). This initial high heat forces the baking soda to react rapidly, creating instant lift before the exterior crust sets.
What is the best method for storing baked blossoms?
Airtight container at room temperature preserves texture best. The sugar coating reduces surface moisture loss, maintaining the chewiness imparted by the brown sugar humectant. Do not refrigerate, as this speeds up staling.
Is it necessary to press the chocolate kiss immediately after baking?
Yes, immediate pressing secures the chocolate kiss permanently. The residual heat melts the chocolate base slightly, acting as an edible adhesive to prevent the kiss from detaching once cooled.
Is salted butter an acceptable swap for unsalted butter?
Salted butter works, but reduces sodium precision. Salted products vary widely in sodium content, disrupting the controlled balance between dough sweetness and the chocolate topping. Reduce added kosher salt by half if substituting.
Myth: Washing chicken spreads Salmonella bacteria to kitchen surfaces.
Myth: Washing chicken spreads Salmonella bacteria to kitchen surfaces. Reality: USDA confirms this action only aerosolizes pathogens via splashing water droplets. Cooking meat to 165°F is the only reliable kill step.
Peanut Butter Blossom Cookies

Ingredients:
Instructions:
Nutrition Facts:
| Calories | 121 kcal |
|---|---|
| Protein | 2.4 g |
| Fat | 6.8 g |
| Carbs | 13.4 g |
| Fiber | 0.5 g |
| Sugar | 9.5 g |
| Sodium | 78 mg |
