Honey Garlic Chicken: Quick and Glazed
- Time: Active 10 minutes, Passive 12 minutes, Total 22 minutes
- Flavor/Texture Hook: Shatter crisp edges with a velvety, garlic forward glaze
- Perfect for: High speed weeknight meals or beginner meal prep
- Achieving Takeout Texture with This Honey Garlic Chicken Recipe
- The Secret to the Sticky Glaze
- Planning Your Weeknight Dinner Efficiency Flow
- Analysis of the Key Flavor Components
- The Essential Pantry Elements and Smart Substitutions
- Tools for High Heat and Fast Searing
- Transforming Raw Chicken into a Glazed Masterpiece
- Fixing Common Sauce and Searing Blunders
- Customizing the Heat and Protein for Variety
- Debunking the "Sear to Seal" Myth
- Preserving That Freshly Glazed Crunch for Later
- Final Touches for a Restaurant Quality Look
- Recipe FAQs
- 📝 Recipe Card
Achieving Takeout Texture with This Honey Garlic Chicken Recipe
You know that specific sound when a piece of floured chicken hits shimmering oil? That sharp, aggressive sizzle is basically the soundtrack to my Tuesday nights. I remember the first time I tried making this. I was starving, staring at a pack of chicken breasts, and nearly ordered a $40 delivery.
Instead, I threw some honey, soy, and a mountain of garlic into a bowl, and twenty minutes later, I was eating something that actually tasted better than the local spot down the street. It was a total "aha" moment for my kitchen routine.
The beauty of this dish is that it doesn't require a deep fryer or a degree in culinary arts. We are using a simple dredge and a quick pan sear to get those golden, craggy bits that hold onto the sauce.
It's fast, it's reliable, and honestly, the aroma of the garlic hitting the pan will have your family hovering over the stove before you even finish reducing the glaze. We've all had those nights where cooking feels like a chore, but this recipe makes the process feel like a win.
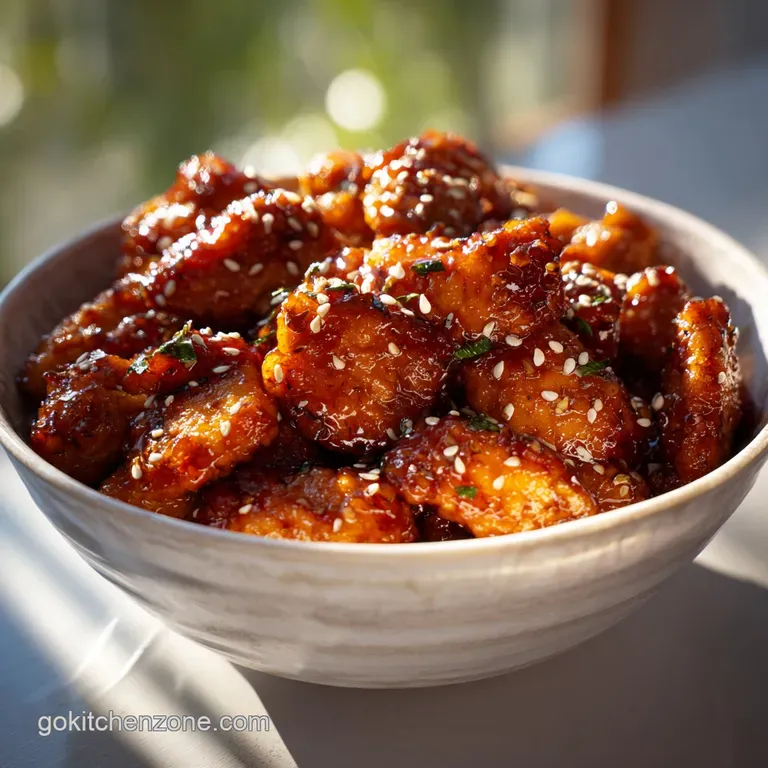
We are going to focus on getting that perfect "lacquered" look on the chicken. It shouldn't be swimming in a watery soup; it should be coated in a thick, glossy syrup that sticks to every nook and cranny. If you've ever struggled with soggy chicken or a sauce that just won't thicken, I've got the fixes right here.
Let's get into the flow of how this comes together so you can get dinner on the table and actually enjoy it.
The Secret to the Sticky Glaze
The Maillard Synergy: The honey’s glucose reacts with the chicken’s proteins under high heat to create complex flavor compounds and a deep amber color. This caramelization happens simultaneously with the soy sauce reduction, creating a natural thickener without needing excess starch.
| Technique Factor | Fast Method (This Recipe) | Classic Battered Method | Visual Cue |
|---|---|---|---|
| Coating Type | Light Flour Dredge | Heavy Egg/Cornstarch Batter | Translucent vs. Opaque |
| Oil Volume | 2 tbsp neutral oil | 2-3 cups for deep frying | Shimmering vs. Bubbling |
| Prep Time | 10 minutes | 35 minutes | Quick toss vs. Station setup |
| Texture Result | Crispy tender skin | Thick, crunchy shell | Golden brown vs. Deep brown |
If you find yourself making this often and want to switch things up, you might also love my Hot Honey Chicken recipe which uses a similar over high heat technique but brings a lot more heat to the party.
Planning Your Weeknight Dinner Efficiency Flow
When we talk about saving time, it's all about the sequence. You don't want to be mincing garlic while your chicken is already overcooking in the pan. I like to call this the "prep sear glaze" rhythm. Start by dicing your 1.5 lbs of chicken into uniform 1 inch pieces.
Small cubes cook faster and offer more surface area for that flour coating to turn into a crispy crust. While the chicken rests in its flour dredge, whisk your sauce ingredients together so they are ready to hit the pan the second the meat is browned.
The total cook time is only 12 minutes, which is faster than most microwave meals if you count the reheating time. Because we are using chicken breast, we have a narrow window for success. Overcook it by two minutes, and it becomes dry; undercook it, and you lose that "shatter" texture on the outside.
Stick to the timeline below, and you’ll hit that sweet spot where the meat is juicy and the sauce is tacky.
Chef's Tip: Grate your fresh ginger and garlic directly into the sauce bowl using a microplane. The fine paste emulsifies into the honey much better than chunky minced pieces, ensuring every bite has an even hit of aromatics.
Analysis of the Key Flavor Components
| Component | Science Role | Pro Secret |
|---|---|---|
| Raw Honey | Primary humectant and sweetener | Use room temp honey so it flows and whisks instantly into the soy. |
| All Purpose Flour | Starch barrier for moisture retention | Press the chicken into the flour firmly to create a dry "skin" before frying. |
| Rice Vinegar | Acidic balancer for sugar | Don't skip this; the acid cuts through the cloying sweetness of the honey. |
| Mined Garlic | Aromatic sulfur compounds | Add to the sauce, not the dry pan, to prevent the tiny bits from burning. |
The Essential Pantry Elements and Smart Substitutions
This recipe relies on 1.5 lbs (680g) of boneless skinless chicken breast, cut into 1 inch pieces for maximum speed. You will also need 1/4 cup (32g) of all purpose flour seasoned with 1/2 tsp (3g) kosher salt and 1/4 tsp (1g) black pepper. This dry coating is the most important part of the texture.
For the cooking fat, use 2 tbsp (30ml) of neutral oil like avocado or grapeseed save the olive oil for salads, as we need a high smoke point here.
The sauce is a blend of 1/3 cup (115g) raw honey, 2 tbsp (30ml) low sodium soy sauce, and 1 tbsp (15ml) rice vinegar. To give it that signature punch, we add 4 cloves of minced garlic, 1 tsp (5g) sriracha for a tiny kick, and 1 tsp (5g) of freshly grated ginger. If you're out of something, don't panic.
Use the table below to swap things out without ruining the meal.
| Original Ingredient | Substitute | Why It Works |
|---|---|---|
| Raw Honey | Maple Syrup | Similar viscosity but adds a woody, autumnal flavor note. |
| Rice Vinegar | Apple Cider Vinegar | Provides the necessary acidity with a slightly fruitier finish. |
| All Purpose Flour | Cornstarch | Creates a lighter, even crispier "glass like" crunch. Note: Better for GF needs. |
| Soy Sauce | Tamari | Same salty umami profile but keeps the dish strictly gluten-free. |
Since you're already mastering the art of the sticky glaze, you might find that my Crispy Honey Garlic recipe is a fantastic way to apply these same flavors to a vegetarian protein on meatless Mondays.
Tools for High Heat and Fast Searing
You don't need a kitchen full of gadgets, but a heavy bottomed skillet is non negotiable. A 12 inch cast iron or a high-quality stainless steel pan is best because they hold heat when you drop the cold chicken in.
If you use a thin, cheap pan, the temperature will plummet, and the chicken will steam in its own juices instead of searing. You'll also want a wide, shallow bowl for dredging and a sturdy whisk to make sure the honey and soy are fully combined before they hit the heat.
For the chicken itself, a sharp chef's knife makes quick work of the 1 inch cubes. If the chicken is slightly frozen just about 20 minutes in the freezer it becomes much easier to slice into perfect, uniform squares.
Uniformity isn't just for looks; it ensures every piece of chicken is done at the exact same time, preventing that annoying mix of dry and undercooked bites.
Transforming Raw Chicken into a Glazed Masterpiece
1. The High Surface Dredge
Toss the 1 inch chicken pieces in the flour, salt, and pepper mixture. Note: This creates a starch barrier that browns quickly while keeping the meat juices inside. Ensure every side is coated, then shake off the excess in a colander so you don't end up with gummy clumps in the pan.
2. The Golden Sear
Heat the 2 tbsp oil in your skillet over medium high heat until it shimmers. Add the chicken in a single layer. Cook for 3-4 minutes until the bottom is deeply golden and releases easily from the pan. Don't crowd the pan; if you can't see the bottom of the skillet between the pieces, work in two batches.
3. The Aromatics Release
Turn the chicken pieces over to sear the other side. As they brown, whisk together the honey, soy sauce, rice vinegar, garlic, ginger, and sriracha. Note: Mixing the aromatics into the liquid protects the garlic from direct contact with the hot metal.
4. The Glaze Reduction
Pour the sauce over the chicken. Simmer for 2-3 minutes until the liquid bubbles rapidly and thickens into a syrup. You will see the bubbles transition from thin and watery to large, slow popping "lava" bubbles.
5. The Finishing Lacquer
Toss the chicken continuously in the reduced sauce for 1 minute. Stop when the sauce clings to the meat and the pan is almost dry. This ensures every piece is fully encapsulated in flavor.
6. The Final Garnish
Remove from heat immediately. Sprinkle with the thinly sliced green onions and toasted sesame seeds. Note: The residual heat will soften the onions just enough to release their flavor without making them limp.
Fixing Common Sauce and Searing Blunders
The most common issue I see is "sauce sliding." This happens when the chicken is too wet or the pan isn't hot enough. If your sauce isn't sticking, it’s usually because the flour didn't form a proper crust. Another frequent mistake is burning the garlic.
Garlic has a high sugar content and a low burn point; that’s why we whisk it into the honey soy mixture rather than sautéing it in the oil first. If the garlic burns, the whole dish will turn bitter, and there is no saving it.
To Prevent Soggy Chicken
The secret is the "dry pan start." If you see liquid pooling in the pan while browning the chicken, your heat is too low. Turn it up! You want the moisture to evaporate the second it hits the air. If you're looking for a different style of comfort, my Smothered Chicken Recipe uses a totally different approach to moisture, focusing on a velvety gravy instead of a sticky reduction.
| Problem | Root Cause | Solution |
|---|---|---|
| Thin, runny sauce | Not enough reduction time | Simmer for another 60 seconds until the bubbles grow large and thick. |
| Bitter aftertaste | Garlic scorched in the pan | Always mix garlic into the liquid ingredients before adding to the heat. |
| Chicken is tough | Overcooked breast meat | Pull the chicken when it hits 160°F; carryover cooking will reach 165°F. |
Common Mistakes Checklist
- ✓ Pat the chicken dry: Use paper towels to remove surface moisture before dredging in flour.
- ✓ Wait for the shimmer: Don't add chicken until the oil is shimmering and moves like water.
- ✓ Avoid the "crowd": Give each piece of chicken its own space to breathe and sear.
- ✓ Low sodium only: Regular soy sauce combined with honey reduction can become salt overload.
- ✓ The "Cold Start" Ginger: Grate ginger into the sauce bowl, not the hot pan.
Customizing the Heat and Protein for Variety
If you want to scale this recipe down for a solo lunch, just cut everything in half, but use a smaller 8 inch skillet so the sauce doesn't evaporate too quickly. To double it for a crowd, use two separate pans.
If you try to double the recipe in one 12 inch skillet, the chicken will pile up and steam, and you'll lose that crispy texture we worked so hard for. Stick to the 1.5 lb limit per pan for the best results.
For Honey Garlic Chicken Thighs
Swap the breast for boneless, skinless thighs. Increase the sear time by 2 minutes per side. Thighs are much more forgiving and stay juicy even if the sauce takes a little longer to reduce.
For a Slow Cooker Honey Garlic Chicken Variation
If you have all day, place whole chicken breasts in the crockpot with the sauce (skip the flour). Cook on low for 4 hours. Remove the chicken, shred it, and simmer the sauce in a saucepan with a cornstarch slurry to thicken it before tossing it back together.
gluten-free Adaptation
This is an easy one. Use cornstarch instead of flour for the dredge and substitute the soy sauce for Tamari or liquid aminos. The texture with cornstarch is actually even crispier it's a "pro move" even if you aren't avoiding gluten.
Debunking the "Sear to Seal" Myth
One of the biggest myths in cooking is that searing "seals in the juices." Science tells us that's simply not true moisture is lost during searing regardless. What we are actually doing is creating the Maillard reaction, which is the chemical dance between amino acids and reducing sugars.
This gives us the brown, savory crust that provides the flavor base for the whole dish. The sear is for taste and texture, not for moisture "sealing."
Another myth is that you must use fresh honey for the best flavor. While raw honey is great, the high heat of the skillet will neutralize many of its unique raw properties anyway. If you have a bottle of honey that has crystallized in the back of your pantry, don't throw it out!
Just microwave it for 15 seconds to liquefy it, and it will work perfectly in this glaze. The heat of the pan will dissolve any remaining crystals instantly.
Preserving That Freshly Glazed Crunch for Later
Storage: Keep leftovers in an airtight container in the fridge for up to 4 days. Note that the chicken will lose its crispiness as it sits in the sauce, but the flavor actually deepens. It makes for a killer cold chicken salad topper the next day.
Freezing: You can freeze this for up to 2 months. However, the flour coating can become a bit mushy upon thawing. For the best results, freeze the chicken and sauce separately if you are doing prep ahead work.
Zero Waste Tip: If you have leftover sauce at the bottom of the pan, don't scrub it away! Add a splash of water or chicken broth and a handful of snap peas or broccoli. The residual honey and garlic will create a quick "glaze" for a side of veggies in seconds.
Final Touches for a Restaurant Quality Look
The difference between a "home cook" meal and something that looks like it cost $20 at a bistro is the contrast. The glaze is dark and glossy, so you need bright pops of color. I always use the white and light green parts of the green onion for a sharp bite and the dark green tops for a fresh, grassy finish.
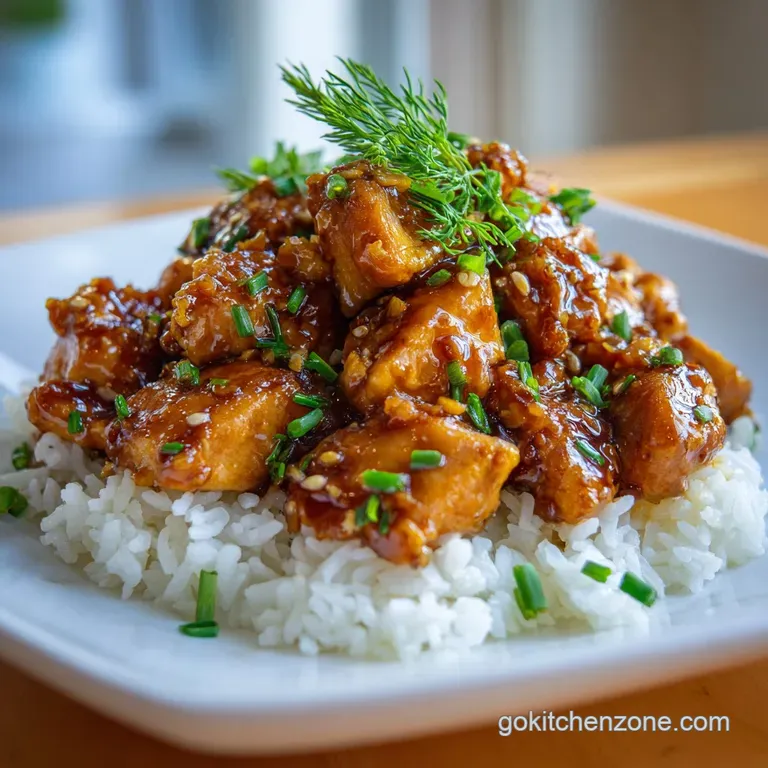
The "Takeout" Bowl
Serve this over a bed of fluffy jasmine rice or rice noodles. The rice acts as a sponge for any extra sauce that drips off the chicken. If you're feeling fancy, a quick slaw of shredded cabbage and lime juice on the side provides the crunchy, acidic contrast that makes the sweet honey glaze really sing.
Texture Contrast
If you want an extra layer of crunch, toss in some roasted cashews or peanuts at the very end. The nuttiness pairs beautifully with the ginger and honey, and it adds a "luxury" feel to what is essentially a 20 minute pantry meal.
Trust me, once you master this rhythm, you'll never look at a takeout menu the same way again.

Recipe FAQs
Can I substitute chicken thighs for the breasts in this quick recipe?
Yes, use bone-in, skinless thighs. Increase the searing time by about two minutes per side, as thighs are more forgiving and benefit from the extra time to render fat.
How to make the sauce stick properly without being watery?
Reduce the liquid rapidly over medium high heat. Wait until the sauce transitions from thin, rapid bubbles to large, slow moving "lava" bubbles before tossing the chicken in for the final minute.
Is it true that searing the chicken seals in all the moisture?
No, this is a common misconception. Searing is primarily for developing deep, savory flavor through the Maillard reaction, not for trapping juices.
How to avoid burning the minced garlic in the sticky glaze?
Whisk the garlic directly into the cold honey and soy sauce first. Adding it to the hot pan directly causes the small pieces to scorch rapidly before the sauce has a chance to thicken.
What is the best substitute for honey if I am avoiding high sugar content?
Use maple syrup as the primary substitute. It offers a very similar viscosity and sweetness profile, much like how we balance flavors in our Peanut Butter Chicken recipe.
How to achieve the same crispiness if I am making this ahead of time?
Store the sauce and chicken separately if prepping in advance. Reheat the chicken uncovered in a 400°F oven for five minutes before tossing it with the reheated glaze for a quick refresh.
What is the secret to achieving uniform, quick cooking chicken pieces?
Slice the chicken into perfect 1 inch cubes while slightly frozen. This small window of partial freezing allows for precise, uniform cutting, which ensures every piece finishes cooking simultaneously.
Honey Garlic Chicken In 22 Min

Ingredients:
Instructions:
Nutrition Facts:
| Calories | 398 kcal |
|---|---|
| Protein | 39 g |
| Fat | 12 g |
| Carbs | 32 g |
| Fiber | 1 g |
| Sugar | 24 g |
| Sodium | 670 mg |
