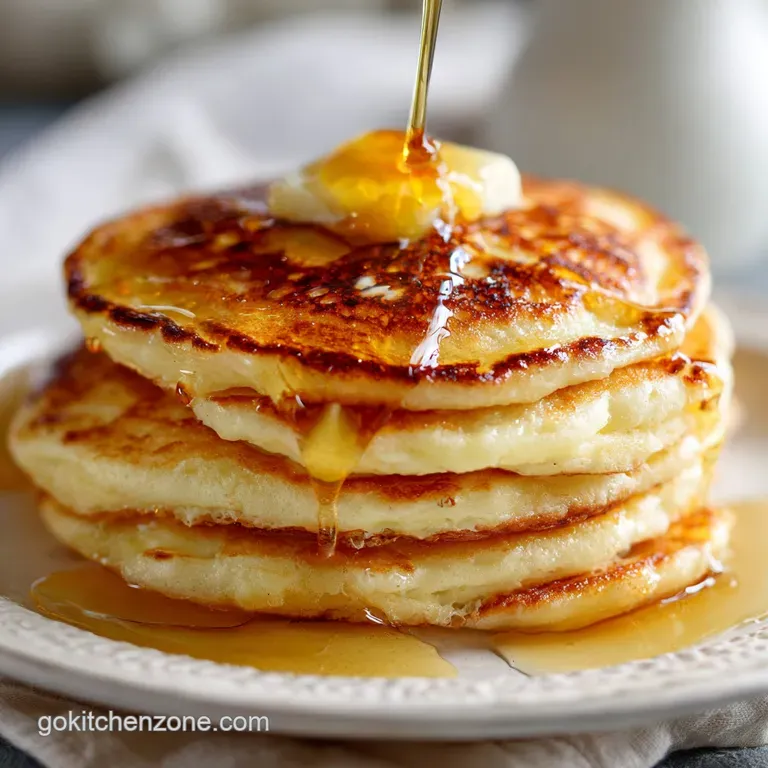
Fluffy Pancakes: Extra Tall
- Time: Active 10 minutes, Passive 15 minutes, Total 25 minutes
- Flavor/Texture Hook: Pillowy, buttery centers with a golden brown, lacy exterior
- Perfect for: Lazy Saturday mornings or a quick "breakfast for dinner" budget save
Listen, I've spent way too much money at fancy brunch spots just to get a stack of pancakes that weren't even that soft. I used to think there was some industrial secret to getting that massive lift, but honestly, I was just overthinking it.
My first few attempts at home were basically sweetened frisbees because I was treating the batter like I was trying to win a weightlifting competition.
The moment it clicked for me was when I realized that the best pancakes come from the "less is more" school of thought. I learned the hard way that a smooth batter is a dead batter. Once I embraced the lumps and figured out the chemistry of buttermilk, my kitchen started smelling like a high end bakery.
Now, I make these for about a dollar's worth of ingredients, and they beat the $18 restaurant versions every single time.
You don't need a degree in pastry arts or a bunch of expensive equipment to pull this off. We're talking basic pantry staples and a bit of patience. If you've got a bowl, a fork, and a pan that doesn't stick too badly, you're already halfway to breakfast glory.
Let's get into the stuff that actually makes these work so you can stop eating rubbery discs and start enjoying real clouds.
The Science Behind the Rise
Chemical Lift: The combination of baking soda and buttermilk creates an immediate carbon dioxide reaction that puffs the batter.
Starch Hydration: Resting the batter allows the flour's starches to absorb moisture, leading to a more uniform crumb and better structure.
Gluten Control: Minimizing agitation prevents the formation of tough protein bonds, ensuring the texture remains tender rather than bread like.
| Method | Time | Texture | Best For |
|---|---|---|---|
| Stovetop | 15 minutes | Crispy edges, soft center | Traditional breakfast vibes |
| Oven (Sheet Pan) | 20 minutes | Uniformly soft and cake like | Feeding a big crowd fast |
| Air Fryer | 12 minutes | Very crispy exterior | Single servings or snacks |
Managing your heat is the biggest hurdle for most home cooks. If the pan is too hot, the outside will scorch before the middle even thinks about setting. I always suggest the "water drop" test: flick a tiny drop of water onto the pan; if it dances and sizzles away instantly, you're in the sweet spot.
Essential Ingredient Deep Dive
| Ingredient | Science Role | Pro Secret |
|---|---|---|
| Buttermilk | Acidic tenderizer | Use full fat for the best richness and height |
| Baking Powder | Secondary leavener | Check the expiration; old powder means flat cakes |
| Melted Butter | Fat for flavor | Cool it before adding to prevent scrambling the egg |
The Dry Foundation
We start with 250g of all purpose flour because it provides just enough structure without getting too heavy. Adding 3 tbsp of granulated sugar isn't just for sweetness; it actually helps with the Maillard reaction, which is that beautiful browning on the surface.
Don't skip the 0.5 tsp of fine sea salt it cuts through the sugar and makes the butter flavor pop.
The Liquid Core
The 360ml of buttermilk is the real MVP here. Its thickness keeps the bubbles trapped in the batter longer than regular milk would. When you mix in the 1 large room temperature egg and the 60g of melted butter, you're creating an emulsion that coats the flour particles, preventing them from clumping.
Adding 1 tsp of pure vanilla extract is my favorite budget hack to make basic ingredients taste like a professional dessert.
Simple Tools for Better Cooking
You really don't need a fancy griddle to make Fluffy Pancakes, though they are nice if you're cooking for a crowd. A standard non stick skillet or a well seasoned cast iron pan works wonders.
If you're using cast iron, just remember it holds heat like crazy, so you might need to turn the burner down lower than you think as you go through the batches.
A wide, thin spatula is your best friend here. You want something that can slide under the delicate batter without squishing the air out. Also, grab a large mixing bowl bigger than you think you need. It gives you room to fold the ingredients gently, which is the secret to keeping those air pockets intact.
If you're on a budget, a simple balloon whisk is great, but even a large fork can get the job done if you're careful not to overwork things.
The Perfect Cooking Process
1. Sifting the Dry Base
Whisk the flour, sugar, baking powder, baking soda, and salt in a large bowl. Note: This aerates the flour and removes clumps without needing a formal sifter.
2. Emulsifying the Wet Ingredients
In a separate jug, beat the egg into the buttermilk, then slowly pour in the cooled melted butter and vanilla. Note: Adding butter to cold buttermilk can make it clump, so ensure the buttermilk isn't ice cold.
3. Folding for Maximum Air
Pour the wet mixture into the dry and use a spatula to fold until just combined. Note: Stop when you see no more streaks of raw flour; lumps are totally fine and necessary.
4. Resting the Batter
Let the batter sit on the counter for 10 minutes. Watch for small bubbles forming on the surface as the leavening agents start to wake up.
5. Mastering the Heat Control
Heat your pan over medium low and lightly grease with a tiny bit of butter or oil. Note: Wipe away excess fat with a paper towel so the pancakes brown evenly instead of frying.
6. Watching for Bubble Signals
Pour about 60ml of batter per pancake and cook for 2-3 minutes until the edges look set and bubbles pop without filling back in.
7. The Gentle Flip
Slide your spatula underneath and flip in one smooth motion. Cook for another 1-2 minutes until the bottom is golden and the center springs back when lightly touched.
Chef's Tip: Use a 1/4 cup measuring scoop to portion the batter. It keeps the pancakes uniform in size, which means they all cook at the same rate. No more guessing which one is done!
Fixing Common Pancake Disasters
Fixing Rubbery Texture
If your pancakes feel like chew toys, you definitely overmixed the batter. When you stir flour into liquid, you develop gluten. A little gluten gives structure, but too much makes things tough. Next time, count your stirs aim for fewer than 15 strokes.
It feels wrong to leave those lumps, but trust the process; they disappear during the cooking phase.
Preventing Burnt Outsides
This is almost always a heat management issue. Most people try to rush breakfast by cranking the stove to high. Pancakes need a steady, medium low heat to cook through to the center. If your pan is smoking, it’s way too hot. Take it off the heat for a minute to cool down before starting the next batch.
| Problem | Root Cause | Solution |
|---|---|---|
| Flat Pancakes | Expired leavening | Replace baking powder/soda every 6 months |
| Greasy Surface | Too much oil in pan | Wipe pan with a dry paper towel after greasing |
| Raw Centers | Heat is too high | Lower the flame and cook for a longer duration |
Correcting Thin Batter
If your batter spreads across the whole pan like a crepe, your measurements might be off, or your buttermilk was too thin. You can gently fold in an extra tablespoon of flour, but do it carefully. You want a batter that drops slowly from the spoon, not one that runs off like water.
Common Mistakes Checklist
- ✓ Using cold eggs (they can cause the melted butter to solidify into chunks)
- ✓ Flipping too early before the surface bubbles have stabilized
- ✓ Pressing down on the pancake with the spatula (this kills the fluffiness!)
- ✓ Using a pan that isn't preheated (the first pancake will always be sad)
- ✓ Over greasing the pan, which leads to mottled, uneven browning
Tasty Variations to Try
Mimicking the Japanese Fluffy Pancake Recipe
If you want that sky high, souffle like look, you can separate the egg white from the yolk. Whisk the white into stiff peaks and fold it into the finished batter at the very end. It adds an incredible amount of air, making them look like those famous Japanese fluffy pancakes you see on social media.
It takes a bit more effort, but for a special occasion, it's a total showstopper.
Infusing Zesty Lemon Poppyseed
For a bright, zingy twist, add the zest of one lemon and a tablespoon of poppyseeds to your dry ingredients. The acid in the lemon juice (if you add a squeeze) actually reacts even more with the baking soda, giving you an extra boost in height. It's a fresh way to change the flavor profile without spending extra money.
Swapping for a gluten-free Blend
You can absolutely make these gluten-free by using a high-quality 1:1 baking flour. I've found that gluten-free batters need a slightly longer rest about 20 minutes to prevent a gritty texture.
Since there's no gluten to worry about, you can actually mix this batter a bit more thoroughly without the risk of it becoming rubbery.
Pairing this with a solid Scrambled Eggs recipe makes it a feast. If you love sweet stuff, my Peanut Butter Pie recipe is another winner for later in the day.
Storage and Zero Waste Tips
Pancakes are actually one of the best things to meal prep on a budget. I usually make a double batch because they freeze beautifully. Let them cool completely on a wire rack first if you stack them while warm, they'll get soggy.
Once cool, place them in a single layer on a baking sheet to flash freeze for 30 minutes, then toss them into a freezer bag. They'll stay good for up to 2 months.
To reheat, skip the microwave if you want to keep that crisp edge. A toaster is actually the best tool for the job. It treats the pancake like a piece of bread, crisping the outside while warming the middle.
If you're reheating a bunch at once, throw them on a rack in a 180°C oven for about 5 minutes.
For zero waste, don't throw away that leftover buttermilk! If you don't have enough for another batch of pancakes, use it as a marinade for chicken. The acidity tenderizes the meat perfectly. You can also freeze buttermilk in ice cube trays if you know you won't use the rest of the carton before it expires.
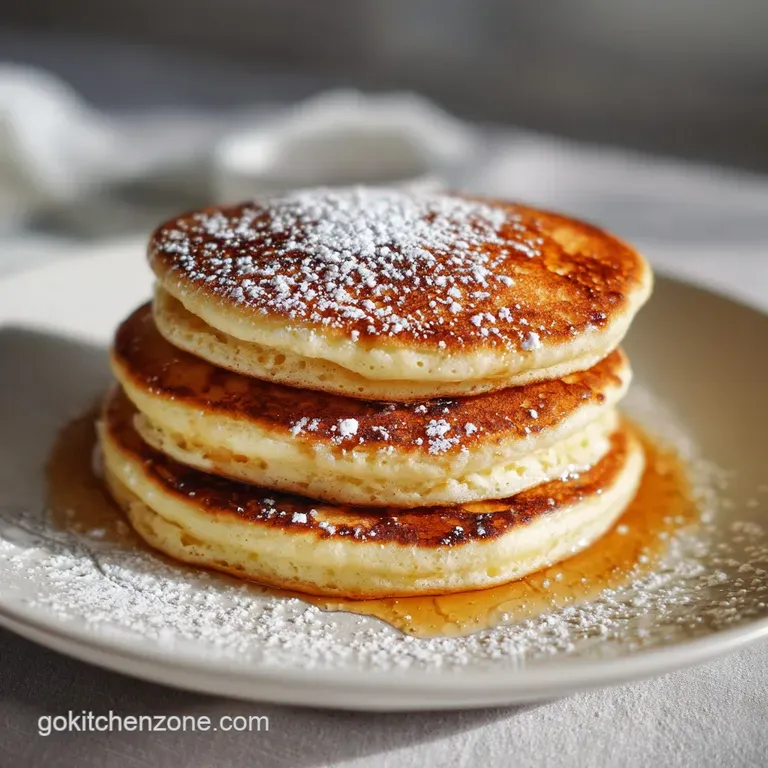
Best Serving and Pairing Ideas
While maple syrup is the classic choice, don't sleep on budget friendly toppings like peanut butter and sliced bananas. The heat from the pancake melts the peanut butter into a creamy sauce that's packed with protein to keep you full longer.
I also love making a quick berry compote by simmering frozen fruit with a splash of water and a spoonful of sugar it's way cheaper than buying high end syrups.
If you're going for a full "lumberjack" style breakfast, serve these alongside some crispy bacon or savory sausage links. The saltiness of the meat balances the sweetness of the batter perfectly.
For a lighter touch, a dollop of Greek yogurt and a sprinkle of cinnamon adds a nice tang and some extra creaminess without being overly heavy.
If you want X, do Y If you want extra crispy edges, use salted butter to grease the pan instead of oil. If you want a malted flavor, swap 2 tablespoons of flour for malted milk powder.
If you want "sheet pan" pancakes, pour the batter into a greased baking tray and bake at 200°C for 15 minutes.
One final myth to bust: you don't need to flip pancakes multiple times. In fact, you should only flip once. Every time you flip, you compress the air pockets you worked so hard to create. One flip, a couple of minutes of patience, and you'll have the fluffiest stack of your life. Trust the bubbles!

High in Sodium
845 mg mg of sodium per serving (37% of daily value)
The American Heart Association recommends limiting sodium intake to no more than 2,300mg per day for overall health.
Tips to Reduce Sodium in Your Pancakes
-
Reduce Added Salt-25%
Completely eliminate the 0.5 tsp of fine sea salt. You likely won't notice a significant difference in flavor, and it will substantially reduce sodium. Consider tasting and adding a pinch later if needed.
-
Baking Soda Adjustment-10%
Carefully measure the baking soda. Using a level teaspoon ensures you're not adding excess sodium. Too much can impart a salty taste.
-
Low Sodium Buttermilk-10%
While buttermilk naturally contains sodium, some brands add more. Check the nutrition label and opt for a lower sodium buttermilk option if available, or make your own using milk and lemon juice or vinegar.
-
Verify Unsalted Butter-5%
Double check that your butter is truly unsalted. Sometimes packaging can be misleading. Using salted butter will significantly increase the sodium content.
-
Enhance with Herbs & Spices
Experiment with sodium free flavor enhancers like cinnamon, nutmeg, or lemon zest to add depth of flavor without increasing sodium. These can help compensate for the reduced salt.
Recipe FAQs
What is the secret to fluffy pancakes?
Using both baking powder and baking soda with an acidic liquid like buttermilk. The chemical reaction between the acid and soda creates immediate carbon dioxide bubbles, maximizing lift while minimizing gluten development prevents toughness.
How to make the most perfect fluffy pancakes?
Gently fold the wet and dry ingredients until just combined, ensuring lumps remain visible. Do not overmix, as this develops tough gluten strands that prevent the interior from rising light and airy. Allow the batter to rest for 10 minutes so the starches hydrate.
What is the 321 rule for pancakes?
No, the 3-2-1 rule is not a standard baking guideline for fluffiness. This concept may refer to a specific ratio of dry/wet ingredients in niche recipes, but true fluffiness relies on proper leavening chemistry and minimizing mixing.
What do I put in my pancakes to make them fluffy?
You must use a chemical leavener combination: baking powder and baking soda. If you are separating the eggs, whipping the whites to stiff peaks and folding them in provides an extra powerful aeration boost.
Is it true that overmixing develops tough gluten, leading to flat pancakes?
Yes, this is absolutely true. Overmixing activates the proteins in the flour, leading to a rubbery texture rather than a tender crumb. If you are focused on texture control here, apply the same gentle folding principle when making a delicate Quiche Recipe Quiche to maintain custard silkiness.
How to stop my pancakes from spreading too thin on the pan?
Ensure your batter is thick enough and that your cooking surface is heated correctly. Pour the batter when the pan is medium low; if it’s too hot, the edges cook instantly before the center sets, causing a fast spread. Your batter should drop slowly from a spoon, not pour quickly.
Should I use room temperature or cold ingredients for the best rise?
Use room temperature eggs and buttermilk for the best volume. Cold ingredients lower the overall batter temperature, which can slow down the chemical reaction of the leaveners. This temporary chill prevents the initial explosive rise you need for maximum fluff.
Fluffy Pancakes From Scratch

Ingredients:
Instructions:
Nutrition Facts:
| Calories | 446 kcal |
|---|---|
| Protein | 11g |
| Fat | 17g |
| Carbs | 62g |
| Fiber | 2g |
| Sugar | 14g |
| Sodium | 845mg |
