Easy 2 Ingredient Chocolate Fudge: Creamy and Rich
- Time: Active 5 minutes, Passive 2 hours, Total 2 hours 10 minutes
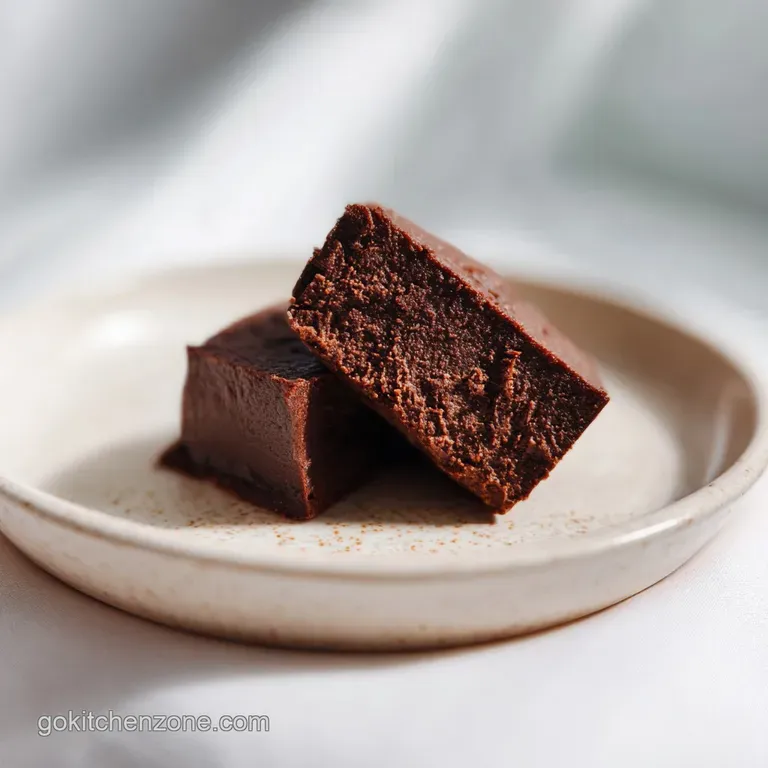
- Flavor/Texture Hook: Deeply chocolatey with a smooth, melt on-the tongue velvety finish
- Perfect for: Last minute holiday gifts, budget-friendly party platters, or satisfying a late night sugar craving
- Make This Easy 2 Ingredient Chocolate Fudge Recipe
- Why This Simple Ratio Works
- Component Analysis of Your Ingredients
- Gathering Your Cheap Pantry Essentials
- Minimal Equipment for Fast Cleanup
- Steps for a Velvety Finish
- Fixing Your Common Fudge Problems
- Budget Ways to Swap Ingredients
- Myths About Making Fudge
- How to Store Your Fudge
- Serving Tips for Great Results
- Recipe FAQs
- 📝 Recipe Card
Make This Easy 2 Ingredient Chocolate Fudge Recipe
The first time I tried making traditional fudge, I ended up with a grainy, rock hard mess that nearly broke my favorite wooden spoon. I was trying to follow a complex recipe involving candy thermometers and precise "soft ball" stages, and honestly, it was a total disaster for my budget and my patience.
That's when I discovered the magic of using sweetened condensed milk as a shortcut hack to get that perfect, silky texture without the stress.
The aroma that fills your kitchen when the semi sweet chocolate hits that thick, syrupy milk is incredible. It’s a deep, rich scent that tells you something good is happening. This isn't just a "survive the holidays" recipe; it's a legitimate staple for anyone who wants high end results on a cheap grocery budget.
You don't need fancy tools or expensive imports to make this work just two basic cans and a bit of patience while it sets.
I’ve made this in tiny apartments with barely any counter space and for huge family gatherings where I needed twenty four servings fast. It never fails to impress because the texture is so consistent.
It has that satisfying "shatter" when you first bite into a cold square, followed immediately by a velvety melt that coats your palate. Trust me, once you see how easy this is, you'll never buy the overpriced stuff from the mall again.
Why This Simple Ratio Works
Understanding the "why" helps you save money and avoid wasting ingredients. This recipe works because of the unique way condensed milk interacts with the fats in chocolate.
- Sugar Saturation: The milk is already cooked down with sugar, which prevents the chocolate from forming large, gritty crystals during the cooling process.
- Fat Emulsification: The lecithin in the chocolate chips binds with the milk solids to create a stable, glossy emulsion that stays soft enough to bite but firm enough to hold its shape.
- Moisture Control: Since condensed milk has a very low water content, there is no risk of the fudge becoming "weepy" or separating like it might with butter and sugar.
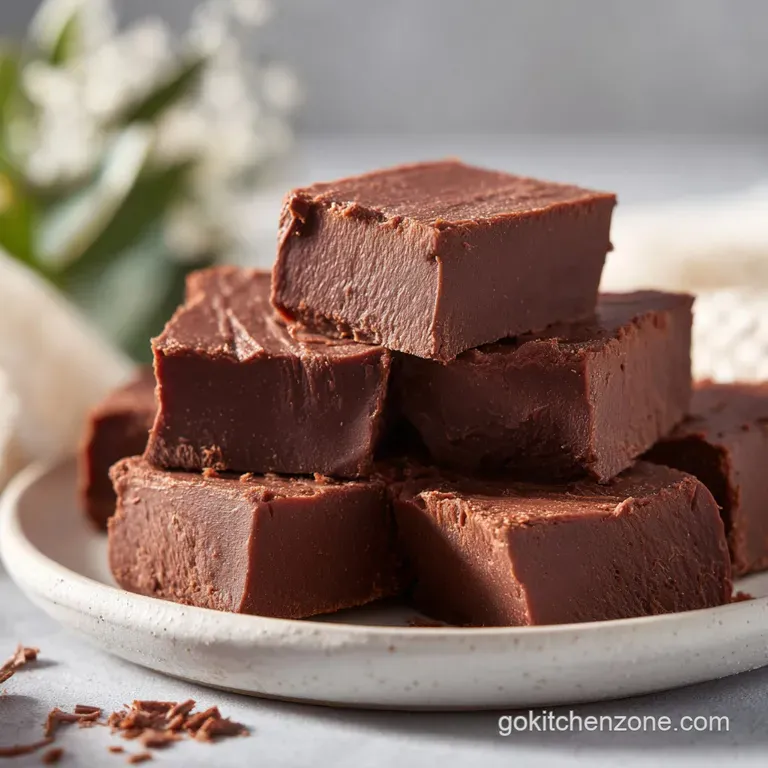
- Structural Integrity: The high cocoa butter content in semi sweet chips ensures the fudge sets firmly at room temperature, making it easy to slice into 24 clean squares.
| Method | Time | Texture | Best For |
|---|---|---|---|
| Microwave | 2-3 mins | Ultra smooth | Fast results & beginners |
| Stovetop | 5 mins | Slightly richer | Controlling heat precisely |
| Slow Cooker | 1 hrs | Very dense | Large batches or parties |
Using the stovetop gives you more control over the "hot spots" that can sometimes burn chocolate in a microwave. However, if you're in a rush, the microwave method is a total life saver as long as you use short bursts of heat.
Component Analysis of Your Ingredients
Choosing the right components is the difference between a "good" fudge and a "wow" fudge. Here is the breakdown of what actually happens inside the bowl.
| Ingredient | Science Role | Pro Secret |
|---|---|---|
| Semi sweet Chips | Provides structure | Use chips with at least 50% cocoa for a firm set. |
| Condensed Milk | Acts as the binder | Never swap for evaporated milk; it lacks the sugar density. |
| Cocoa Powder | Adds depth | Sift it first to prevent tiny bitter clumps in the mix. |
Because we are keeping costs low, store brand chips usually work just fine here. The main thing to look for on the label is "cocoa butter" if the chips use mostly vegetable oil, the fudge might feel a bit greasy.
Gathering Your Cheap Pantry Essentials
You only need a few items for this, and most are probably sitting in your cupboard right now. This is the ultimate budget hack for a luxury tasting dessert.
- 18 oz (510g) semi sweet chocolate chips: These provide the backbone. Semi sweet is best because it balances the sugar in the milk. Why this? The fat to sugar ratio in semi sweet chips creates the most stable room temp set.
- 14 oz (395g) sweetened condensed milk: This is your "liquid gold." Why this? It provides the creaminess and sweetness in one pre reduced, shelf stable package.
- 1 pinch flaky sea salt: Optional, but it cuts through the richness. Why this? Salt enhances the chocolate flavor and prevents the fudge from being cloyingly sweet.
- 1 tbsp (6g) unsweetened cocoa powder: For dusting the top. Why this? It adds a professional matte finish and a hit of extra bitterness to balance the sugar.
If you're looking for more ways to use that pantry staple peanut butter, you might want to try this Peanut Butter Fudge recipe next time you have an extra jar hanging around.
Minimal Equipment for Fast Cleanup
You don't need a kitchen full of gadgets to pull this off. In fact, fewer tools often mean a better result because there's less room for error.
- Glass Heat proof Bowl: A medium sized bowl allows enough room for vigorous stirring without splashing.
- Heavy bottomed Saucepan: If you're using the stove, a thick base prevents the milk from scorching at the bottom.
- 8x8-inch (20cm) Square Pan: This is the standard size for 24 servings. A larger pan will result in very thin "bark" rather than fudge.
- Parchment Paper: This is non negotiable for an easy release. Foil works in a pinch, but parchment is better for preventing sticking.
- Silicone Spatula: Great for scraping every last drop of the glossy mixture out of the bowl.
Chef's Tip: Freeze your butter for 10 minutes then grate a tiny bit into the mixture at the very end if you want an extra glossy sheen. It's an old trick that adds a "silk" finish to the chocolate.
Steps for a Velvety Finish
Follow these steps closely to ensure your fudge doesn't seize. The most important thing is managing the residual heat.
- Line your pan. Place parchment paper in your 8x8 pan, leaving an inch of overhang on two sides to act as handles.
- Combine the basics. Put the 18 oz of chocolate chips and the 14 oz of sweetened condensed milk into your bowl or saucepan.
- Apply gentle heat. If using a microwave, heat for 30 seconds at a time. If using the stove, keep the flame at the lowest possible setting.
- Stir vigorously. After each 30 second burst or every minute on the stove, stir the mixture. Note: This distributes the heat and prevents the bottom from burning.
- Watch for the 90% mark. Stop heating when a few small lumps of chocolate are still visible. Until you see a thick, dark lava consistency.
- Finish by hand. Remove from the heat and stir for 1-2 minutes. The residual heat will melt the remaining lumps into a glossy emulsion.
- Transfer to pan. Pour the mix into your prepared pan and smooth the top with your spatula until level.
- The "Counter Tap". Firmly tap the pan on the counter three times. Until air bubbles rise to the surface and pop.
- The Chill Phase. Refrigerate for at least 2 hours. Do not try to cut it earlier, or it will be too soft to hold its shape.
- Final Flourish. Dust with the 1 tbsp of cocoa powder or sprinkle with sea salt before lifting the parchment out and slicing.
Fixing Your Common Fudge Problems
Even the easiest recipes can go sideways if the heat is too high or the ingredients are cold. Don't panic if your mixture looks weird at first.
Why Your Fudge Is Seized
If your chocolate suddenly turns from smooth to a dry, grainy clump, it has "seized." This usually happens if a tiny drop of water gets into the bowl or if the heat was way too high. The chocolate fats separate from the solids, creating a gritty mess.
Why Your Fudge Is Too Soft
If your fudge won't firm up even after 2 hours in the fridge, you might have used too much milk or the chocolate chips had a lower cocoa butter content. It’s still edible! It just becomes a fantastic chocolate ganache for cake instead.
| Problem | Root Cause | Solution |
|---|---|---|
| Grainy Texture | Sugar crystallized | Stir in 1 tsp of warm milk to re dissolve crystals. |
| Greasy Surface | Heat was too high | Blot with a paper towel; next time, use lower heat. |
| Won't Release | No parchment used | Dip the bottom of the pan in warm water for 10 seconds. |
Common Mistakes Checklist
- ✓ Never use a wet spoon; even one drop of water can cause the chocolate to seize.
- ✓ Don't skip the "90% melted" rule; overheating is the number one cause of bitter fudge.
- ✓ Use full fat condensed milk; the low-fat versions don't have enough stability to set.
- ✓ Let the pan sit at room temp for 5 minutes before cutting to prevent the top from cracking.
- ✓ Always use a sharp, warm knife (run it under hot water and dry it) for those clean, professional edges.
Budget Ways to Swap Ingredients
If you can't find semi sweet chips or want to try something different without spending more, there are several ways to pivot.
| Original Ingredient | Substitute | Why It Works |
|---|---|---|
| Semi sweet Chips | Dark Chocolate Bar | Higher cocoa content. Note: Result will be less sweet and firmer. |
| Sea Salt | Table Salt | Same flavor enhancement. Note: Use half the amount as it's finer. |
| Cocoa Powder | Powdered Sugar | Provides a decorative finish. Note: Adds extra sweetness to the crust. |
If you enjoy this type of buttery, sweet treat, you might also like making this Chocolate Toffee Crack recipe, which uses similar pantry staples like chocolate and sugar but adds a salty crunch.
Double or Half the Batch
Scaling this recipe is straightforward because the ratios are so simple. If you want to double it, use a 9x13 inch pan and keep the salt and cocoa powder at 1.5x the original amount to avoid overpowering the chocolate.
When doubling, the cooling time will increase to about 3 or 4 hours because the mass is much larger.
If you’re just cooking for one or two, you can easily halve the recipe. Use a smaller loaf pan and start checking for firmness after just 1 hour. Because the volume is smaller, it will heat up much faster in the microwave use 15 second intervals instead of 30.
Myths About Making Fudge
There is a lot of bad advice out there that makes people think fudge is harder than it actually is. Let's clear some of that up.
"You must use a candy thermometer to get the right stage." This is only true for old-fashioned boiled fudge. With this 2 ingredient version, the sweetened condensed milk has already done the heavy lifting of stabilizing the sugar.
"Cheap chocolate chips won't set." While premium chocolate tastes better, even the most basic store brand chips contain enough stabilizers and fats to set perfectly with condensed milk. Just avoid "imitation chocolate" which uses only vegetable oils.
"You can't make fudge without butter." Butter adds a nice shine, but the milk solids in the condensed milk provide all the fat and creaminess you need for a traditional fudge mouthfeel.
How to Store Your Fudge
One of the best things about this easy 2 ingredient chocolate fudge recipe is how long it lasts. It's a "survive the week" snack for sure.
In the Fridge: Store the squares in an airtight container with layers separated by parchment paper. It will stay fresh and velvety for up to 2 weeks. The cold keeps the structure firm and the flavors concentrated.
In the Freezer: You can freeze this fudge for up to 3 months! Wrap the entire block or individual squares tightly in plastic wrap, then place them in a freezer bag. To eat, let them thaw in the fridge overnight. This is a great hack for getting your holiday baking done way ahead of time.
Zero Waste Tip: If you have "crumbs" or small uneven pieces from slicing, don't toss them. Melt them down with a splash of milk to make an incredible hot fudge sauce for ice cream, or chop them up and fold them into your next batch of brownie batter.
Serving Tips for Great Results
Presentation is everything when you're working with a budget recipe. You want it to look like it came from a boutique, not a microwave.
To get those perfectly clean squares, use the "parchment sling" to lift the whole block out of the pan. Place it on a cutting board. Heat a long, thin knife under hot running water, wipe it completely dry, and make one long, smooth slice. Clean and reheat the knife between every single cut.
This prevents the fudge from sticking to the blade and tearing the edges of the squares.
If you're serving this for a party, try placing each square into a small paper truffle liner. It makes them look much more expensive and prevents guests' fingers from getting sticky.
You can also vary the toppings while cocoa powder is classic, a tiny piece of dried fruit or a single toasted walnut pressed into the top before the fudge sets adds a nice visual contrast without adding much to the total cost.

Recipe FAQs
How to melt the chocolate chips and condensed milk correctly?
Heat in 30-second intervals in the microwave, stirring vigorously between each session. If using the stove, keep the heat at the absolute lowest setting and stir constantly until the mixture is 90% melted.
Why is it important to remove the mixture while small lumps remain?
Overheating causes the chocolate to seize or become bitter. Removing it early allows the residual heat to finish the melting process, which creates a perfectly stable emulsion; if you enjoyed this technique, see how the same principles of heat control apply to our silky brown sauce.
Is it true I should use a double boiler for this recipe?
No, this is a common misconception. You can easily use a microwave or a heavy bottomed saucepan on the lowest stove setting, as direct but gentle heat is sufficient for these ingredients.
How to prevent the top from cracking when cutting?
Let the pan sit at room temperature for 5 minutes before slicing. For the cleanest cuts, run a sharp knife under hot water and wipe it completely dry before each pass through the fudge.
Why did my chocolate seize into a grainy clump?
Water or excessive heat is the likely culprit. Even a single drop of water introduced during stirring will cause chocolate to seize, so ensure your spatula and bowl are completely dry before you begin.
How to ensure the fudge sets with the right consistency?
Use only full fat sweetened condensed milk. Lower fat versions lack the necessary sugar and protein stability to set properly, which prevents the fudge from achieving its signature velvety texture.
How to release air bubbles from the mixture before cooling?
Tap the baking pan firmly on your kitchen counter three times immediately after pouring. This simple action forces trapped air pockets to the surface, ensuring a smooth and professional finish.
Easy 2 Ingredient Chocolate Fudge
Ingredients:
Instructions:
Nutrition Facts:
| Calories | 155 calories |
|---|---|
| Protein | 2.2g |
| Fat | 7.4g |
| Carbs | 22.5g |
| Fiber | 1.1g |
| Sugar | 21.3g |
| Sodium | 23mg |
