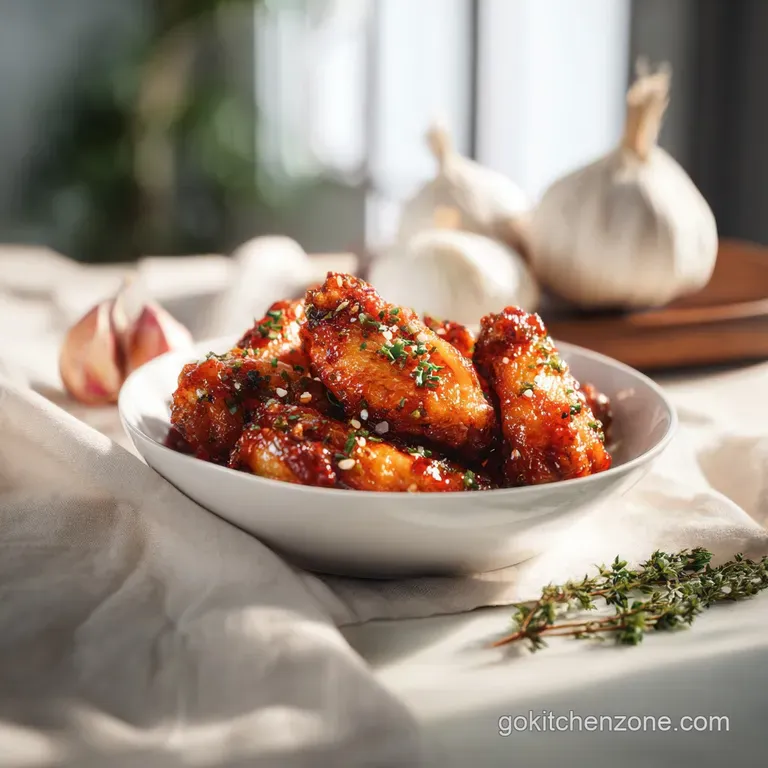
Tangy Crispy Oven Baked Honey Bbq Chicken Wings
- Time: Active 15 minutes, Passive 45 minutes, Total 60 minutes
- Flavor/Texture Hook: Shatter crisp skin with a velvety, sticky sweet glaze
- Perfect for: Stress free weeknight dinners or low effort game day snacks
- Why This Oven Method Wins
- Selecting the Best Wing Ingredients
- Choosing Tools for High Heat
- Following the Essential Cooking Steps
- Fixing Common Oven Baking Issues
- Customizing Your Favorite Wing Flavors
- Keeping Leftovers Fresh and Tasty
- Serving Suggestions for Your Party
- CRITICAL: Very High in Sodium
- Recipe FAQs
- 📝 Recipe Card
We've all been there. You pull a tray of wings out of the oven, expecting that restaurant style snap, but instead, you get something that feels more like wet cardboard. It’s the ultimate dinner struggle.
For years, I thought the only way to get a real crunch was to haul out the heavy pot, deal with three liters of bubbling oil, and end up with a kitchen that smells like a fast food joint for three days. But honestly, who has the energy for that on a Tuesday?
Discover our signature recipe for Tangy Crispy Oven Baked Honey BBQ Chicken Wings with Garlic. This method is the targeted fix for anyone who has ever suffered through a plate of flabby, under rendered chicken skin.
We aren't just "baking" them; we’re using a bit of kitchen chemistry to change the way the skin reacts to heat. It’s about working smarter, not harder, to get that mahogany finish we all crave.
The beauty of this dish is how it handles the sauce. Most home cooks toss their wings in cold sauce right at the end, which instantly kills any crispness you worked so hard to achieve. We’re doing things differently.
By simmering a garlic heavy reduction while the wings bake, we create a glaze that is thick enough to coat but concentrated enough that it doesn't soak into the skin. It stays on the surface, keeping the interior juicy and the exterior loud enough to hear from the next room.
Why This Oven Method Wins
Alkaline Surface Shift: Adding baking powder raises the pH level of the chicken skin, which breaks down the peptide bonds and allows the skin to crisp up much faster and more intensely than salt alone.
Moisture Evaporation: Starting the wings in a cold oven allows the fat to slowly render out as the temperature rises, ensuring the skin dries out completely before the high heat kicks in to brown it.
Convection Airflow: Placing the wings on a wire rack ensures that hot air circulates 360 degrees around the meat, preventing the "soggy bottom" syndrome caused by wings sitting in their own juices.
Glaze Concentration: Simmering the BBQ sauce with apple cider vinegar and honey reduces the water content, creating a syrup like consistency that bonds to the chicken rather than sliding off.
| Thickness | Internal Temp | Rest Time | Visual Cue |
|---|---|---|---|
| Standard Flat | 165°F (74°C) | 3 mins | Skin is taut and golden |
| Large Drumette | 170°F (77°C) | 5 mins | Juices run clear when pierced |
| Extra Large Wing | 175°F (80°C) | 5 mins | Bone pulls away easily from meat |
The temperature range is slightly higher than the standard 165°F because chicken wings are rich in connective tissue. Taking them up to 175°F actually makes them more tender as the collagen melts into gelatin.
Selecting the Best Wing Ingredients
| Ingredient | Science Role | Pro Secret |
|---|---|---|
| Baking Powder | Increases pH for browning | Use aluminum free to avoid a metallic aftertaste |
| Honey | Provides viscosity and sweetness | Use clover honey for a neutral, clean sweetness |
| Apple Cider Vinegar | Breaks down sugar heaviness | Adds a "bright" note that cuts through the fat |
| Garlic | Aromatics and texture | Mince it fresh; jarred garlic lacks the sharp bite |
When choosing your wings, try to find "air chilled" chicken if your budget allows. Most commercial chicken is water chilled, meaning the meat absorbs extra liquid during processing. That extra water is the enemy of a Tangy Crispy Oven Baked Honey BBQ Chicken Wing with Garlic because it creates steam in the oven.
If you can only find standard wings, just spend an extra minute with the paper towels. It makes a world of difference.
For the sauce, I always lean toward a smoky BBQ base rather than a sweet one. Since we’re adding a 1/4 cup of honey, a sweet BBQ sauce can become cloying. A smoky or vinegar forward base provides the perfect canvas for the garlic and red pepper flakes to shine. If you're feeling adventurous, this glaze technique works wonders on other proteins too; I've even used a similar profile when making my Parmesan Crusted Chicken recipe for a weird but delicious fusion night.
The Essentials List: 2 lbs chicken wings (flats and drumettes separated) 1 tbsp baking powder (must be aluminum free) Why this? It creates tiny bubbles on the skin that increase surface area for crunch. 1 tsp kosher salt 1 tsp smoked paprika 1/2 tsp black pepper 1/2 cup
smoky BBQ sauce 1/4 cup honey Why this? Provides the "stick" and the caramelized shine. 4 cloves garlic, minced 1 tbsp apple cider vinegar 1 tsp soy sauce 1/2 tsp red pepper flakes
| Original Ingredient | Substitute | Why It Works |
|---|---|---|
| Honey | Maple Syrup | Thinner consistency, but adds a woody sweetness. |
| Apple Cider Vinegar | Rice Vinegar | Slightly milder acidity but still cuts the sugar well. |
| Smoked Paprika | Chili Powder | Adds heat and color, though loses the smoky depth. |
Choosing Tools for High Heat
You don't need a professional kitchen, but a few specific items are non negotiable here. The most important is a stainless steel wire cooling rack. If you put the wings directly on a baking sheet, the side touching the metal will boil in its own rendered fat. We want that fat to drip away.
A rimmed baking sheet (half sheet pan) is necessary to catch those drippings so they don't end up on the floor of your oven.
I also recommend a small, heavy bottomed saucepan for the glaze. Because honey and BBQ sauce have high sugar content, they can scorch easily if the pan is too thin. A silicone spatula is my tool of choice for the final toss because it allows you to scrape every last drop of that velvety garlic sauce from the bowl onto the wings.
Chef's Tip: If your wire rack isn't non stick, give it a very light coating of oil before adding the wings. This prevents the skin from tearing when you try to move them later.
Following the Essential Cooking Steps
- Pat the chicken wings extremely dry with paper towels. Note: Surface moisture is the enemy of crispness.
- Toss wings in a bowl with baking powder, salt, paprika, and pepper until every wing is lightly and evenly dusted.
- Arrange wings in a single layer on the wire rack over the baking sheet. Ensure they are not touching to allow maximum airflow.
- Place the tray into a completely cold oven.
- Turn the oven to 425°F (220°C).
- Bake for 45 minutes until the skin is golden, bubbling, and firm to the touch.
- While baking, combine BBQ sauce, honey, garlic, vinegar, soy sauce, and red pepper flakes in a saucepan.
- Simmer over medium low heat for 10 minutes until the garlic smells fragrant and the sauce coats the back of a spoon.
- Remove wings from the oven and transfer immediately to a large metal bowl.
- Pour the warm glaze over the wings and toss until they are glossy and mahogany colored.
The cold oven start is a trick I learned the hard way. I used to preheat to 450°F, but the outside would burn before the fat had a chance to melt away. By letting the wings heat up with the oven, you're essentially "par cooking" them in their own fat. By the time the oven hits 425°F, the skin is already primed to turn into a cracker like crust. If you love this kind of crunchy texture, you might also enjoy the breading technique in my Jalapeno Popper Chicken for your next gathering.
Fixing Common Oven Baking Issues

Why Your Wings Aren't Crunchy
If your wings come out soft, it’s almost always a moisture issue. Either the wings weren't dried properly before coating, or you skipped the baking powder. Another culprit is overcrowding the pan.
If the wings are touching, they create a "steam pocket" between them, which prevents the skin from dehydrating and crisping.
Why Your Garlic Tastes Bitter
Garlic can go from perfect to burnt in a matter of seconds. When simmering your glaze, keep the heat low. If the sauce starts to bubble aggressively, pull it off the heat. Burnt garlic has a sharp, acrid flavor that honey cannot hide.
| Problem | Root Cause | Solution |
|---|---|---|
| Metallic Taste | Aluminum baking powder | Switch to aluminum free brands only. |
| Wings Sticking | Dirty rack or no oil | Clean rack thoroughly; apply light oil spray. |
| Sauce Sliding Off | Sauce is too thin | Simmer longer to reduce water content. |
Common Mistakes Checklist:
- ✓ Never use baking soda instead of baking powder (it tastes terrible).
- ✓ Don't skip the wire rack; air needs to move under the wings.
- ✓ Use a cold oven start to render the fat slowly.
- ✓ Pat the chicken dry until the paper towel comes away clean.
- ✓ Toss the wings while they are piping hot so the glaze sets instantly.
Customizing Your Favorite Wing Flavors
While the honey garlic BBQ combo is a classic, you can easily pivot this recipe. For a "Dry Rub" version, simply double the spices and skip the glaze entirely. If you want a more "Buffalo" vibe, swap the BBQ sauce for Frank's RedHot and keep the honey to balance the heat.
The technique remains the same the magic is all in that baking powder coating and the rack based roasting.
Scaling for a Crowd:Scaling Down (1/2 batch): Use 1 lb of wings. You can use a smaller toaster oven or a 9x9 rack. Reduce the sauce simmering time by 3 minutes as it will thicken faster. Scaling Up (2x or more): Use multiple baking sheets.
Do not try to cram 4 lbs of wings onto one rack. If you have a convection setting on your oven, use it, but rotate the pans halfway through. For the sauce, increase ingredients linearly but be careful with the red pepper flakes spiciness can build up quickly.
| Method | Time | Texture | Best For |
|---|---|---|---|
| Standard Oven | 45 mins | Very Crispy | Consistency and ease |
| Air Fryer | 25 mins | Extremely Crispy | Small batches (1 lb) |
| Deep Fry | 12 mins | Greasy/Crispy | Traditionalists |
Keeping Leftovers Fresh and Tasty
Wings are always best right out of the bowl, but life happens. If you have leftovers, store them in an airtight container in the fridge for up to 4 days. Whatever you do, do not use the microwave to reheat them. The microwave will turn that beautiful crispy skin into a gummy, rubbery mess.
Instead, put them back on a wire rack and bake at 375°F (190°C) for about 8 to 10 minutes. This will re melt the sugars in the glaze and crisp up the skin again. For long term storage, you can freeze the wings before saucing them.
They stay good for 2 months. Just bake them from frozen for an extra 15 minutes, then toss in fresh sauce.
- Wing Tips
- If you buy whole wings and cut them yourself, save the tips! Throw them in a freezer bag and use them to make a rich chicken stock later.
- Leftover Sauce
- If you have extra glaze, it’s amazing on grilled salmon or as a dipping sauce for roasted potatoes.
- Garlic Scraps
- Don't toss the garlic skins; they can be toasted and ground into a mild garlic powder or added to your stock pot.
Serving Suggestions for Your Party
There's a lot of debate about what goes with wings. Personally, I think you need something cold and crunchy to contrast the hot, sticky meat. Traditional celery and carrots are the gold standard for a reason they act as a palate cleanser.
A cold ranch or blue cheese dressing is also essential, but since our wings have that tangy garlic BBQ glaze, a lime cilantra crema also works beautifully.
- Myth 1
- "You have to deep fry for crunch." Truth: Baking powder and over high heat convection create a similar chemical reaction (dehydration and Maillard browning) without the oil bath.
- Myth 2
- "Wings should be room temp before cooking." Truth: Cold wings are actually better for this method because it gives the fat more time to render as the meat comes up to temperature slowly.
- Myth 3
- "Preheating is mandatory." Truth: For wings, a cold start is actually a secret weapon for fat rendering.
Ultimately, making a Tangy Crispy Oven Baked Honey BBQ Chicken Wing with Garlic is about patience and chemistry. Once you see those little bubbles forming on the skin in the oven, you'll know you've done it right.
No more soggy dinners, no more rubbery skin just pure, loud crunch and a sauce that you’ll be licking off your fingers for an hour. Enjoy the wing night you actually deserve!

CRITICAL: Very High in Sodium
1640 mg 1640 mg of sodium per serving (71% 71% of daily value)
The American Heart Association recommends limiting sodium intake to no more than 2,300mg per day, with an ideal limit of 1,500mg for most adults.
Tips to Reduce Sodium in Your Chicken Wings
-
Low-Sodium BBQ Sauce & Soy Sauce-20%
Swap the regular BBQ sauce for a low-sodium version and use low-sodium soy sauce. This will significantly cut down on added salt.
-
Reduce Added Salt-10%
Cut the 1 tsp of kosher salt in half, or omit it entirely. The spices and sauces will still provide plenty of flavor.
-
Boost Garlic and Spices
Increase the minced garlic and red pepper flakes, and consider adding other no-sodium herbs and spices like onion powder or a pinch of cayenne for more flavor complexity.
-
Control Honey-5%
While honey is not a direct sodium source, reducing the amount slightly can help balance the overall flavor profile, allowing for less reliance on salty components.
Recipe FAQs
Why is a cold oven start necessary for these wings?
Starting in a cold oven allows the fat in the chicken skin to render slowly as the temperature rises. This process ensures the skin crisps thoroughly before the meat finishes cooking, preventing the rubbery texture often found in standard high heat roasting.
How to achieve the perfect crispy skin without deep frying?
Pat the wings extremely dry with paper towels before tossing them with baking powder. This step is essential because surface moisture is the enemy of crunch; removing it allows the baking powder and heat to create a chemically induced, shatter crisp exterior.
Is it true that I should sauce the wings while they are still in the oven?
No, this is a common misconception. You must wait until the wings are fully baked and out of the oven before tossing them in the reduction, otherwise, the sauce will steam the skin and destroy that crisp texture you worked to achieve.
How to make the BBQ glaze stick to the wings instead of sliding off?
Simmer the sauce over medium low heat for 5-10 minutes to reduce it. Thickening the sauce into a velvety reduction ensures it coats the wings in a sticky layer that stays put rather than pooling at the bottom of the bowl.
Can I use a different cooking method for these wings?
Stick to the oven method to ensure the specific skin rendering chemistry works as intended. If you enjoy mastering these types of precise thermal reactions, you can see how we apply similar focus to texture in our crispy pizza recipe.
How to ensure the garlic flavor is bold but not burnt?
Mince your garlic finely and simmer it within the sauce reduction. Because the garlic is cooked in the liquid components rather than directly on the baking sheet, it infuses the glaze with flavor without the risk of turning bitter or burnt during the 45-minute bake time.
What is the best way to handle the wings if I am short on time?
Focus your 15 minutes of prep on ensuring the wings are completely dry and evenly coated with the baking powder mixture. While the 45-minute cook time is passive, having your wire rack and baking sheet ready beforehand ensures you can slide them into the oven without delay.
Crispy Oven Baked Honey Bbq Wings
Ingredients:
Instructions:
Nutrition Facts:
| Calories | 568 kcal |
|---|---|
| Protein | 32 g |
| Fat | 33 g |
| Carbs | 36 g |
| Fiber | 1 g |
| Sugar | 31 g |
| Sodium | 1640 mg |
