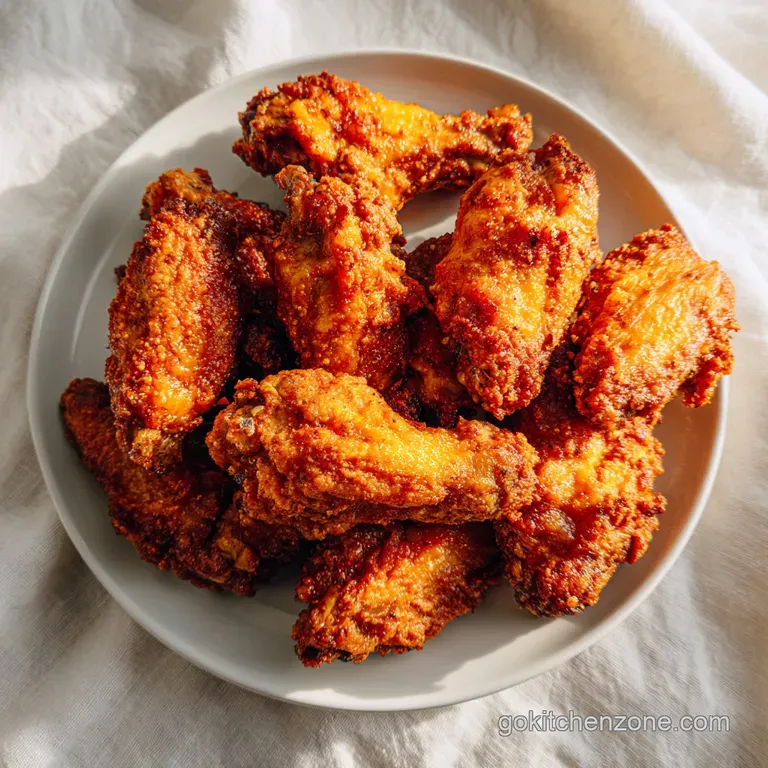
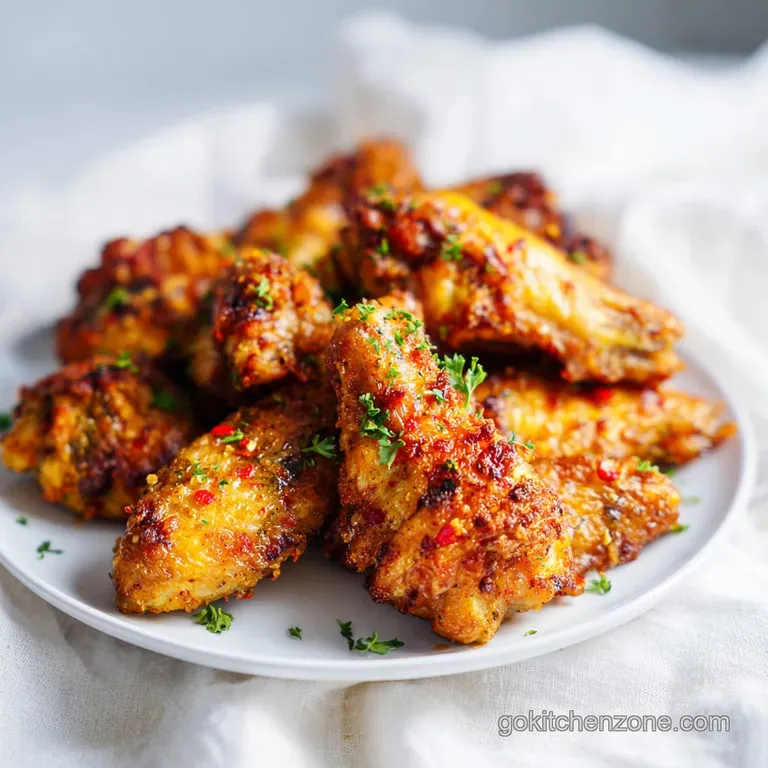
Crispy Baked Chicken Wings: Golden and Crackling
- Time: Active 15 minutes, Passive 45 minutes, Total 60 minutes
- Flavor/Texture Hook: Mahogany colored, crackling skin with a velvety, buttery buffalo finish
- Perfect for: Stress free weeknight dinners or a crowd friendly game day snack
- The Secret to Making Crispy Baked Chicken Wings 2
- Key Details for Reliable Results
- Component Analysis: What Actually Makes It Crispy
- Ingredients for These Weeknight Wings
- Tools for a Stress Free Kitchen
- Simple Steps for Perfect Results
- Solving Common Wing Cooking Struggles
- Simple Ways to Customise Flavours
- Tips for Keeping Wings Fresh
- Great Ideas for Your Wing Spread
- Myths About Oven Frying
- CRITICAL Sodium Alert
- Recipe FAQs
- 📝 Recipe Card
The Secret to Making Crispy Baked Chicken Wings 2
Forget everything you have been told about needing a vat of bubbling oil or a fancy air fryer to get that specific crunch we all crave. There is a common myth that oven baked poultry always ends up soggy or rubbery unless you blast it with heat from the start.
I used to believe that too, until I realized that the dinner struggle isn't about the heat source, but about how you manage the moisture on the surface of the skin. Most people pull their wings straight from the plastic pack and toss them in flour, but that just creates a gummy paste that never stands a chance in a standard oven.
We have all been there, standing over a tray of pale, sad looking wings, wondering where it went wrong. For me, it happened during a busy Tuesday night when I tried to rush the process by skipping the drying phase. The result was a steaming pile of meat that tasted fine but had zero "shatter" when bitten.
That failure led me to experiment with pH levels and surface tension. By using a specific combination of alkaline powders and starches, we can actually change the way the skin reacts to heat. This method ensures that every single bite delivers that satisfying snap you usually only find at high end sports bars.
This approach is specifically designed for the busy home cook who wants reliable results without the kitchen looking like a disaster zone. We are focusing on minimal tools and maximum impact. You don't need a degree in chemistry to understand that dry skin equals crispy skin.
By the time you finish this guide, you will be able to turn out a batch of wings that look mahogany colored and sound like crackling parchment paper, all while keeping your stovetop clean.
Key Details for Reliable Results
When you are trying to get dinner on the table, precision matters. I have found that guessing the temperature or "eyeballing" the crispness is the fastest way to end up with dry meat or flabby skin.
To ensure these come out exactly the same every time, we need to look at the specific checkpoints that make this method work. The transition from a cold oven to a over high heat environment is the core of this recipe, as it allows the fat to liquefy and drip away before the skin hardens into its final crust.
- Moisture Control
- Patting the wings bone dry is not a suggestion; it is a requirement. If there is visible water on the skin, the baking powder will clump and create a metallic tasting crust.
- pH Modification
- Adding baking powder raises the pH of the chicken skin. This allows the proteins to break down more effectively, resulting in a surface that is covered in tiny, crisp bubbles rather than one smooth, tough layer.
- Heat Gradation
- Starting in a cold oven sounds wrong, but it's brilliant for wings. It mimics the "rendering" phase of slow cooking while finishing with the intense heat needed for that deep golden color.
- Air Circulation
- Using a wire rack is the only way to ensure the bottom of the wing doesn't sit in a puddle of its own grease. Without air hitting the underside, you will end up with half crispy, half soggy wings.
| Comparison Factor | Fast Method (Air Fryer) | Classic Method (This Oven Recipe) |
|---|---|---|
| Total Cook Time | 25 minutes | 45 minutes |
| Capacity | 1 lb at a time | 2-4 lbs at once |
| Cleanup Level | High (Basket scrub) | Low (Foil lined tray) |
| Texture Profile | Very dry, hard crunch | Juicy meat, crackling skin |
As you can see, while an air fryer might be faster for a single serving, the oven method is the winner for anyone cooking for a family or a group. It allows you to produce a larger volume of food with much less active monitoring.
If you've ever tried to cook wings for four people in a small air fryer basket, you know the frustration of eating in shifts. This recipe solves that problem by using the full real estate of your oven.
Component Analysis: What Actually Makes It Crispy
| Ingredient | Science Role | Pro Secret |
|---|---|---|
| Baking Powder | Raises pH level | Always use aluminum free to avoid a bitter, metallic aftertaste. |
| Cornstarch | Moisture absorber | Acts as a barrier that keeps the skin from becoming chewy. |
| Kosher Salt | Protein denaturant | Draws out deep seated moisture to the surface for evaporation. |
| Cayenne Sauce | Acidic finisher | The vinegar in the sauce cuts through the rendered fat for balance. |
Ingredients for These Weeknight Wings
Getting the ingredients right is half the battle. We aren't using anything fancy here, but the quality of your dry goods will dictate the final texture. Make sure your baking powder hasn't been sitting in the back of the pantry for three years; it needs to be active to create those tiny air bubbles we are looking for.
- 2 lbs chicken wings, split: Why this? Splitting them into flats and drumettes ensures they cook evenly and are easier to eat.
- 1 tbsp aluminum free baking powder: Why this? This is the "magic" ingredient that creates the bubbly, crispy texture.
- 1 tbsp cornstarch: Why this? It adds an extra layer of crunch and helps the spices stick.
- 1 tsp kosher salt: Why this? Enhances flavor and helps with the dehydration of the skin.
- 1 tsp garlic powder: Why this? Provides a savory base that survives the high heat of the oven.
- 1/2 tsp smoked paprika: Why this? Adds a hint of color and a subtle "charred" aroma without a grill.
- 1/2 tsp black pepper: Why this? Standard seasoning to provide a bit of back end heat.
- 1/3 cup cayenne pepper sauce: Why this? The classic "Buffalo" base that gives that iconic tang.
- 4 tbsp unsalted butter, melted: Why this? Emulsifies the hot sauce into a velvety coating.
- 1 tsp Worcestershire sauce: Why this? Adds depth and umami to the final toss.
| Original Ingredient | Substitute | Why It Works |
|---|---|---|
| Cayenne Sauce | Gochujang (thinned) | Adds a fermented, sweet heat but changes the flavor to Korean style. |
| Cornstarch | Potato Starch | Very similar results; potato starch can actually feel even lighter. |
| Unsalted Butter | Ghee | Higher smoke point and richer flavor, though slightly less creamy. |
For those looking for a different profile, you might want to try a dry rub approach. If you are a fan of savory, crispy textures on other proteins, you should definitely look into how a similar coating works on my Jalapeno Popper Chicken, which uses a similar logic for achieving a crunch without deep frying.
Tools for a Stress Free Kitchen
To keep this a "minimal tools" operation, we are going to rely on a few specific items that most of us already have. If you don't have a wire rack, you can use a crumpled piece of aluminum foil to create "ridges" on your baking sheet, but a rack is truly the gold standard for this recipe.
- Rimmed Baking Sheet: Essential for catching the rendered fat so it doesn't end up on the bottom of your oven (which causes smoke).
- Wire Cooling Rack: This allows heat to hit the wings from all 360 degrees. Without it, the "down" side of the wing will just steam.
- Large Mixing Bowl: You need plenty of space to toss the wings vigorously. If the bowl is too small, the coating won't be even.
- Paper Towels: You will use more than you think. Getting the moisture off is the most important part of the prep.
- Whisk: For ensuring the baking powder and cornstarch are perfectly integrated before they hit the chicken.
Simple Steps for Perfect Results
- Use paper towels to pat the chicken wings bone dry. Note: Spend extra time on this; the drier the skin is before the coating hits, the faster the fat will render.
- In a large bowl, whisk together the baking powder, cornstarch, salt, garlic powder, paprika, and pepper.
- Add the wings to the bowl and toss vigorously until the coating is microscopic and translucent. Note: You shouldn't see thick clumps of powder; it should look like a fine dust.
- Arrange the wings on a wire rack set over a rimmed baking sheet, skin side up, leaving space between each piece.
- Place the baking sheet in a cold oven and set the temperature to 425°F (220°C).
- Bake for 45 minutes until the skin is mahogany colored and crackling.
- While the wings bake, whisk together the melted butter, hot sauce, and Worcestershire sauce in a clean bowl.
- Remove the hot wings from the oven and toss them immediately in the sauce bowl.
- Serve right away while the skin is at its maximum "shatter" point.
Solving Common Wing Cooking Struggles
Even with a simple recipe, things can happen. The most common issue I hear about is the "metallic" taste. This almost always comes from using baking powder that contains aluminum. When heated, the aluminum reacts with the chicken's proteins and creates a bitter flavor.
Always check the label of your baking powder tin before you start.
Another struggle is the wings sticking to the rack. If you find your wings are tearing when you try to move them, it usually means the skin hasn't fully crisped yet. A fully crisped wing will release itself from the metal rack with very little resistance.
If they are stuck, give them another 5 minutes in the heat.
Why Your Wings Aren't Crunching
If your wings come out chewy rather than crispy, it is usually a moisture issue. Perhaps the wings weren't patted dry enough, or the oven wasn't reaching the true 425°F (220°C). Check your oven with an external thermometer if this happens consistently.
Also, make sure you aren't overcrowding the pan; if the wings are touching, they will trap steam between them, and steam is the enemy of the crunch.
| Problem | Root Cause | Solution |
|---|---|---|
| Bitter Aftertaste | Aluminum in baking powder | Switch to "Aluminum Free" brands only. |
| Soggy Bottoms | No air circulation | Use a wire rack to lift wings off the tray. |
| Skin is Leathery | Fat didn't render | Start in a cold oven to give fat time to melt. |
Common Mistakes Checklist
- ✓ Skipping the paper towel dry down (leads to steaming instead of frying)
- ✓ Using baking soda instead of baking powder (they are not interchangeable and will ruin the taste)
- ✓ Forgetting to line the baking sheet with foil (makes cleanup a nightmare)
- ✓ Crowding the wings too close together (creates steam pockets)
- ✓ Tossing in sauce too early (the sauce will soften the skin if they sit too long)
Simple Ways to Customise Flavours
While the classic cayenne butter toss is a staple, this base recipe is a blank canvas. Because the skin is so crispy, it can handle almost any type of glaze or dry seasoning you throw at it.
If you want a "Dry Rub" version, simply double the garlic powder and paprika, and add a teaspoon of onion powder and dried oregano to the initial coating mix. Skip the sauce at the end, and you'll have wings that stay crispy for hours.
For a sweet and spicy twist, try mixing honey and Sriracha instead of the cayenne sauce. The sugars in the honey will glaze onto the hot skin and create a sticky, crackling finish. Just be sure to toss them right before serving, as the sugar can eventually soften the crust. If you’re looking for a meal that feels a bit more "complete" for a weeknight, these wings pair exceptionally well with a side of Smothered Chicken gravy if you're doing a big comfort food spread, though usually, a simple salad or celery sticks are all you need.
- If you want a Keto version: This recipe is already very low carb, but you can replace the cornstarch with extra baking powder or a pinch of xanthan gum for even fewer carbs.
- If you want more heat: Add a half teaspoon of cayenne pepper directly into the dry coating mix before baking.
- If you want a Garlic Parmesan finish: Skip the hot sauce. Melt the butter with three cloves of minced garlic, then toss the wings in the butter followed by a half cup of freshly grated Parmesan cheese.
Tips for Keeping Wings Fresh
Leftover wings are a rarity in my house, but they do happen. The biggest mistake people make is putting them in the microwave the next day. This turns the once shatteringly crispy skin into something resembling a wet sponge. It is honestly better to eat them cold than to microwave them.
- Storage
- Keep leftovers in an airtight container in the fridge for up to 4 days.
- Freezing
- You can freeze the cooked wings for up to 2 months. To do this, freeze them in a single layer on a tray first so they don't stick together, then transfer to a freezer bag.
- Reheating
- To get the crunch back, put the wings on a wire rack in a 400°F (200°C) oven for about 8-10 minutes. This will re render the fat and crisp the skin right back up.
For a zero waste approach, don't throw away the wing tips if you bought whole wings and trimmed them yourself. Toss those tips into a bag in the freezer. When you have enough, they make an incredible base for a rich chicken stock because they are packed with collagen.
Great Ideas for Your Wing Spread
When I serve these, I like to keep the tools to a minimum on the table too. A big bowl for the discarded bones and plenty of napkins are essential. If you are serving these for a crowd, consider doing a "sauce bar." Keep the wings plain and crispy on a warm platter and have three or four different sauces on the side so people can dip as they go.
This keeps the wings from getting soggy if they sit out during a game.
- The Classic Game Day Spread
- Serve these alongside carrot sticks, celery, and a heavy duty blue cheese dressing. The cool crunch of the vegetables is the perfect reset for your palate after the spicy, buttery wings.
- The Fusion Twist
- Serve the wings with a side of steamed jasmine rice and some pickled cucumbers. The acidity of the pickles mimics the role of the vinegar in the buffalo sauce and keeps the meal feeling light.
- The "One Pan" Dinner
- While the wings are in the oven, you can actually roast some broccoli or asparagus on a separate tray. Since the oven is already at 425°F (220°C), most green vegetables will char beautifully in about 15-20 minutes, finishing right as you are ready to toss the wings.
Myths About Oven Frying
"You have to deep fry for a real crunch." This is the biggest lie in the kitchen. Crunch is about the removal of water and the structure of the surface. By using baking powder, we create more surface area (the tiny bubbles), which creates more "crunch points" for your teeth.
It is actually more scientific than just dropping meat into oil.
"Searing meat seals in the juices." I hear this one all the time, but it's just not true. Searing creates flavor through browning, but it doesn't create a waterproof barrier. In this wing recipe, we aren't trying to "seal" anything; we are trying to let the moisture escape so the skin can dehydrate and become brittle.
That's why the cold oven start is so effective it doesn't "shock" the meat into tightening up and trapping water; it lets everything happen gradually.

CRITICAL Sodium Alert
2180 mg 2180 mg (95% 95% of daily value)
The American Heart Association recommends a limit of no more than 2,300 mg of sodium per day, ideally moving toward a lower limit of 1,500 mg per day for most adults.
Tips to Reduce Sodium in Your Chicken Wings
-
Eliminate Added Salt-25%
The recipe calls for 1 tsp of kosher salt, which is a significant source of sodium. Omitting this entirely will make a substantial difference.
-
Boost Flavor with Herbs and Spices
Instead of relying on salt, use a generous amount of fresh or dried herbs like garlic powder, onion powder, paprika, black pepper, rosemary, or thyme to add flavor and depth.
-
Rinse Chicken Wings-5%
While not a primary source, rinsing the chicken wings under cold water before cooking can help remove some surface sodium, especially if they have been pre-brined or treated.
Recipe FAQs
Is it true I should preheat my oven to 425°F before adding the wings?
No, this is a common misconception. You must place the baking sheet in a cold oven and set the temperature to 425°F to ensure the fat renders slowly, which creates that signature crispy texture.
How to ensure the chicken skin gets extra crispy?
Pat the wings bone dry with paper towels before seasoning. Drier skin allows the baking powder and cornstarch mixture to adhere better and helps the fat render effectively during the 45-minute bake time.
Can I reheat these wings in the microwave?
No, avoid the microwave at all costs. Microwaving turns the shatteringly crispy skin into a soggy, wet sponge; it is much better to eat them cold or reheat them in a standard oven.
How to properly arrange wings for maximum airflow?
Place them on a wire rack set over a rimmed baking sheet with space between each piece. This positioning allows hot air to circulate 360 degrees around the wings, ensuring even browning and a crackling finish.
How to store leftovers for the best results?
Keep them in an airtight container in the refrigerator for up to 4 days. If you need to store them longer, freeze them in a single layer on a tray first before transferring them to a freezer bag for up to 2 months.
Is the coating supposed to look thick and heavy?
No, the coating should be microscopic and translucent. If you enjoyed learning how to balance these dry ingredients for the perfect crust, see how we use similar pan-fried chicken techniques to create a light, crispy exterior.
How to tell when the wings are finished cooking?
Look for skin that is mahogany colored and crackling. The 45-minute bake time at 425°F typically results in the desired golden brown, crispy texture required for the sauce to cling properly.
Crispy Baked Chicken Wings

Ingredients:
Instructions:
Nutrition Facts:
| Calories | 482 kcal |
|---|---|
| Protein | 39.8 g |
| Fat | 33.1 g |
| Carbs | 3.5 g |
| Fiber | 0.4 g |
| Sugar | 0.6 g |
| Sodium | 2180 mg |
