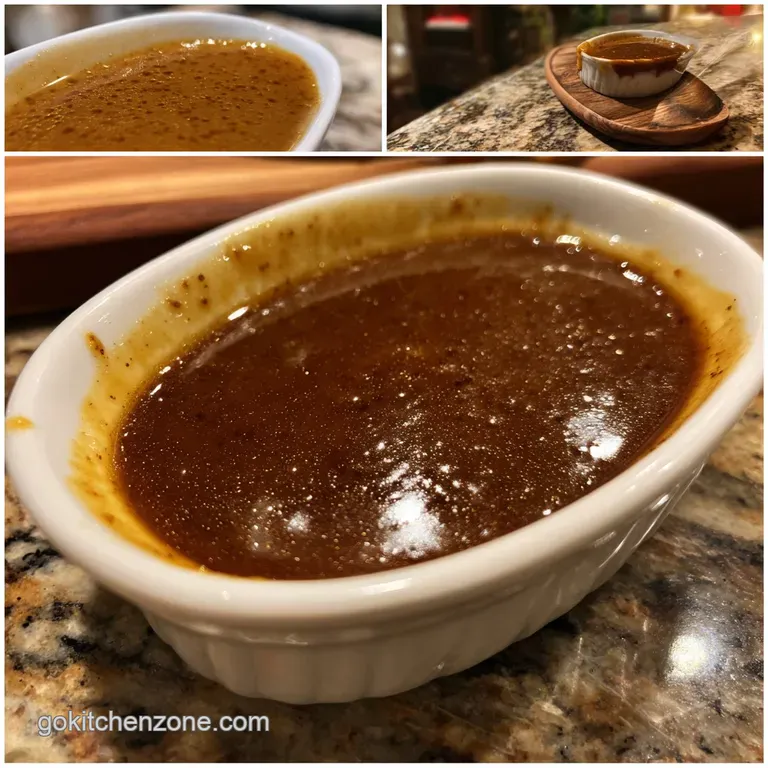
Brown Gravy Recipe: Savory and Silky
- Time: Active 10 minutes, Passive 5 minutes, Total 15 minutes
- Flavor/Texture Hook: Savory, silky, and deeply umami
- Perfect for: Quick weeknight dinners, mashed potatoes, or poutine
- Make a Savory Brown Gravy Recipe from Scratch
- Understanding the Mechanics of a Silk Smooth Sauce
- Ingredient Deep Dive for Flavor
- Pantry Staples for Homemade Success
- Tools for Success Without Kitchen Clutter
- Step by Step Guide to a Flawless Finish
- Solving Common Lumps and Texture Issues Instantly
- Customizing Your Sauce for Different Family Meals
- Debunking Kitchen Myths
- Keeping Your Leftovers Fresh and Perfectly Silky
- What to Serve with Savory Comfort Food
- Brown Gravy Recipe FAQs
- 📝 Recipe Card
Make a Savory Brown Gravy Recipe from Scratch
We've all been there. You've got the meatballs or the mashed potatoes ready, but the plate looks a bit dry and sad. You reach for a packet of mix, only to find it's mostly salt and cornstarch.
I used to think a good brown gravy recipe required roasting a whole bird or a massive beef joint just to get those precious drippings. Honestly, don't even bother waiting for a Sunday roast to enjoy a decent sauce.
This version is my absolute lifesaver because it uses butter and store-bought broth but tastes like it spent hours simmering on the back of a stove. It's about building layers of flavor in under 15 minutes. We are skipping the artificial thickeners and sticking to the basics that actually work.
Right then, let's get into how we make this happen. You'll find that once you get the whisking rhythm down, you'll never go back to the store-bought jars. It's brilliant because it's consistent, reliable, and uses things you already have in the cupboard. If you are looking for more holiday inspiration, this pairs beautifully with a Christmas Dinner Sides recipe to round out a big family meal.
Understanding the Mechanics of a Silk Smooth Sauce
The magic of a great sauce isn't luck, it's chemistry. When we cook this brown gravy recipe, we are focused on two main events: the Maillard reaction and starch gelatinization.
- Maillard Reaction: Toasting the flour in butter creates new flavor compounds and gives the gravy its deep, tawny color.
- Starch Gelatinization: Flour granules swell and burst when heated with liquid, creating a thick, stable network that coats a spoon.
- Emulsification: The whisking action suspends fat droplets within the broth, ensuring the sauce doesn't feel greasy on the tongue.
Before we move into the ingredients, it is helpful to decide how you want to finish your sauce. While we usually stick to the stovetop for speed, some people prefer the "set it and forget it" nature of an oven for larger batches.
| Method | Time | Texture | Best For |
|---|---|---|---|
| Stovetop | 10 minutes | Velvety and precise | Quick weeknight meals and small batches |
| Oven | 25 minutes | Thick and crusty edges | Large holiday gatherings or potlucks |
Choosing the right method depends on your kitchen flow. If you're already using the burners for steak or browning sausages, the stovetop is your best friend. However, if you're making a massive amount of poutine for a crowd, doing a bulk bake can save your arms from a lot of whisking.
Ingredient Deep Dive for Flavor
Every component in this brown gravy recipe has a specific job to do. We aren't just adding things for the sake of it; we are building a foundation of flavor that stands up to heavy meats and potatoes.
| Ingredient | Science Role | Pro Secret |
|---|---|---|
| Unsalted Butter | Fat base & flavor | Brown it slightly before adding flour for a nuttier profile |
| All Purpose Flour | Primary thickener | Cook it until it smells like toasted bread to remove raw taste |
| Beef Broth | Liquid & umami | Use low sodium so you can control the final saltiness yourself |
When you're selecting your broth, look for the darkest one available. The color of your liquid directly impacts the visual appeal of the final sauce. If your broth is pale, your gravy will be pale.
Pantry Staples for Homemade Success
To get this on the table, you'll need the following quantities. I've tested these ratios dozens of times to make sure it's thick enough to cling to a fry but thin enough to pour.
- 1/4 cup unsalted butter: This is our fat source. Why this? Using unsalted allows you to control the seasoning precisely without surprises.
- 1/4 cup all purpose flour: Our structural backbone. Why this? It provides a more stable, opaque thickness than cornstarch.
- 2 cups low sodium beef broth: The flavor base. Why this? Beef provides the deepest color and most traditional "brown" flavor.
- 1 tsp Worcestershire sauce: An umami bomb. Why this? Adds fermented depth and acidity to cut through the fat.
- 1/2 tsp onion powder: For savory background notes.
- 1/4 tsp black pepper: Use freshly cracked if you can; it makes a difference.
- 1/4 tsp salt: Adjust this at the very end.
| Original Ingredient | Substitute | Why It Works |
|---|---|---|
| Unsalted Butter | Beef Drippings | Traditional flavor. Note: Adds heavy meat notes and extra salt. |
| All Purpose Flour | Cornstarch (2 tbsp) | gluten-free option. Note: Result is more translucent and "glossy". |
| Beef Broth | Vegetable Broth | Makes it a brown gravy recipe vegetarian. Note: Lighter flavor; add soy sauce for color. |
| Worcestershire Sauce | Soy Sauce | Provides similar salt and dark color. Note: Lighter on the tang, heavier on salt. |
The beauty of this list is that most of it is probably in your pantry right now. If you're out of beef broth, a mushroom broth works wonders for a vegetarian twist that still feels incredibly meaty.
Tools for Success Without Kitchen Clutter
You don't need a high end kitchen to pull this off, but two specific tools will make your life much easier. I've made the mistake of using a fork to whisk gravy before, and trust me, it’s a one way ticket to Lump City.
- Heavy bottomed saucepan: Think stainless steel or cast iron. Thinner pans have "hot spots" that will burn your flour before it has a chance to brown properly.
- Silicone or wire whisk: A whisk is non negotiable. It breaks up flour clumps and keeps the liquid moving so it doesn't scorch on the bottom.
- Measuring cups: Since this is a ratio based recipe, being exact with your 1/4 cup measurements ensures it sets up correctly.
If you are doubling the recipe for a big group, make sure your saucepan is large enough. A crowded pan makes it harder to whisk vigorously, which is how we get that velvety finish we're after.
step-by-step Guide to a Flawless Finish

Let's crack on. The secret is in the first three minutes. If you rush the roux, you'll taste raw flour. If you take it too far, it will turn bitter.
- Melt the butter. Place 1/4 cup unsalted butter in your saucepan over medium heat. Note: Wait for the foaming to subside before moving to the next step.
- Create the roux. Sprinkle in 1/4 cup all purpose flour. Whisk constantly for about 2 minutes until it smells like toasted biscuits and turns light brown.
- Slow pour the broth. Add the 2 cups beef broth in a very slow, steady stream. Whisk vigorously with your other hand. Note: The mixture will seize up at first; this is normal.
- Incorporate aromatics. Stir in 1/2 tsp onion powder and 1/4 tsp black pepper.
- Add the umami. Pour in 1 tsp Worcestershire sauce. Watch as the color deepens instantly.
- Simmer and thicken. Bring the mixture to a gentle bubble. Reduce heat to low and simmer for 3-5 minutes until the sauce coats the back of a spoon.
- Final seasoning. Taste the gravy. Add the 1/4 tsp salt now if needed. Note: Broths vary in saltiness, so always taste first.
- Strain (Optional). If you see any tiny lumps, pour the gravy through a fine mesh sieve into a serving boat.
- Rest. Let it sit for 2 minutes before serving. It will thicken slightly as it cools.
Chef's Tip: For a "dark" gravy without using drippings, add 1/2 teaspoon of instant espresso powder or a dash of kitchen bouquet. It deepens the color and adds a sophisticated bitter note that mimics roasted meat.
This sauce is the perfect topping for a Clean Eating Chicken recipe if you want to skip the stir fry sauce and go for something more like a "smothered chicken" vibe. Just keep the heat medium low to prevent the butter from burning.
Solving Common Lumps and Texture Issues Instantly
Even the best cooks have a "gravy fail" now and then. Usually, it's a temperature issue or a timing problem. If your sauce looks like it's separating or feels like library paste, don't throw it out yet.
The Lumpy Disaster
This usually happens when you add the cold liquid too fast to the hot roux. The flour clumps together before it can distribute. To fix this, you can use an immersion blender right in the pot, or just pour the whole thing through a strainer.
In the future, add the broth one splash at a time until a paste forms, then add the rest.
The "Too Pale" Problem
If your gravy looks like beige wallpaper paste, you didn't cook the roux long enough. You can't really fix this once the broth is in without muddying the flavor, but you can add a teaspoon of soy sauce or browning liquid to darken the appearance.
The Thin and Watery Result
If it hasn't thickened after 5 minutes of simmering, the ratio was likely off. You can fix this by mixing 1 teaspoon of cornstarch with 1 teaspoon of cold water (a slurry) and whisking it into the simmering gravy. It will clear up and thicken in about 30 seconds.
| Problem | Root Cause | Solution |
|---|---|---|
| Grainy texture | Flour wasn't cooked in fat long enough | Simmer for an extra 3 minutes to soften the starch |
| Too salty | Broth was too concentrated | Add a splash of water or a pinch of sugar to balance |
| Skin on top | Exposure to air while cooling | Press plastic wrap directly onto the surface of the sauce |
Common Mistakes Checklist
- ✓ Never add flour directly to hot broth (it will clump instantly).
- ✓ Use a whisk, not a spoon, to ensure total emulsification.
- ✓ Don't walk away from the roux; it can burn in 10 seconds.
- ✓ Always use low sodium broth to avoid an "oversalted" disaster.
- ✓ Let the gravy simmer for at least 3 minutes to remove the floury aftertaste.
Customizing Your Sauce for Different Family Meals
While the base recipe is solid, sometimes you need a specific "vibe." For example, if you are making a brown gravy recipe for poutine, you want it a bit thinner and punchier. If you’re doing a Sunday roast, you want it thick and rich.
- Poutine Style: Use half beef and half chicken broth. Add a dash of apple cider vinegar at the end for a sharp tang that cuts through the cheese curds.
- Mushroom Infusion: Sauté 1 cup of minced cremini mushrooms in the butter before adding the flour. This adds incredible texture and earthiness.
- Creamy Version: Stir in 2 tablespoons of heavy cream right before serving for a "Swedish meatball" style sauce.
Adjusting for Different Batch Sizes
If you need to scale down for a solo dinner, just cut everything in half. Use a smaller pan so the liquid doesn't evaporate too quickly. When scaling up for a crowd (2x or 3x), be careful with the salt. Spices and salt don't always need to be doubled exactly; start with 1.5x the salt and adjust as you go.
For large batches, you might need to simmer it for an extra 5 minutes because the larger volume of liquid takes longer to reach the gelatinization point.
If you are looking for a great way to use this sauce on a weeknight, try drizzling it over these Louisiana Voodoo Fries recipe for a salty, savory snack that feels like restaurant food.
Debunking Kitchen Myths
There is a common belief that you must have meat drippings to make a "real" gravy. That’s simply not true. While drippings add a specific fatty depth, a well made roux with high-quality butter provides plenty of richness. The flavor actually comes from the browning of the flour and the quality of your stock.
Another myth is that you should use boiling broth. Actually, using room temperature or even slightly cold broth allows you to control the incorporation process better. Adding boiling liquid to a hot roux can cause it to "splatter" and seize up too quickly, making it harder to get that velvety texture we're aiming for.
Keeping Your Leftovers Fresh and Perfectly Silky
Gravy is one of those things that actually keeps quite well, but it does change texture in the fridge. It will turn into a jelly like substance because of the starches and fats. Don't panic; this is normal.
Storage: Keep it in an airtight container in the fridge for up to 4 days. If you aren't going to use it by then, it freezes beautifully for up to 3 months. I like to freeze mine in silicone ice cube trays so I can pop out just a small amount for a single sandwich later.
Reheating: The best way to reheat is in a small saucepan over low heat. You will likely need to whisk in a tablespoon of water or broth to loosen it back up. Avoid high microwave heat, as it can cause the fat to separate, leaving you with a greasy mess.
Zero Waste Tip: If you have just a little bit left over, don't toss it. Stir it into a beef stew, use it as a base for a shepherd's pie, or mix it into ground beef when making meatloaf. It adds moisture and seasoning that you can't get from water alone.
What to Serve with Savory Comfort Food
This brown gravy recipe is the ultimate utility player. It obviously belongs on mashed potatoes, but it’s also the secret to making a simple Salisbury steak feel like a fancy meal. I also love using it for "open faced" hot turkey or beef sandwiches.
If you want a change from potatoes, try serving this over a Vegetarian Garlic Mushroom recipe for a deeply savory, earthy meal. The gravy seeps into the rice and creates a rich, risotto like texture that is incredibly satisfying.
Whatever you serve it with, remember that the gravy is the "glue" of the plate. It brings the starch and the protein together. Take those extra 2 minutes to brown your flour properly, and your family will think you’ve been standing over the stove all afternoon.
Trust me, it's the little tricks that make the biggest difference.

Brown Gravy Recipe FAQs
How do you make brown gravy?
Melt butter, whisk in flour to create a roux, then slowly add beef broth while whisking. Simmer until thickened, then season with Worcestershire sauce, onion powder, pepper, and salt to taste. For a richer flavor, slightly brown the butter and cook the flour until it smells like toasted biscuits.
What is the 3 2 1 rule for gravy?
This rule generally refers to a flavor enhancement ratio. While not a standard cooking term, it often implies a balance of liquid, thickening agent, and seasoning elements to achieve a well rounded taste and texture.
How to make your own gravy easy?
Melt equal parts butter and flour in a pan to form a paste (roux), then slowly whisk in broth until smooth. Cook until thickened, adding seasonings like salt, pepper, and Worcestershire sauce at the end. This method is straightforward and avoids lumps.
What is the secret ingredient for good gravy?
Worcestershire sauce is a common "secret" ingredient that adds a significant depth of umami and a slight tang. A splash of soy sauce or a pinch of instant espresso powder can also deepen the color and flavor profile, mimicking long simmered drippings.
Can I make brown gravy without meat drippings?
Yes, absolutely. A well made roux with butter and quality beef broth, enhanced with Worcestershire sauce or soy sauce, can achieve a rich brown color and savory flavor comparable to gravy made with drippings.
Why is my gravy lumpy?
Lumps typically form when liquid is added too quickly to the hot roux, causing the flour to seize. To fix this, try to vigorously whisk or blend the gravy, or strain it through a fine mesh sieve. Always add broth gradually while whisking constantly.
How do I make my gravy thicker?
Simmer the gravy longer to allow more liquid to evaporate and the starch to thicken. If it's still too thin, you can create a slurry with 1 teaspoon of cornstarch mixed with 1 teaspoon of cold water, then whisk it into the simmering gravy until it thickens.
Brown Gravy Recipe
Ingredients:
Instructions:
Nutrition Facts:
| Calories | 70 kcal |
|---|---|
| Protein | 1.1 g |
| Fat | 5.8 g |
| Carbs | 3.7 g |
| Fiber | 0.2 g |
| Sugar | 0.3 g |
| Sodium | 124 mg |
