Homemade Cinnamon Rolls: Yeast & Icing
- Time: Active 30 mins, Passive 2 hours 25 mins, Total 2 hours 25 mins
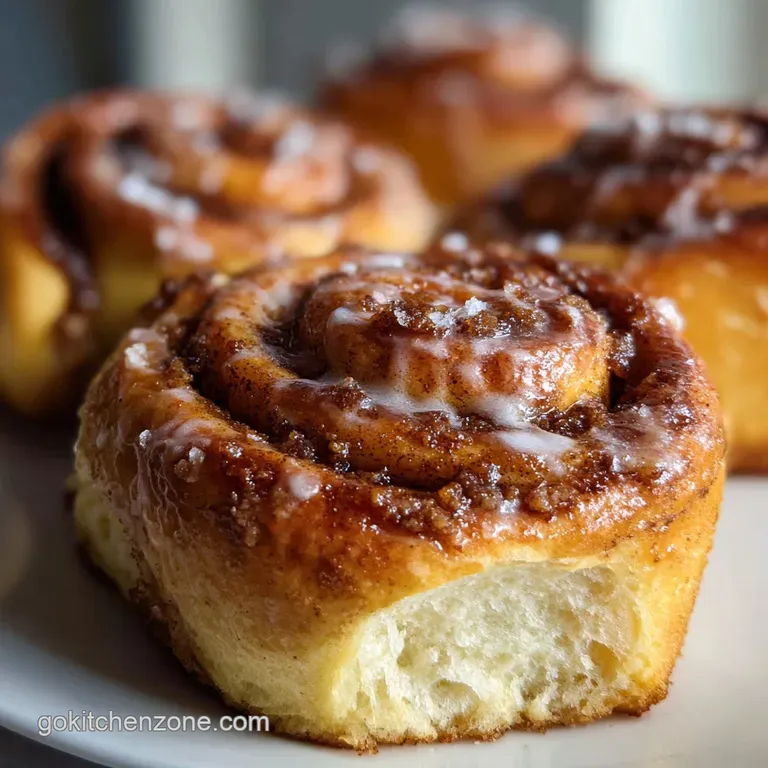
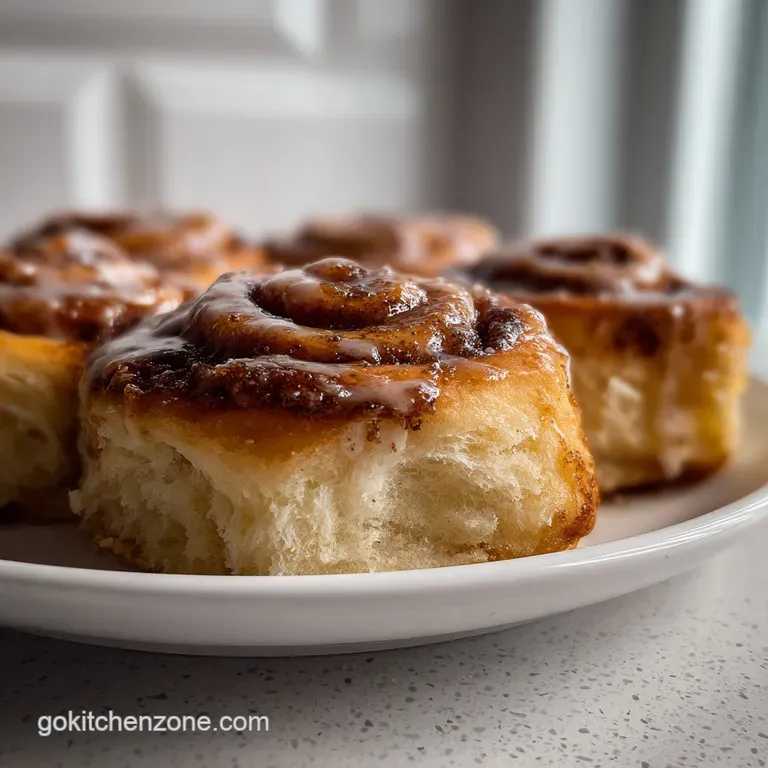
- Flavor/Texture Hook: Pillowy, buttery crumb with a gooey, caramelized cinnamon center
- Perfect for: Lazy weekend mornings, holiday brunches, or impressing friends on a budget
- Stop Overpaying for Bakery Buns with These Homemade Cinnamon Rolls
- The Science of Why it Works
- A Component Analysis of Your Pantry Staples
- Selecting Your Elements and Budget Substitutions
- Necessary Tools for Bakery Success
- Step by Step Guide to Rolling Greatness
- Solving Common Dough and Bake Issues
- Adjusting the Batch for Any Crowd
- Deciding on Your Flavor Profile
- Debunking Traditional Baking Myths
- Guidelines for Storage and Reducing Waste
- The Best Ways to Serve Your Creation
- Recipe FAQs
- 📝 Recipe Card
Stop Overpaying for Bakery Buns with These Homemade Cinnamon Rolls
You know that specific, intoxicating aroma that hits you when you walk past a mall bakery? It’s a mix of bubbling brown sugar, toasted cinnamon, and melting butter that makes your wallet feel lighter before you even see the price tag.
For years, I was convinced that achieving those giant fluffy homemade cinnamon rolls required some kind of industrial magic or a secret ingredient that cost a fortune. Honestly, I was just overthinking it.
Making homemade cinnamon rolls from scratch is one of the most satisfying ways to save money while feeling like an absolute pro in the kitchen. We’re using basic ingredients like flour, milk, and yeast to create something that people usually pay five or six dollars a pop for.
I've had my fair share of "yeast disasters" and "hockey puck buns" in the past, but those mistakes taught me exactly where you can cut corners and where you need to be precise.
If you’ve been intimidated by working with yeast or the idea of kneading dough, trust me on this it’s much simpler than it looks. We’re going to walk through the process together, using a few clever budget hacks to make sure these turn out velvety every single time.
You don't need a fancy stand mixer or expensive imported butter to make this happen. Let’s get into how we survive the morning with the best treat you've ever pulled out of your own oven.
The Science of Why it Works
Enrichment Interference: Adding fats from butter and eggs slows down gluten formation, which is why the dough feels soft and pillowy rather than chewy like a pizza crust.
Thermal Activation: Warming the milk to exactly 110°F provides the ideal environment for yeast to ferment without denaturing the proteins that give the dough its structure.
| Method | Time | Texture | Best For |
|---|---|---|---|
| Same Day Standard | 2 hours 55 mins | Light and airy | Immediate cravings |
| Overnight Chill | 10-12 hours | Complex and tangy | Stress free mornings |
| over High heat Fast Track | 1 hours 45 mins | Slightly denser | Unexpected guests |
Choosing the right approach depends entirely on your schedule, but the standard method usually yields the most consistent results for beginners. If you're looking for another way to use these flavors in a fun, pull apart format, you might want to try a Monkey Bread recipe which uses a similar caramelization technique.
A Component Analysis of Your Pantry Staples
| Ingredient | Science Role | Pro Secret |
|---|---|---|
| Bread Flour | Protein Strength | High protein content (12-14%) creates the "stretch" needed to hold those heavy layers of cinnamon sugar. |
| Active Dry Yeast | Biological Leaven | It feeds on the sugar and releases CO2, which gets trapped in the gluten to make the rolls rise. |
| Cream Cheese | Acidic Contrast | The tanginess breaks up the heavy sugar molecules in the icing, preventing it from being one dimensionally sweet. |
The magic happens when these basic components collide under the right temperature. If you find yourself enjoying the process of making dough from scratch, you'll find that this Cinnamon Rolls recipe follows a very similar logic regarding dough hydration and rise times.
Selecting Your Elements and Budget Substitutions
- 1 cup whole milk, warmed to 110°F: Why this? Provides the liquid base and fat for a tender, velvety crumb. (Sub: 2% milk with 1 tbsp of heavy cream)
- 1 packet (7g) active dry yeast: Why this? The engine that makes the dough expand and stay light. (Sub: 2.15 tsp instant yeast)
- 0.5 cup granulated sugar: Why this? Feeds the yeast and sweetens the dough slightly. (Sub: Light brown sugar for a deeper molasses note)
- 0.33 cup unsalted butter, softened: Why this? Adds richness and fat to the enriched dough structure. (Sub: Margarine or salted butter just skip the extra salt)
- 1 large egg, room temperature: Why this? Acts as a binder and adds structure to the rise. (Sub: 1/4 cup unsweetened applesauce for a budget friendly swap)
- 4.25 cups bread flour: Why this? Provides the necessary gluten for that classic bakery style chew. (Sub: All purpose flour, but reduce milk by 1 tbsp)
- 1 tsp fine sea salt: Why this? Tightens the gluten and balances the sweetness. (Sub: 1.5 tsp kosher salt)
- 0.5 cup unsalted butter, softened (filling): Why this? The glue that holds the cinnamon and sugar in place. (Sub: Coconut oil, solid state)
- 1 cup brown sugar, packed: Why this? Creates the gooey, molten center as it melts. (Sub: Granulated sugar with 1 tbsp molasses)
- 2.5 tbsp ground cinnamon: Why this? The primary flavor driver of the entire dish. (Sub: Pumpkin pie spice for a seasonal twist)
- 4 oz cream cheese, softened: Why this? Gives the icing body and a silky, velvety mouthfeel. (Sub: Greek yogurt, strained well)
- 0.25 cup unsalted butter, softened (icing): Why this? Adds shine and flavor to the final glaze. (Sub: Heavy cream, whisked until thick)
- 1.5 cups powdered sugar: Why this? Dissolves quickly for a smooth, lump free frosting. (Sub: Blend granulated sugar in a high speed blender)
- 1 tsp vanilla extract: Why this? Rounds out the flavors and adds a nostalgic aroma. (Sub: Almond extract for a nutty profile)
Necessary Tools for Bakery Success
You don't need a high end stand mixer to pull this off, though a KitchenAid certainly makes the kneading easier. If you're working by hand, a large sturdy bowl and a wooden spoon are your best friends.
To get those clean, professional looking slices, grab a roll of unflavored dental floss trust me, it works better than any knife I've ever owned.
A standard 9x13 inch baking pan is the way to go here. If you use glass, the rolls might take an extra few minutes to brown on the bottom, whereas dark metal pans will crisp them up faster.
Make sure you have a reliable kitchen thermometer too; yeast is a living thing, and if your milk is over 120°F, you'll kill it, and your rolls will stay flat and sad.
step-by-step Guide to Rolling Greatness
- Activate the yeast. Whisk 1 cup warmed milk (110°F) with a pinch of the granulated sugar and the 1 packet of yeast in a small bowl. Let it sit for 5 to 8 minutes until the surface is covered in frothy bubbles.
- Mix the wet ingredients. In a large bowl, combine the yeast mixture with the remaining 0.5 cup granulated sugar, 0.33 cup softened butter, 1 large egg, and 1 tsp sea salt. Stir until the egg is fully incorporated and the butter is broken into small bits.
- Incorporate the flour. Gradually add 4.25 cups bread flour, one cup at a time. Stir with a spoon until a shaggy, sticky dough forms and pulls away from the sides.
- Knead the dough. Turn the dough onto a floured surface and knead for 8 to 10 minutes. Note: The dough is ready when it feels soft like an earlobe and springs back when poked.
- First rise. Place the dough in a greased bowl, cover with a warm damp cloth, and let it sit for 1 hours 30 mins until it has visibly doubled in size.
- Shape the rectangle. Punch the dough down to release air and roll it out into a 12x18 inch rectangle. Spread 0.5 cup softened butter over the surface, leaving a half inch border at the top.
- Add the filling. Combine 1 cup brown sugar and 2.5 tbsp cinnamon, then sprinkle it evenly over the buttered dough. Press it down slightly until the sugar looks dampened by the butter.
- Roll and slice. Roll the dough tightly from the long edge. Slide a piece of dental floss under the log and cross it over the top to "zip" through, creating 12 even rolls.
- Second rise. Place the rolls in a greased 9x13 pan. Cover and let them rise for 45 minutes until they are crowded together and look puffy.
- Bake and ice. Bake at 350°F for 25 minutes until the tops are golden brown and the edges sizzle. While warm, whisk 4 oz cream cheese, 0.25 cup butter, 1.5 cups powdered sugar, and 1 tsp vanilla until velvety and smooth, then spread generously over the rolls.
Solving Common Dough and Bake Issues
Why Your Yeast Failed to Bubble
If your yeast didn't foam during the activation step, the milk was likely too hot or too cold. Yeast is a living organism; it thrives in a very specific window. If you're using milk straight from the fridge, it's too cold to wake it up. If it’s steaming, it’s too hot.
Why the Rolls Are Dry and Tough
This usually happens if you’ve added too much flour during the kneading process. It's tempting to keep adding flour so the dough doesn't stick to your hands, but a slightly tacky dough produces a much more velvety center.
Overbaking is the second culprit once the internal temp hits 190°F, pull them out!
| Problem | Root Cause | Solution |
|---|---|---|
| Exploding centers | Rolled too tightly | Leave a little breathing room in the spiral when rolling. |
| Leaking filling | Butter was too melted | Use softened, room temp butter, not liquid/melted butter. |
| Dense, flat rolls | Under proofed | Ensure the second rise happens in a warm, draft free spot. |
Common Mistakes Checklist
- ✓ Check your yeast expiration date before you even start.
- ✓ Use a thermometer for the milk; don't just "guess" the temp.
- ✓ Pat the brown sugar into the butter to prevent it from falling out.
- ✓ Don't skip the second rise it's what makes them fluffy, not bready.
- ✓ Apply half the icing while they are hot and the rest when they've cooled slightly.
Adjusting the Batch for Any Crowd
When you need to feed a smaller group, don't just cut the ingredients in half and hope for the best. For a half batch (6 rolls), use a 9 inch round cake pan. You'll still want to use a whole egg, but you might need to add an extra tablespoon of flour to compensate for the extra moisture.
Reduce your bake time by about 5 minutes since there's less mass in the oven.
If you're scaling up for a big brunch, it’s better to make two separate batches of dough rather than one giant one. Most home ovens and bowls can't handle a double batch of bread dough effectively, and the rise times get wonky. Work in batches to ensure every roll has that perfect, velvety texture.
Deciding on Your Flavor Profile
- If you want it "Gooey": Pour 1/4 cup of heavy cream over the rolls right before they go into the oven.
- If you want it "Crunchy": Add 1/2 cup of toasted pecans to the cinnamon sugar filling.
- If you want it "Quick": Use the overnight method to save an hour of prep on the day of serving.
Debunking Traditional Baking Myths
Many people believe that you must scald the milk (bring it to a boil and then cool it) to make good cinnamon rolls homemade. In the past, this was done to kill bacteria and break down proteins that could weaken gluten. However, with modern pasteurized milk, this step is totally unnecessary and just adds extra time.
Another myth is that you need a "proofish box" or an expensive oven setting to get the dough to rise. Honestly, your microwave is a fantastic, cheap alternative. Just boil a cup of water in the microwave, move it to the corner, and put your dough bowl inside (with the door closed and power OFF).
The residual heat and steam create the perfect tropical environment for your easy homemade cinnamon rolls to thrive.
Guidelines for Storage and Reducing Waste
Keep your leftover rolls in an airtight container at room temperature for up to 2 days. If you want them to stay fresh longer, the fridge will buy you 5 days, but you MUST reheat them. A 15 second zap in the microwave will bring back that velvety softness by melting the fats in the dough again.
If you somehow end up with stale rolls (rare, I know!), don't toss them! Chop them up and use them as the base for a decadent bread pudding or even as the most incredible French toast you've ever had.
You can also freeze unbaked rolls after the second rise; just pull them out the night before you want to bake them and let them thaw in the fridge.
The Best Ways to Serve Your Creation
These rolls are a powerhouse on their own, but they play incredibly well with salty sides. A plate of crispy bacon or some savory sausage links provides the perfect contrast to the sweet, molten cinnamon center.
If you're hosting a full breakfast spread, consider pairing these with a fresh fruit salad tossed in a little lime juice to cut through the richness of the cream cheese icing.
For a drink, a strong, dark roast coffee is the classic choice. The bitterness of the coffee balances the powdered sugar beautifully. If you're feeling fancy, a cold glass of milk or even a spicy chai latte complements the cinnamon and vanilla notes in the frosting.
No matter how you serve them, make sure they are warm there is nothing like that first bite when the icing is still slightly translucent and melting into the spirals.

Recipe FAQs
What is the secret to the best homemade cinnamon rolls?
Use bread flour and don't over flour the dough. Bread flour has a higher protein content, which creates the perfect chewy texture. Resist the urge to add too much extra flour during kneading; a slightly tacky dough results in a more tender roll.
What is the secret ingredient in Cinnabon?
There isn't one single "secret" ingredient, but a combination of factors. The closest thing to a secret is using a high protein bread flour for that signature chew, the exact right temperature for activating yeast, and a rich, creamy frosting that balances the sweetness. If you enjoyed mastering the dough handling for these rolls, see how the same principles of dough hydration apply to our French Toast Casserole: Overnight Prep & Baked.
Are cinnamon rolls hard to make from scratch?
No, they are surprisingly straightforward with a few key techniques. The biggest hurdle for beginners is often working with yeast, but as long as you use warm milk and avoid overheating, it’s quite forgiving. Kneading and proofing are simple steps that yield delicious results.
Why put heavy cream in the bottom of cinnamon rolls?
Pouring heavy cream over them before baking makes them extra gooey. The cream melts and infuses into the bottom spirals as they bake, creating a rich, moist, and decadent texture that is truly irresistible. If you enjoy the idea of gooey, caramelized flavors, you might also like our Peanut Butter Fudge: Creamy Texture.
How do I prevent my cinnamon rolls from being dry?
Don't over flour the dough and avoid overbaking. A dough that feels slightly tacky before the first rise will result in a softer roll. Bake them just until the edges are golden brown and the centers are cooked through; an internal temperature of around 190°F is ideal.
What can I do if my yeast doesn't bubble?
Your milk was likely too hot or too cold for the yeast. Yeast needs a specific temperature range (around 105-115°F) to activate. If the milk is too hot, it kills the yeast; if it's too cold, it won't wake up. Using a thermometer is the best way to ensure success.
Can I make cinnamon rolls ahead of time?
Yes, you can use the overnight method. After shaping and slicing, place the rolls in their pan, cover, and refrigerate. The cold slows down the yeast activity, allowing for a slow, flavorful rise. Bake them straight from the fridge in the morning; they might need a few extra minutes.
Homemade Cinnamon Rolls

Ingredients:
Instructions:
Nutrition Facts:
| Calories | 518 kcal |
|---|---|
| Protein | 7.4 g |
| Fat | 21.6 g |
| Carbs | 74.9 g |
| Fiber | 2.5 g |
| Sugar | 41 g |
| Sodium | 240 mg |
