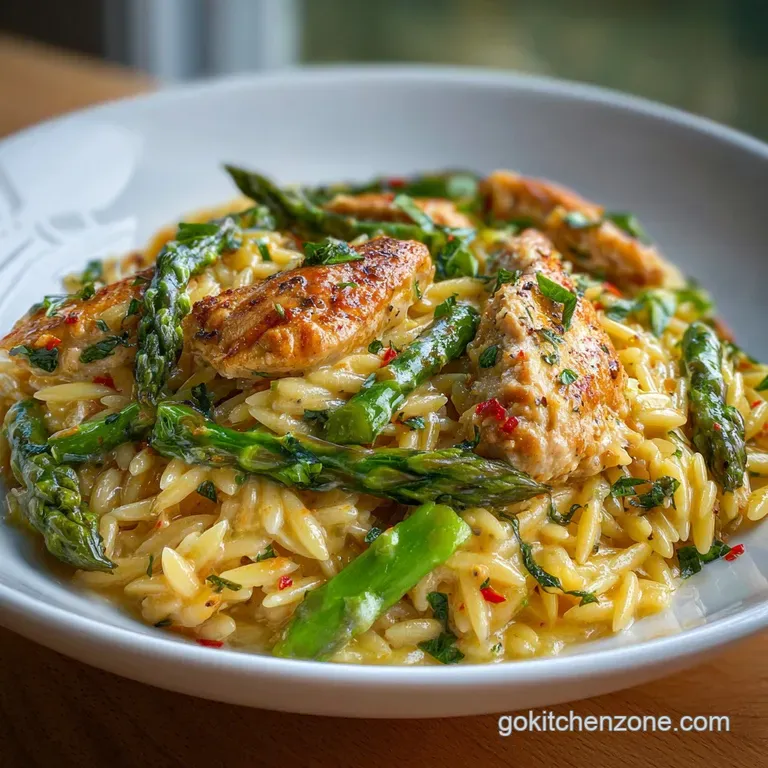
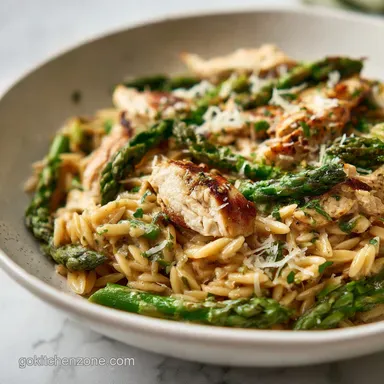
Creamy Parmesan Orzo with Chicken and Asparagus
- Time: Active 10 minutes, Passive 20 minutes, Total 30 minutes
- Flavor/Texture Hook: Silky, citrus brightened sauce with snappy asparagus and tender seared chicken.
- Perfect for: High stress weeknights, budget conscious meal prep, or beginner cooks wanting a foolproof win.
- Why You’ll Love This Orzo Recipe
- The Science of Why it Works
- Crucial Timing and Yield Specs
- Essential Ingredients and Smart Swaps
- Necessary Kitchen Tools for Success
- Step-by-Step Cooking and Timing
- Common Errors and Simple Fixes
- Troubleshooting Common Issues
- Easy Dietary and Flavor Swaps
- Best Storage and Reheating Methods
- Finishing Touches and Side Dishes
- One Pan Myths to Ignore
- Recipe FAQs
- 📝 Recipe Card
The sizzle of chicken hitting hot olive oil is the ultimate signal that the dinner struggle is finally over. We have all been there, staring into the fridge at 6:00 PM, exhausted, hoping a nutritious meal will just materialize.
This Creamy Parmesan Orzo Recipe with Chicken and Asparagus delivers a comforting and flavorful one pan meal that feels like a luxury but costs less than a few lattes.
I used to think that "creamy" meant standing over a stove for forty minutes, whisking a temperamental roux. I was wrong. By cooking everything in a single pan, we trap all those browned chicken bits and the starch from the orzo, creating a naturally thickened sauce that clings to every single grain.
It’s efficient, it’s reliable, and it actually works without the fuss of traditional pasta methods.
Right then, let's get into why this specific method is a winner. We are using the orzo almost like rice in a risotto, but without the constant arm aching stirring. You’ll get that velvety mouthfeel and bright, zesty finish that makes you forget you’re eating out of the same pan you used to cook the raw meat.
Trust me on this one; once you try the one pan orzo method, you won't go back to boiling pasta in a separate pot.
Why You’ll Love This Orzo Recipe
The beauty of this dish lies in the chemistry of the pan. Instead of draining away the pasta water which is essentially liquid gold we keep it and use it to build the body of our sauce.
This is a budget smart move because it allows us to use less heavy cream while still achieving a rich, luxurious texture.
The Starch Release Secret
When orzo cooks directly in the chicken broth, it undergoes starch gelatinization. The starch molecules swell and burst, thickening the surrounding liquid into a silky glaze. This is why the sauce feels so much thicker than just "broth and cream." It’s also the same technique I use in my Boursin Orzo with Chicken recipe to get that signature cling.
Maillard Reaction Mastery
By searing the 1 lb of chicken breasts first with smoked paprika and garlic powder, we trigger the Maillard reaction. This creates those savory, browned bits (called fond) on the bottom of the pan.
When we add the broth later, these bits dissolve, infusing the entire dish with a deep, roasted flavor that you simply can't get from boiling meat.
Precision Vegetable Timing
Asparagus is a delicate vegetable that turns to mush if you look at it wrong. By adding the bunch of trimmed asparagus only in the final five minutes of cooking, we ensure they stay bright green and snappy.
The residual steam in the pan cooks them just enough to remove the raw bite while maintaining their structural integrity.
The Science of Why it Works
Starch Gelatinization: As the orzo absorbs the 3 cups of chicken broth, it releases amylopectin starches that emulsify with the 1/2 cup of heavy cream and 1/2 cup of parmesan. This creates a stable, thickened sauce that won't separate even as it cools slightly on the plate.
Chef's Tip: Toast the dry orzo in the pan for 2 minutes before adding any liquid. This creates a "nutty" flavor profile and prevents the pasta from becoming overly gummy.
Crucial Timing and Yield Specs
Success in the kitchen often comes down to knowing exactly when to move to the next step. Here is how the timing breaks down for this specific recipe to ensure nothing is overcooked or dry.
| Milestone | Target Time | Visual/Sensory Cue |
|---|---|---|
| Chicken Sear | 5-6 minutes | Edges are opaque and bottom is golden brown |
| Orzo Toasting | 2 minutes | Pasta smells like popcorn/toasted bread |
| Simmer Phase | 8-10 minutes | Liquid is reduced by half and orzo is al dente |
| Asparagus Finish | 3-5 minutes | Stalks turn "electric green" and are tender crisp |
If you want the chicken to be extra juicy, pull the pan off the heat when the orzo is just a tiny bit too firm. The carryover heat will finish the pasta and the chicken while you stir in the 1/2 cup of parmesan cheese.
This prevents the chicken from reaching that "rubbery" stage that happens when poultry is simmered for too long.
Essential Ingredients and Smart Swaps
Building a great meal starts with understanding your components. For this dish, we are looking for a balance of fat, acid, and salt to keep the palate interested. Here is the deep dive into why these specific items are in your pan.
| Component | Science Role | Pro Secret |
|---|---|---|
| Orzo Pasta | High surface to volume ratio releases maximum starch. | Use a high-quality semolina brand for better "bite." |
| Heavy Cream | Provides fat soluble flavor carriers and velvety mouthfeel. | Don't use fat free; it will curdle with the lemon juice. |
| Parmesan | Acts as both a seasoning and a natural emulsifier for the sauce. | Grate it fresh from the block for a smoother melt. |
| Lemon Zest | Contains limonene oils that cut through the richness of the cream. | Zest only the yellow part; the white pith is bitter. |
It is worth noting that using low sodium chicken broth is non negotiable here. As the liquid reduces, the salt concentration increases. If you start with a full sodium broth, the end result will be unpleasantly salty once the orzo has soaked up all that moisture.
Quality Comparison: Fresh vs. Shortcut
Since this is a budget smart recipe, you might be tempted to swap fresh for frozen or pre prepped ingredients. Here is how those choices affect your dinner.
| Feature | Fresh Asparagus | Frozen Asparagus |
|---|---|---|
| Texture | Snappy and firm | Often soft or limp after thawing |
| Flavor | Grass sweet and earthy | Can have a "watery" or metallic finish |
| Cooking Tip | Add at the very end | Thaw and pat dry completely before adding |
Necessary Kitchen Tools for Success
You don't need a pantry full of gadgets, but a few specific tools will make this one pan process much smoother. I personally use a 12 inch heavy bottomed skillet (like a Lodge cast iron or a stainless steel All Clad). A thin pan will create hot spots that scorch the orzo before it can soften.
- 12 inch Skillet: Needs to be wide enough to spread the chicken out for a good sear.
- Microplane: For the lemon zest and the garlic. Minced garlic from a jar is a shortcut, but fresh garlic has a much punchier "bite."
- Silicone Spatula: Essential for scraping up the fond (browned bits) without scratching your pan.
- Chef's Knife: A sharp blade makes trimming that bunch of asparagus a 30 second job instead of a chore.
If your pan is too small, the chicken will steam rather than sear, and you'll miss out on all that flavor. If you find yourself in that situation, just cook the chicken in two batches. It's an extra five minutes that pays off in huge flavor dividends.
step-by-step Cooking and Timing
Let's crack on with the actual cooking. Follow these steps closely, especially the sensory cues, to get that "shatter crisp" exterior on the chicken and the silky finish on the pasta.
Phase 1: The Sear and Sauté
- Season the chicken. Toss the 1 lb chicken pieces with 1 tsp smoked paprika, 1 tsp garlic powder, 1/2 tsp sea salt, and 1/2 tsp black pepper. Note: Pre seasoning ensures the spices bloom in the oil.
- Sear the meat. Heat 2 tbsp olive oil in the skillet over medium high heat. Add chicken and cook for 5-6 minutes until golden and no longer sticking to the pan. Remove chicken and set aside.
- Aromatic base. Add the diced yellow onion to the same pan. Sauté for 3 minutes until translucent and fragrant. Add the 3 cloves of minced garlic and cook for 30 seconds.
Phase 2: Toasting and Deglazing
- Toast the orzo. Stir in the 1.5 cups dry orzo. Cook for 2 minutes, stirring constantly, until the grains look slightly golden.
- Deglaze. Pour in the 3 cups of low sodium chicken broth. Use your spatula to scrape every bit of browned flavor off the bottom of the pan.
Phase 3: The Gentle Simmer
- Initial simmer. Bring to a boil, then reduce heat to medium low. Simmer, uncovered, for about 8 minutes. Note: Stir occasionally to keep the starch from sticking.
- Add asparagus. Stir in the bunch of asparagus pieces. Continue simmering for 3-5 minutes until the orzo is tender and most liquid is absorbed.
Phase 4: The Final Assembly
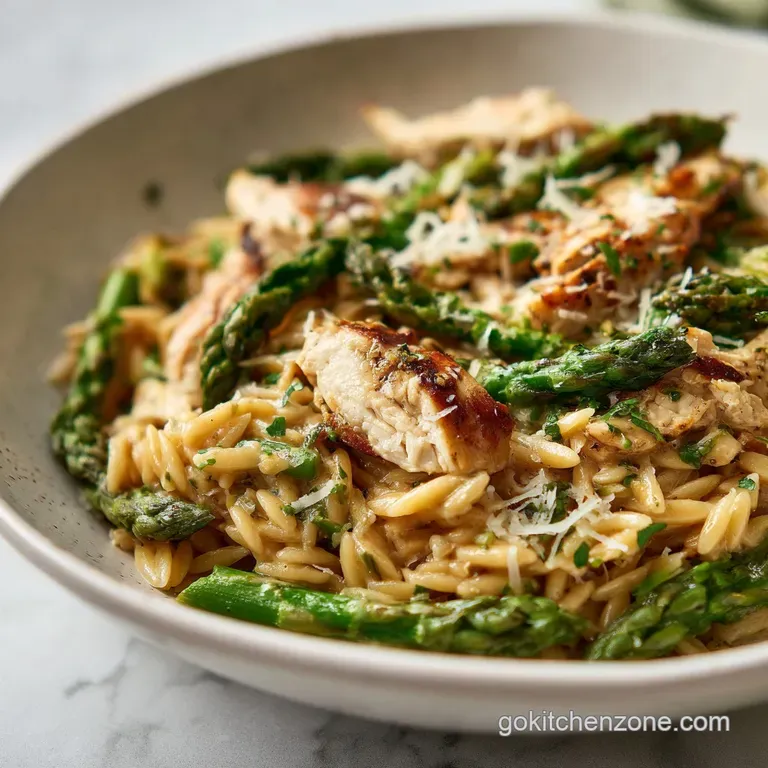
- Cream and Cheese. Stir in the 1/2 cup heavy cream and 1/2 cup grated Parmesan. Note: The sauce will look thin at first but will thicken instantly as the cheese melts.
- Brighten it up. Add the cooked chicken back to the pan along with 1 tbsp lemon juice, 1 tsp lemon zest, and 2 tbsp fresh parsley.
- Rest and Serve. Let the pan sit for 2 minutes until the sauce becomes velvety and coats the back of a spoon.
The secret to this whole dish is the lemon juice. It acts as a "brightness corrector," waking up all the heavy flavors of the cream and parmesan. Without it, the dish can feel a bit flat and one dimensional.
Common Errors and Simple Fixes
Even the best of us hit a snag sometimes. Usually, if something goes wrong with this orzo recipe, it’s a matter of heat management or liquid ratios.
Troubleshooting Common Issues
| Issue | Solution |
|---|---|
| Why Your Orzo Is Sticky | If the grains are clumping together or sticking to the bottom like glue, your heat was likely too high, or you didn't stir enough. The starch needs movement to stay suspended in the liquid rather than |
| Why Your Sauce Is Gloopy | "Gloopy" sauce happens when the liquid reduces too far before you add the cream. If it looks like a thick paste rather than a sauce, don't panic. Just splash in an extra 1/4 cup of broth or even water |
| Why Your Chicken Is Dry | Chicken breast is lean and can go from perfect to "cardboard" in sixty seconds. If you find your chicken is dry, it’s probably because it simmered in the broth for the full 10 minutes. Next time, make |
Easy Dietary and Flavor Swaps
This recipe is a fantastic "template" for whatever you have in the pantry. Don't feel like you have to run to the store if you’re missing one small thing. I’ve made this with everything from frozen peas to leftover rotisserie chicken.
- Protein Swap: Use boneless skinless chicken thighs for a more forgiving, juicier result. They can handle a bit more heat without drying out.
- Vegetable Swap: If you aren't an asparagus fan, use 1.5 cups of frozen peas or chopped fresh spinach. Just stir them in at the very end they only need about 60 seconds of heat.
- The Zesty "Lemon Parmesan Chicken Orzo Asparagus" Twist: For an even punchier version, double the lemon zest and add 1 tsp of crushed red pepper flakes during the garlic sauté phase.
| Original Ingredient | Substitute | Why It Works |
|---|---|---|
| Heavy Cream | Half and Half | Lighter texture, but may require 1 tsp cornstarch to thicken properly. |
| Asparagus | Broccoli Florets | Similar cook time if chopped small. Note: Adds a slightly earthier flavor. |
| Parmesan | Pecorino Romano | Hard sheep's cheese. Note: Much saltier and tangier; reduce added salt. |
If you are looking for a bolder flavor profile, you might want to try my Cowboy Butter Chicken Pasta recipe. It uses a similar one pan logic but brings in a lot more heat and garlic.
Best Storage and Reheating Methods
Orzo is a thirsty pasta. It will continue to soak up moisture as it sits in the fridge, meaning leftovers will likely be a bit more "solid" than when you first made it. This is totally normal and easy to fix.
Store your leftovers in an airtight container in the fridge for up to 3 days. I don't recommend freezing this specific dish because the cream and parmesan sauce can become grainy and "split" when thawed, and the asparagus will lose all its snap.
To reheat, put a portion in a small skillet or a microwave safe bowl. Add 1-2 tablespoons of water or milk. This is the "magic trick" for bringing the creaminess back to life. Heat it gently, stirring often, until the sauce becomes silky again. If you just microwave it dry, you'll end up with a clump of oily pasta.
For a zero waste tip: don't throw away those woody asparagus ends! Toss them into a bag in your freezer. Once you have enough veggie scraps, you can boil them down to make your own vegetable broth for the next time you make an orzo recipe.
Finishing Touches and Side Dishes
Because this is a one pan meal with protein, starch, and greens, you really don't need anything else. However, a little bit of crunch on the side never hurts. A simple piece of crusty sourdough bread is perfect for mopping up any leftover sauce at the bottom of the bowl.
Chef's Note: If you want to take the presentation up a notch, save a handful of the grated parmesan and some fresh parsley to sprinkle over the top right before serving. A final "crack" of fresh black pepper over the plate adds a nice visual and a hit of heat.
If you are hosting friends and want a more complete spread, this pairs beautifully with a simple arugula salad tossed in a balsamic vinaigrette. The peppery greens cut through the richness of the parmesan and cream perfectly.
One Pan Myths to Ignore
There is a lot of bad advice floating around about one pan cooking. Let's clear up a few things so you can cook with confidence.
Myth: You have to rinse the orzo first. Never rinse your pasta! Rinsing washes away the surface starch that we desperately need to create that velvety sauce. Just pour it straight from the box into the pan.
Myth: Searing meat "seals in" the juices. Searing does nothing for moisture retention; in fact, over high heat cooking causes moisture loss. We sear purely for the Maillard reaction that incredible flavor and color. The juiciness comes from not overcooking the meat during the simmer phase.
Myth: You need a lid to cook orzo. While a lid can speed things up, cooking uncovered allows you to keep an eye on the liquid levels. Since we want the sauce to reduce and thicken, leaving the lid off is actually better for this specific recipe.
One last thing don't be afraid of a little "crunch" on the bottom of the pan. Those slightly toasted bits of orzo are often the best part. As long as they aren't black and bitter, they just add another layer of texture to your meal. Happy cooking!

Recipe FAQs
Can I use chicken thighs instead of breasts?
Yes, chicken thighs are a great substitute. They are more forgiving and can handle higher heat without drying out, making them a juicier option.
What can I use if I don't have asparagus?
Frozen peas or chopped fresh spinach are excellent alternatives. Stir them in during the last minute of cooking; they only need a moment to heat through.
How do I prevent the orzo from becoming sticky?
Stir frequently and control your heat. If the grains clump, the heat was likely too high, or it wasn't stirred enough, preventing the starch from suspending properly in the liquid.
My sauce looks too thick, what can I do?
Add a splash more liquid to loosen it. If the sauce appears paste like, add another 1/4 cup of chicken broth or even water and stir to reach a saucier consistency.
How do I store and reheat leftovers?
Store in an airtight container for up to 3 days and reheat gently with a little liquid. Add 1-2 tablespoons of water or milk when reheating to restore creaminess; dry reheating will result in a clumpy texture.
Can I make this dish ahead of time?
Yes, you can prep ingredients in advance. Chop the chicken and trim the asparagus up to 24 hours ahead. For best results, assemble and cook the orzo just before serving.
Is it true that rinsing pasta is necessary for creamy sauces?
No, this is a common misconception. Never rinse pasta, especially for creamy sauces like this one, as rinsing washes away the essential starches that thicken the sauce.
Creamy Parmesan Orzo With Chicken And Asparagus
Ingredients:
Instructions:
Nutrition Facts:
| Calories | 703 calories |
|---|---|
| Protein | 48.6 g |
| Fat | 25.4 g |
| Carbs | 56.7 g |
| Fiber | 4.2 g |
| Sugar | 3.1 g |
| Sodium | 645 mg |
