Buffalo Chicken Dip: Creamy and Baked

- Time: Active 10 minutes, Passive 20 minutes, Total 30 minutes
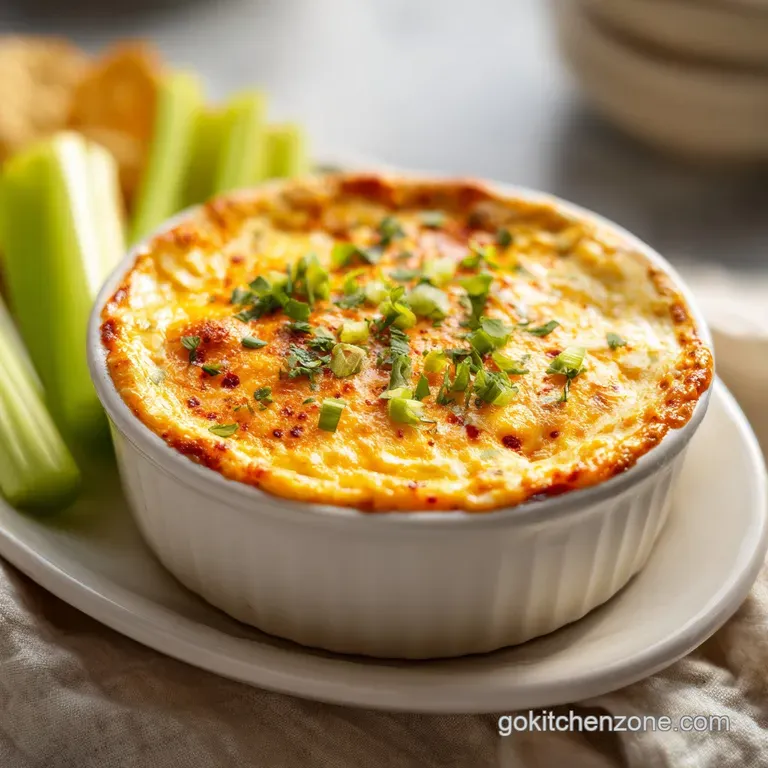
- Flavor/Texture Hook: A velvety, spicy base topped with a golden brown, shattering cheese crust
- Perfect for: Game day gatherings, vibrant party appetizers, or cozy movie nights
- Creating the Ultimate Tangy Buffalo Chicken Dip
- Understanding the Core Specs of This Dish
- Selecting Vibrant Ingredients for Maximum Crave Ability
- Gathering the Essential Kitchen Tools for Success
- Mastering the Layered Flavor Execution Steps
- Navigating Hurdles and Refining Your Technique
- Inclusive Adaptations for Every Hungry Guest
- Maintaining Freshness with Smart Storage Solutions
- Styling for Visual Impact and Texture Contrast
- Clearing Up Kitchen Myths
- Recipe FAQs
- 📝 Recipe Card
Creating the Ultimate Tangy Buffalo Chicken Dip
There is a specific, unmistakable aroma that fills a kitchen when vinegar based hot sauce hits warm cream cheese. It is sharp, tangy, and promises a hit of endorphins. I remember the first time I realized that the secret to this dish wasn't actually the chicken, but the cream cheese.
I had tried making a lighter version once using only Greek yogurt, and it was a watery, broken mess. The cream cheese is the hero here because it acts as a structural anchor. It provides the heavy, silky mouthfeel that allows the buffalo heat to linger on your tongue without burning it.
When you whisk that softened cream cheese with the buffalo sauce, you see it transform from a stark white block into a beautiful, sunset orange emulsion. This is the moment where the dip is won or lost. If the cream cheese is too cold, you get white lumps that never quite go away.
But when it's perfectly softened, it becomes a velvety canvas. That's the vibe we are going for today. We want a dip that is so cohesive it clings to a celery stick like it's a lifeline.
This isn't just about mixing things in a bowl and hoping for the best. We are building layers of flavor. We start with the tang of the sauce, move into the savory depth of the garlic and chicken, and finish with a bubbling, toasted crust of cheddar and Monterey Jack.
It is fusion cooking at its most accessible, taking the classic wing experience and turning it into something you can eat with a chip. Trust me, once you see that golden crust emerge from the broiler, you'll understand why we don't settle for "good enough."
Understanding the Core Specs of This Dish
Before we get our hands messy, we need to look at the roadmap. This recipe is designed to be efficient, but precision matters when you are dealing with fats and acids. We are aiming for a specific consistency that stays scoopable even as it cools down on the snack table.
Phase 1: Emulsification: This happens in the first 10 minutes. We aren't just stirring; we are creating a stable base that won't separate in the oven.
Phase 2: The Melt: During the 20 minutes of baking, the proteins in the cheese knit together while the fats from the chicken and dressing meld into the sauce.
| Servings | Ingredient Adjustments | Pan Size | Cook Time |
|---|---|---|---|
| 6 people | 1.5 cups chicken, 8 oz cream cheese | 6 inch skillet | 25 minutes |
| 12 people | 3 cups chicken, 16 oz cream cheese | 8x8 inch dish | 30 minutes |
| 24 people | 6 cups chicken, 32 oz cream cheese | 9x13 inch dish | 40 minutes |
When you are scaling this up for a massive party, remember that the depth of the dish affects the cook time more than the surface area. If the dip is too deep, the center will stay cold while the edges burn. Stick to a depth of about 1.5 to 2 inches for the most even heat distribution. If you find yourself with extra chicken, you might even consider making a Buffalo Chicken Pizza alongside this dip for a full on flavor feast.
Selecting Vibrant Ingredients for Maximum Crave Ability
The ingredients are the building blocks of that "crave worthy" factor we keep talking about. Every component has a job to do. We aren't just adding garlic powder for the sake of it, we are adding it to provide a savory baseline that cuts through the sharp vinegar of the buffalo sauce.
Fat as a Carrier: The lipids in the cream cheese and ranch dressing wrap around the capsaicin molecules in the hot sauce, slowing down their interaction with your heat receptors.
Protein Structure: Shredded rotisserie chicken provides a fibrous texture that contrasts against the silky sauce, making the dip feel like a substantial meal rather than just a condiment.
| Component | Science Role | Pro Secret |
|---|---|---|
| Cream Cheese | Primary Emulsifier | Always use full fat bricks; tubs have too much air and water. |
| Buffalo Sauce | Acidic Brightener | Look for a vinegar heavy sauce to cut through the richness of the dairy. |
| Monterey Jack | Moisture Retention | This cheese has a high moisture content, ensuring a gooey "cheese pull." |
The choice of chicken is actually quite controversial in some circles. While canned chicken is a shortcut, rotisserie chicken is the absolute king for flavor and texture. It has been seasoned and roasted, which means you are bringing those deeply savory, roasted notes into the dip.
- 16 oz cream cheese, softened: Why this? Provides the structural, velvety base that holds the emulsion together without breaking.
- 1 cup ranch or blue cheese dressing: Why this? Adds herbaceous depth and extra creaminess to temper the buffalo heat.
- 3 cups shredded rotisserie chicken: Why this? The pre roasted flavor adds a complex savoriness that plain boiled chicken lacks.
- 0.75 cup buffalo hot sauce: Why this? The acidic punch is vital for balancing the heavy fats in the cheese.
- 0.5 tsp garlic powder: Why this? Enhances the "umami" profile without adding the moisture of fresh garlic.
- 1.5 cups sharp cheddar cheese, freshly shredded: Why this? Sharp cheddar provides a bold flavor contrast to the mild cream cheese.
- 0.5 cup monterey jack cheese, shredded: Why this? This melts beautifully and creates that classic stretchy texture on top.
- 2 tbsp green onions, sliced: Why this? Provides a fresh, crisp bite to finish the rich dish.
Gathering the Essential Kitchen Tools for Success
You don't need a professional kitchen to nail this, but a few specific items make the process much smoother. I personally love using a 9 inch cast iron skillet because it retains heat so well. When you bring a cast iron skillet to the table, the dip stays bubbling for much longer than it would in a ceramic dish.
If you are using a ceramic 8x8 baking dish, just make sure it's oven safe up to 400°F (200°C) since we will be using the broiler at the very end. You will also want a sturdy whisk.
A flimsy whisk won't handle the resistance of the cream cheese, and you'll end up with a tired arm and a lumpy dip. A silicone spatula is also your best friend here for smoothing the top and getting every last bit of goodness out of the mixing bowl.
| Feature | Fresh Rotisserie Chicken | Canned Chicken Shortcut |
|---|---|---|
| Texture | Long, tender fibers | Short, chunky nuggets |
| Flavor | Deep, roasted, salty | Mild, slightly metallic |
| Prep Time | 5-10 mins shredding | 1 min draining |
I once tried to use a food processor to mix the chicken in, and it was a disaster. It turned the chicken into a paste. Don't do that. You want those distinct shreds of meat. If you are looking for a different texture profile, you might enjoy the crunch of crispy wings, but for this dip, the tender, sauce soaked chicken is the goal.
Mastering the Layered Flavor Execution Steps
Let's get into the flow of the kitchen. This is where we turn those individual components into a cohesive, bubbling masterpiece. Follow these steps closely, especially the temperature and visual cues.
- Preheat your oven to 350°F (175°C). Note: A steady, moderate heat ensures the dip warms through without the dairy curdling.
- Whisk the cream cheese and buffalo sauce. Combine the 16 oz of softened cream cheese and 0.75 cup of hot sauce in a large bowl until a smooth, orange emulsion forms with no white streaks.
- Incorporate the aromatics and liquids. Fold in the 1 cup of ranch (or blue cheese) dressing and 0.5 tsp garlic powder. Note: Adding the dressing now helps loosen the mixture before adding the bulk.
- Fold in the shredded chicken. Add the 3 cups of rotisserie chicken and stir until every shred is thoroughly coated in the sauce base.
- Prepare the baking vessel. Transfer the mixture into your 8x8 inch dish or skillet, using a spatula to smooth the surface into an even layer.
- Apply the cheese topping. Evenly distribute the 1.5 cups of sharp cheddar and 0.5 cup of Monterey Jack over the top. Aim for edge to edge coverage to trap moisture.
- Execute the primary bake. Place in the center rack for 15-18 minutes until the edges are bubbling and the center is hot.
- Activate the broiler. Switch the oven to the broiler setting for the final 2 minutes until the cheese is golden brown and toasted. Watch it like a hawk; it goes from gold to burnt in seconds.
- Garnish and rest. Remove from the oven and sprinkle with 2 tbsp of green onions. Let it sit for 3 minutes until the bubbling settles.
- Serve immediately. Provide plenty of celery sticks or sturdy tortilla chips for dipping.
Navigating Hurdles and Refining Your Technique
Even the most straightforward recipes can hit a snag. The most common issue people face is a "broken" dip, where a layer of yellow oil sits on top. This usually happens if the heat is too high or if you use pre shredded cheese that is coated in potato starch.
Rescuing a Greasy Dip
If you pull your dip out and it looks oily, don't panic. The fat has likely separated from the proteins. This often happens if the cheddar is extremely sharp and aged. You can usually fix this by giving the dip a gentle stir (yes, even through the cheese crust) to re incorporate the oils while it's still very hot.
In the future, using a bit more Monterey Jack can help, as its higher moisture content acts as a stabilizer.
Avoiding the Cold Center
There is nothing worse than a dip that is scorching on the outside but refrigerator cold in the middle. This happens if your cream cheese or chicken started at a very low temperature. To prevent this, ensure your cream cheese is truly at room temperature before you start.
If you are in a rush, you can microwave the combined chicken and sauce mixture for 60 seconds before putting it in the baking dish.
| Problem | Root Cause | Solution |
|---|---|---|
| Gritty Texture | Pre shredded cheese | Grate your own cheese from a block to avoid anti clumping starches. |
| Soupy Consistency | Too much hot sauce | Add an extra 4 oz of cream cheese to thicken the base. |
| Excessive Saltiness | Salty rotisserie chicken | Use a low sodium ranch dressing to balance the overall salt profile. |
Common Mistakes Checklist
- ✓ Ensure cream cheese is softened for at least 60 minutes (prevents a lumpy base).
- ✓ Shred the cheddar yourself from a block (ensures a superior, smooth melt).
- ✓ Pat the chicken dry with paper towels if it seems moist (prevents a watery dip).
- ✓ Do not skip the resting period; it allows the sauce to thicken slightly.
- ✓ Use a sturdy chip; thin "restaurant style" chips will snap under the weight of this dip.
Inclusive Adaptations for Every Hungry Guest
One of the reasons I love this recipe is how easily it adapts to different needs without losing its soul. If you have friends who are watching their calorie intake, you don't have to serve them a "sad" version. You just need to make smart swaps.
The Crockpot Method: If you want to keep this dip warm throughout a four hour football game, the slow cooker is your best friend. Simply combine all ingredients (except the garnish) in the crockpot and cook on low for 1-2 hours. Once it's melted, switch it to the "warm" setting.
Just be aware that you won't get that toasted, broiled crust.
Lightening the Load: You can swap half of the cream cheese for Neufchâtel cheese. It has about a third less fat but still maintains a similar texture. Avoid using fat free cream cheese; it contains stabilizers that turn into a gummy mess when heated.
For the chicken, using poached breast meat instead of rotisserie can also save some calories, though you might want to add a pinch more garlic powder to make up for the lost flavor.
For those looking for a keto friendly option, this dip is naturally low in carbs. Just serve it with celery, bell pepper strips, or pork rinds instead of chips. It's a fantastic way to keep the fusion flavors alive while sticking to dietary goals.
Maintaining Freshness with Smart Storage Solutions
If you actually have leftovers (a rare occurrence!), this dip keeps remarkably well. The flavors actually deepen overnight as the garlic and buffalo sauce permeate the chicken fibers.
Fridge Storage: Place the cooled dip in an airtight container and store it in the refrigerator for up to 3-4 days. When reheating, I recommend the oven over the microwave. Microwaving can cause the oils to separate, leaving you with a greasy texture.
Put it back in a small oven safe dish at 350°F (175°C) for about 10-15 minutes until it's bubbly again.
Freezer Guidelines: You can freeze this dip, but be warned: the texture of the dairy might change slightly upon thawing. It can become a bit "grainy." To minimize this, freeze it before the final bake. Wrap the assembled dish tightly in plastic wrap and then foil. It will stay good for up to 2 months.
Thaw it completely in the fridge for 24 hours before baking as directed.
Zero Waste Ideas: Don't let those last three tablespoons of dip go to waste. It makes an incredible spread for a turkey sandwich the next day. You can also stir it into scrambled eggs for a spicy breakfast or dollop it onto a baked potato.
The goal is to make sure every bit of that liquid gold is enjoyed.
Styling for Visual Impact and Texture Contrast
We eat with our eyes first, and a big bowl of orange dip needs a little help to look "feel good" and vibrant. This is where the green onions come in. That pop of bright green against the toasted orange cheese creates a beautiful visual contrast.
Choosing the Best Dippers: Diversity is key here. I like to provide a "color wheel" of dippers. Bright green celery sticks provide a watery, cool crunch that resets the palate. Deep red bell pepper strips add a subtle sweetness. Blue corn tortilla chips offer a dark, moody contrast to the bright dip.
Garnishing Secrets: If you want to take the presentation to the next level, drizzle a tiny bit of extra buffalo sauce over the top in a zig zag pattern after it comes out of the oven. You could also add a few crumbles of blue cheese if you used ranch in the base.
This provides "flavor markers" that tell your guests exactly what to expect.
| If you want... | Do this... |
|---|---|
| Maximum Crunch | Serve with thick cut kettle chips or toasted baguette slices. |
| Extra Heat | Fold in 1 tbsp of chopped pickled jalapeños before baking. |
| A Cooler Bite | Increase the ranch dressing by 0.25 cup and serve with chilled cucumbers. |
Clearing Up Kitchen Myths
There are a few misconceptions about this dip that I see floating around the internet, and I want to set the record straight so your kitchen experience is stress free.
One common myth is that you must use blue cheese to be "authentic." While the original Buffalo wings are served with blue cheese, many people find the flavor too polarizing for a crowd pleasing dip. Ranch dressing works perfectly as a substitute because it provides the same creamy, herbal notes without the funk.
It's all about what your specific crowd craves.
Another myth is that searing the chicken before shredding it "seals in the juices." In reality, the chicken stays moist because it's submerged in a high fat environment (cream cheese and dressing).
The real reason to use rotisserie chicken isn't about the "juices," but about the Maillard reaction that brown, flavorful crust on the skin of the roasted bird that adds a smoky depth you can't get from boiling.
Finally, some people think you need to cook this dip for hours. That's simply not true. Since the chicken is already cooked, the baking time is purely about melting the cheeses and allowing the flavors to marry. Overcooking it will only lead to the dairy breaking and becoming oily.
Stick to the 20 minute total bake time for the best results. Ready to get started? Let's crack on!

Recipe FAQs
How to achieve a smooth texture without white lumps?
Ensure your cream cheese is completely softened to room temperature before mixing. Whisk the cream cheese and buffalo sauce together until you see a uniform, orange emulsion with no white streaks remaining before adding other ingredients.
Is it true I must use a blender to get the right consistency?
No, this is a common misconception. Simply whisking the softened cream cheese and buffalo sauce by hand in a large bowl creates the perfect, velvety base required for this dip.
How to prepare this dish in advance for a party?
Assemble the dip up to 24 hours in advance and store it covered in the refrigerator. When you are ready to serve, bake it according to the recipe instructions, adding a few extra minutes to the oven time if starting from a cold dish.
How to create the golden brown crust on top?
Switch your oven to the broiler setting for the final 2 minutes of the baking process. Keep a close eye on the dish during this phase to ensure the shredded cheddar and Monterey Jack cheese turn golden brown without burning.
Can I use different types of meat instead of rotisserie chicken?
Yes, you can substitute with other cooked poultry, though rotisserie chicken provides the best texture. If you enjoy perfecting these quick protein bases, see how the same principles of flavor pairing work in our easy chicken bites.
How to serve this dip to guests?
Garnish with sliced green onions immediately after removing it from the oven. Serve the dip while it is piping hot, accompanied by crunchy celery sticks or sturdy tortilla chips for dipping.
How to fix the dip if it looks too runny after baking?
Broil the dip for an additional 1 2 minutes to allow excess moisture to evaporate. The combination of cream cheese and shredded cheese will naturally thicken and set as the dip cools slightly to serving temperature.
Creamy Buffalo Chicken Dip

Ingredients:
Instructions:
Nutrition Facts:
| Calories | 349 kcal |
|---|---|
| Protein | 18.4 g |
| Fat | 29.1 g |
| Carbs | 3.2 g |
| Fiber | 0.1 g |
| Sugar | 2.1 g |
| Sodium | 632 mg |
