

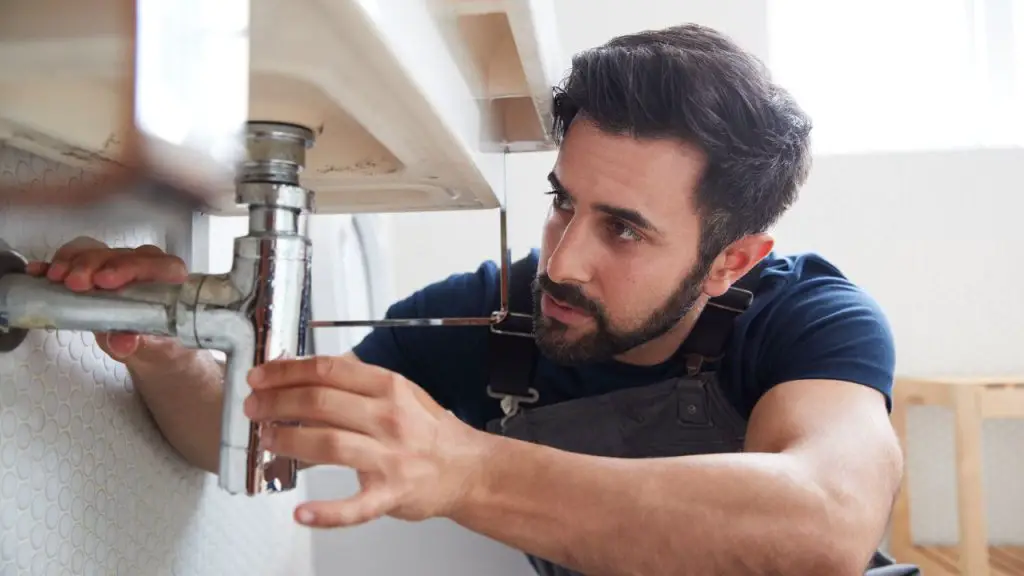
To fix a leaky shower valve, start by turning off the water supply. Then, remove the handle and cartridge to inspect for damage or debris.
Leaky shower valves can be frustrating and wasteful, causing water damage and higher water bills. It is essential to resolve the issue promptly to prevent further damage. In this blog post, we’ll discuss how to fix a leaky shower valve step by step so you can enjoy a leak-free shower again.
Whether you’re a DIY enthusiast or looking to understand the repair process before calling a professional, these tips will help you resolve the issue efficiently. Please keep reading to learn how to tackle this common household problem and restore your shower to its fully functional state.
Introduction To Leaky Shower Valves
Learn how to fix a leaky shower valve with these simple steps. Start by turning off the water supply, then disassemble the valve to inspect and clean the parts. Replace any damaged components and reassemble the valve to stop the leak and restore your shower’s functionality.
Common Signs Of A Leashower’sshower valves can cause water wastage and damage. Signs include low water pressure and visible water stains.
Potential Consequences Of Ignoring The Issue
Ignoring a leaky shower valve can lead to mold growth and structural damage. Address the issue promptly.
Tools And Materials Needed
You will need a few essential tools and materials to fix a leaky shower valve. These include an adjustable wrench, screwdriver, replacement washers or cartridges, plumber’s tape, and a rag for cleaning. These plumbers will make the repair process much smoother and more efficient.
Tools and Materials Needed: Fixing a leaky shower valve is a relatively easy task that can be accomplished with the right tools and materials. Before you begin, ensure you have everything you need to complete the job right the first time. Here are the essential DIY toolkit and specialized plumbing supplies required for fixing a leaky shower valve:
Basic Diy Toolkit
Specialized Plumbing Supplies
In addition to the essential DIY toolkit, you may also need some specialized plumbing supplies depending on the type of shower valve you are working with. Here are some of the most common specialized plumbing supplies for fixing a leaky shower valve: – Replacement valve cartridge or stem – O-ring – Washer – Valve seat – Grease – Silicone caulk. Remember to turn off the water supply to your shower before you begin working on the valve. Once you have all the necessary tools and materials, you can start fixing the leaky shower valve.
Preparation Steps
Properly preparing your workspace before beginning any repair work on a leaky shower valve is crucial. Taking the time to execute the necessary preparation steps will help ensure a smooth and successful fix. Below, we outline the essential steps before diving into the repair process.
Shutting Off Water Supply
Locate the main water shut-off valve for your home. Turn the valve clockwise to shut off the water supply to the shower. Once the water is off, open the shower faucet to drain any remaining water from the pipes.
Protecting Your Work Area
Before getting started, protecting the surrounding area from potential damage is essential. Cover the shower floor and drain with a cloth or towel to prevent small parts from falling down the drain. Use a drop cloth or plastic sheeting to shield the shower walls and surrounding surfaces from water and debris.
Identifying The Type Of Shower Valve
Identifying the type of shower valve is crucial for successfully fixing a leak. Before taking action, you must determine whether you have a single-handle or dual-handle shower valve. In addition, considering the manufacturer and model of your shower valve is essential for obtaining the correct repair parts.
Single-handle Vs. Dual-handle
Single-handle shower valves have one handle for controlling the temperature and water flow, while dual-handle shower valves have separate handles for hot and cold water. Identifying which type of valve you have is the first step in addressing leaks.
Manufacturer And Model Considerations
Knowing the manufacturer and model of your shower valve is essential for obtaining the correct replacement parts. Look for identifying marks or labels on the valve, or refer to the original installation paperwork if available. This information will ensure that you acquire the right components for the repair.
Dismantling The Shower Handle
Dismantling the shower handle is the first crucial step in fixing a leaky shower valve. Care and attention to It’sail are essential to ensure a successful process.
Removing The Handle
Start by turning off the water supply to the shower to avoid any unexpected leaks or water flow during the dismantling process. Use a screwdriver to remove the screws that secure the handle in place carefully. Once the screws are removed, gently pull the handle away from the wall to reveal the valve components inside.
Keeping Track Of Components
As you dismantle the handle, keeping track of the component’s movement is essential. Place the component’s location and consider using a small container or tray to organize the screws, washers, and other parts. This will make reassembly much more accessible and ensure no components are misplaced or lost during the repair process.
Inspecting The Valve Components
Inspecting the valve components is crucial when dealing with a leaky shower valve. You can identify and address any issues causing the leak by carefully examining the various parts. Here are the key steps to follow when inspecting the valve components.
Checking For Visible Damage
Start by visually inspecting the valve for any visible signs of damage, such as cracks, corrosion, or mineral buildup. Then, check the valve body, handle, and any exposed pipes for irregularities that could be contributing to the leak.
Assessing O-rings And Washers
Next, focus on the O-rings and washers, as these are familiar sources of leaks in shower valves. Carefully examine these components for wear, tear, or deterioration. Look for any signs of distortion, brittleness, or disintegration that could be causing the leak.
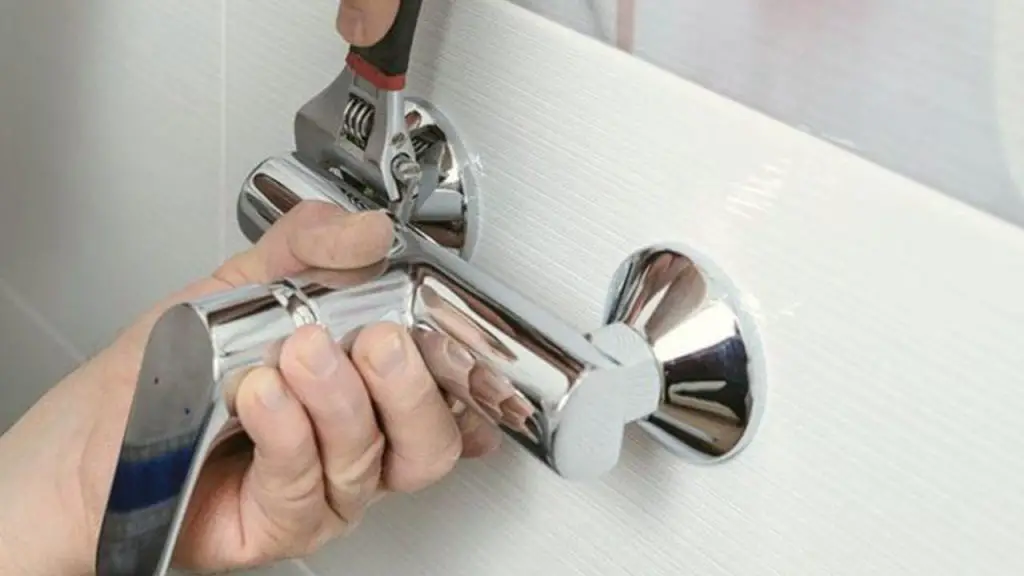
Replacing Faulty Parts
Start by turning off the wa:
- Start to fix a leaky shower valve.
- Disassemble the valve and inspect for faulty parts.
Replace any damaged components and reassemble the valve carefully to ensure a leak-free shower experience.
- Replacing Faulty Parts: If you have determined that the cause of your leaky shower valve is a faulty part, you will need to replace it. This is often a more cost-effective solution than replacing the entire valve and can be done with just a few tools and some basic plumbing knowledge. Here are some tips for finding the correct replacements and ensuring a successful installation.
- Finding the Right Replacements: The first step in replacing a faulty shower valve part is to identify the make and model of your valve. This information can usually be found on the valve or the manufacturer’s documentation. Once you have a manufacturer’s manufacturer, you can search for replacement parts online or at your local hardware store. Purchase parts compatible with your valve to ensure a proper fit.
- Installation Tips: Before beginning the replacement process, it is essential to turn off the water supply to your shower. This can be done by turning off the water valve near your shower or shutting off the main water supply to your home.
Once the water is turned off, you can remove the faulty part by unscrewing it from the valve. Follow the manufacturer’s instructions for removing and manufacturer’ser’st, and use any necessary toinstmanufacturer’stht fit. Once the new part is installed, turn the water supply back on and test the valve for leaks.
Reassembling The Shower Valve
To fix a leaky shower valve, start by disassembling it carefully. Clean all parts thoroughly, replace any damaged components, and reassemble the valve tightly to prevent leaks. Then, test the valve by turning on the water to ensure it is working properly.
Ensuring Tight Seals
Apply the plumber’s grease to ensure the O-rings have a plumber’s. Secure the valve with tighttigplumber’sSecureut with a wrench.
Careful Handle Reattachment
Slide the handle back on, making sure it aligns properly.
Tighten the screw to secure the handle in place.
Testing For Leaks
Regarding Testing for Leaks, it’s crucial to follow a systematic approach. it’sit’sng Water Supply
1. Turn on the water sResit’sngthe shower valve.
2. Observe the valve for any signs of leaking water.
Observing For Further Dripping
1. Check the valve closely for any continuing drips.
2. Look for water pooling around the valve area.
3. Listen for any sounds of dripping water.
Maintenance Tips
Regular maintenance is vital to keeping your shower valve in top condition. Here are some essential maintenance tips to help you prevent and address leaky shower valves.
Regular Cleaning Routines
- Clean the shower valve with a mild soap solution regularly.
- Remove mineral deposits by soaking the valve in vinegar overnight.
- Inspect the valve handle for any buildup or damage.
When To Call A Professional
- If you notice persistent leaks despite regular maintenance efforts.
- When the shower valve is making unusual noises during operation.
- If you are unsure about the cause of the leak or how to fix it.
Frequently Asked Questions
What To Do If Shower Valve Is Leaking?
To fix a leaking shower valve, first shut off the water supply, disassemble the valve, replace the faulty parts, and reassemble.
Can A Shower Valve Be Repaired?
Yes, a shower valve can be repaired. The extent of the repair depends on the issue. Simple maintenance can be done by replacing the O-ring or washer, while more complex repairs may require replacing the entire valve. Hiring a professional plumber for repair is best to ensure the job is done correctly.
How To Stop A Shower From Dripping?
First, check and tighten the shower handle to stop the shower from dripping. If that doesn’t work, replace the rubber washer, which doesn’t have an accent. You can also call a plumber for professional assistance.
Why Is My Shower Faucet Dripping When Turned Off?
When turned off, a dripping shower faucet is usually caused by a worn-out washer or seal, which leads to water leakage. Regular use and aging can also contribute to the problem. Fixing this issue to save water and prevent further damage is essential.
How Do I Know If My Shower Valve Is Leaking?
To check for a leaky shower valve, look for water drips or stains around the valve area.
What Causes A Shower Valve To Leak?
Worn-out seals, damaged O-rings, or mineral buildup can cause a leaky shower valve.
Can I Fix A Leaky Shower Valve Myself?
You can fix a leaky shower valve by replacing the faulty seals or O-rings with new ones.
What Tools Do I Need to Fix a Shower Valve Leak?
You will need an adjustable wrench, a screwdriver, replacement parts, plumber’s tape, and lubricant.
How Does Long Plumber’s Sex A Shower Valve Leak?
Depending on the plumber, fixing a shower valve leak can take 30 minutes to a few hours.
Should I shut off the water before fixing the valve?
Yes, turn off the shower’s water supply before starting the shower. It’s essential.
Conclusion
Fixing a leaky shower valve is a simple DIY task that can save you time and money. By following these steps, you can repair the issue quickly and effectively. Regular maintenance is vital in preventing future leaks and preserving your shower’s functionality. Take action now for the shower see-shower experience.


