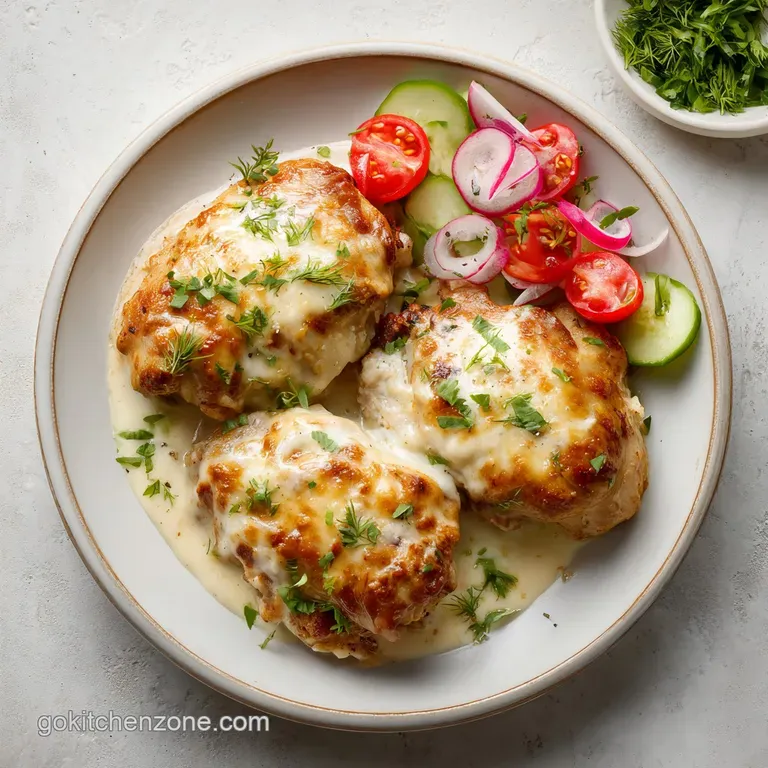
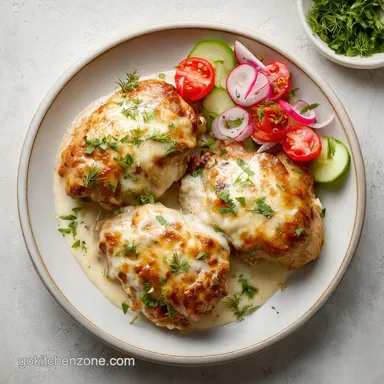
Ultimate Creamy Ranch Chicken
- Time:15 minutes prep + 25 minutes cook = 40 minutes total
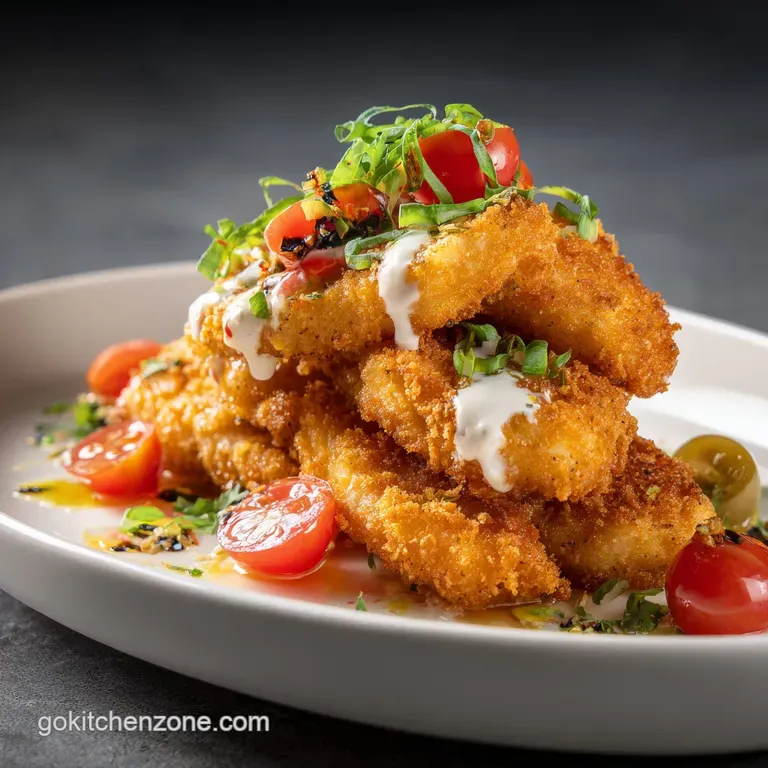
- Flavor/Texture Hook: Shattering golden panko crust with a velvety, herb infused center
- Perfect for: Busy weeknight wins, picky eaters, and low effort meal prep
- The Secret to Perfectly Crispy Ranch Chicken
- Essential Stats for This Ranch Chicken
- Mechanism Behind the Crispy Coating
- Buying Guide for Best Ranch Chicken
- Essential Tools for Easy Ranch Chicken
- Step by Step Crispy Ranch Chicken
- Avoid These Common Ranch Chicken Mistakes
- Scaling for Larger or Smaller Crowds
- Realities of Kitchen Lore
- Keeping Your Ranch Chicken Fresh Longer
- Best Sides for Ranch Chicken Dinners
- Very High in Sodium
- Recipe FAQs
- 📝 Recipe Card
The Secret to Perfectly Crispy Ranch Chicken
Picture this: It is 6:15 PM on a Tuesday. The kitchen is a bit of a mess, the kids are asking about dinner for the fifth time, and you really just want a win that doesn't involve a drive thru. I remember the first time I pulled this specific tray out of the oven.
The aroma of toasted garlic and dried dill hit me before I even opened the door. There was this distinct, aggressive sizzle as the rendered butter bubbled through the panko crumbs. I poked one with a fork and heard that satisfying "scritch scritch" sound of a crust that actually stayed crispy.
We have all been there trying to make a breaded dish in the oven only to have it come out half burnt on top and a wet, mushy disaster on the bottom. It is frustrating and honestly feels like a waste of good meat. But this version? It is different.
We are using a combination of mayonnaise and sour cream as a "moisture jacket" that keeps the chicken from drying out at high heat. It’s a total game changer for anyone who thinks chicken breast is naturally boring or dry.
Trust me, once you see how the Parmesan melts into the panko to create this almost armor plated seasoning, you will never go back to the basic shake and-bake methods. It's about working smarter, not harder, in the kitchen. We are focusing on reliability here.
No fancy equipment is required, just a few smart choices about how we layer the flavors and how we use the heat of the oven to our advantage. Let's get into what makes this work so well every single time.
Essential Stats for This Ranch Chicken
Before you start preheating, let's look at how this method stacks up against the classic frying technique. Most people think you need a deep fryer to get a real crunch, but that’s just not true if you use the right airflow.
| Method | Total Time | Texture | Cleanup Level |
|---|---|---|---|
| Fast Oven Roast | 40 minutes | Shattering & Light | Low (One sheet pan) |
| Classic Pan Fry | 55 minutes | Heavy & Greasy | High (Oil splatters everywhere) |
| Slow Bake | 1 hour 10 mins | Soft & Bready | Medium (Casserole dish) |
This comparison shows why we stick to the 400°F (200°C) oven temp. It's hot enough to crisp the breadcrumbs before the chicken overcooks, which is the "sweet spot" for poultry. If you go lower, the chicken dries out while waiting for the crumbs to brown.
If you go higher, you risk burning the Parmesan before the middle is safe to eat.
Performance Checkpoints
- Weight: 1.5 lb of chicken should be divided into 4 even portions.
- Thickness: 1 inch uniform thickness ensures everything finishes at the same time.
- Temperature:165°F (74°C) internal is the non negotiable finish line.
Mechanism Behind the Crispy Coating
The success of this dish isn't luck; it's about how the ingredients interact under high heat. We are building a structural barrier that protects the protein.
- Moisture Jacket: The fats in the mayonnaise and sour cream create a physical barrier. This prevents the moisture inside the chicken from evaporating, effectively steaming the meat inside its own crust.
- Starch Suspension: By mixing the panko with melted butter before coating, we ensure every single crumb is hydrated with fat. This allows the crumbs to "fry" in the oven's dry heat.
- Protein Fusion: The grated Parmesan acts as a natural glue. As it melts, it binds the breadcrumbs to the creamy ranch layer, preventing the crust from sliding off when you slice into it.
- Airflow Dynamics: Using a wire rack allows the 400°F (200°C) air to hit the bottom of the chicken. This evaporates any juices that drip down, turning them into flavor rather than soggy residue.
| Component | Role in Dish | Pro Secret |
|---|---|---|
| Mayonnaise | Emulsified Fat | Keeps chicken velvety even if slightly overcooked |
| Panko | Structural Crunch | Use Japanese style for a lighter, airier snap |
| Parmesan | Flavor & Binding | Use "dusty" grated style to fill the gaps between crumbs |
Most home cooks skip the "pounding" step, but that's actually why the science fails sometimes. If one side is 2 inches thick and the other is half an inch, the thin part will be leather by the time the thick part is safe. Taking two minutes to even them out changes everything.
Buying Guide for Best Ranch Chicken
You don't need a massive budget for this, but choosing the right versions of these staples makes a huge difference in the final "crunch factor."
- Chicken Breasts (1.5 lb): Look for air chilled if possible; they have less water weight and brown better.
- Mayonnaise (1/2 cup): Use a full fat version. low-fat substitutes often have too much water and sugar, which can lead to a gummy coating.
- Sour Cream (1/4 cup): Adds a necessary tang that cuts through the richness of the mayo.
- Ranch Seasoning (1 oz): Hidden Valley is the classic choice here for that specific nostalgia driven flavor.
- Garlic Powder (1/2 tsp): Bolsters the savory notes in the ranch mix.
- Cracked Black Pepper (1/4 tsp): Freshly cracked provides a floral heat that pre ground pepper lacks.
- Panko Breadcrumbs (1.5 cups): These are larger and airier than traditional breadcrumbs. Why this? They provide a significantly louder crunch and don't soak up as much moisture.
- Parmesan Cheese (1/2 cup): Use the finely grated variety. Why this? It creates a "mesh" that holds the larger panko pieces in place.
- Unsalted Butter (2 tbsp): Melted and stirred into the crumbs.
- Fresh Parsley (1 tbsp): For a pop of color and freshness at the end.
| Original Ingredient | Substitute | Why It Works |
|---|---|---|
| Panko crumbs | Crushed Ritz crackers | Adds a buttery, salty richness but is slightly less crunchy |
| Sour cream | Plain Greek yogurt | Provides similar acidity and moisture with more protein |
| Parmesan | Romano cheese | Offers a sharper, saltier bite that stands up to the ranch |
If you find yourself making this often, you might want to try different ranch variations. For instance, pairing this with a Broccoli Casserole recipe makes for a complete, comforting meal that feels like it took way more effort than it actually did.
Essential Tools for Easy Ranch Chicken
We are keeping the tool list short because nobody wants to do extra dishes on a weeknight. The goal is efficiency and reliability.
- Rimmed Baking Sheet: This catches any stray crumbs and prevents butter from dripping onto your oven floor.
- Wire Cooling Rack: This is the most important tool in the arsenal. It must be oven safe. Lifting the chicken off the pan is the only way to ensure the bottom gets crispy.
- Meat Mallet: Or a heavy rolling pin. We need this to pound the 1.5 lb of chicken to a uniform thickness.
- Shallow Bowls (2): One for the "wet" ranch mixture and one for the "dry" breadcrumb mixture. Wide, flat bottomed bowls work best for even coating.
- Meat Thermometer: This is the only way to know for sure that your chicken is done without cutting into it and letting all the juices escape.
Chef's Tip: If you don't have a wire rack, you can thinly slice some lemons or onions and lay the chicken on top of those. It won't be quite as crispy as the rack method, but it keeps the meat from sitting in its own juices and adds a nice aromatic flavor to the base.
step-by-step Crispy Ranch Chicken
Follow these steps exactly. The order of operations matters because we are building layers of flavor and texture that need to stay distinct.
- Heat the oven. Set it to 400°F (200°C). Line your pan with foil for easy cleanup and set the wire rack on top.
- Prep the meat. Pat the 1.5 lb of chicken breasts completely dry. Note: Moisture on the surface of the meat will prevent the ranch mixture from sticking.
- Level the thickness. Use your mallet to pound the breasts to a uniform 1 inch thickness. This is your insurance policy against dry meat.
- Mix the binder. Whisk the 1/2 cup mayo, 1/4 cup sour cream, garlic powder, black pepper, and half the ranch seasoning in a shallow bowl.
- Prep the crunch. In the second bowl, combine 1.5 cups panko, 1/2 cup Parmesan, the rest of the ranch seasoning, and 2 tbsp melted butter. Stir until the crumbs look like wet sand.
- The first coat. Dip the chicken into the wet mixture. Ensure every nook and cranny is covered.
- The final crust. Press the chicken firmly into the panko mixture. Note: Use your hands to press the crumbs in; don't just toss them or they will fall off.
- The bake. Place on the rack and bake for 20-25 minutes. Wait for the crust to turn a deep, golden brown.
- The temp check. Use your thermometer to verify the center has hit 165°F (74°C).
- The rest. Let it sit for 5 minutes before slicing. This allows the juices to redistribute so they stay in the meat, not on your plate.
Avoid These Common Ranch Chicken Mistakes
Even simple recipes have pitfalls. Most of the "failures" with this dish come from skipping the small details that handle moisture and heat.
Prevention of Soggy Bottoms
The most common complaint is a wet underside. This happens when the chicken sits directly on a baking sheet or foil. The meat releases juices as it cooks, and without a rack, the breadcrumbs sit in that liquid and turn into a paste.
If you absolutely must cook on the pan, preheat the pan in the oven first so the bottom starts searing the second it hits the metal.
Troubleshooting Dry Rubbery Meat
If your chicken feels like a rubber band, it’s likely overcooked. Chicken breast has almost no fat, so the window between "perfect" and "dry" is only a few degrees. This is why the mayo/sour cream layer is so vital it adds a supplemental fat source that lubricates the muscle fibers.
| Problem | Root Cause | Solution |
|---|---|---|
| Crust falls off | Surface was too wet | Pat chicken dry with paper towels before dipping |
| Pale crumbs | Not enough fat | Ensure butter is thoroughly mixed into panko |
| Raw in middle | Breasts too thick | Pound to 1 inch thickness before starting |
Common Mistakes Checklist
- ✓ Always pat the chicken dry; surface moisture is the enemy of adhesion.
- ✓ Never skip the wire rack if you want a 360 degree crunch.
- ✓ Use a thermometer rather than timing by "feel" ovens vary wildly.
- ✓ Let the butter cool slightly before mixing with panko to prevent clumping.
- ✓ Don't overcrowd the rack; leave at least an inch between pieces for air to flow.
Scaling for Larger or Smaller Crowds
If you are cooking for a big party or just for yourself, you need to adjust more than just the quantities. The physics of the oven changes when you pack it full.
Reducing for Two
If you are only making 2 servings, use a smaller toaster oven sized rack and pan. You can beat one egg and use half of it to replace a portion of the mayo if you want a lighter binder, but sticking to the original ratios usually yields the best flavor.
Reduce the bake time by about 5 minutes, as smaller ovens often have more intense direct heat.
Doubling for a Crowd
When doubling to 8 servings, don't just double the salt and ranch seasoning it can become overwhelmingly salty. Increase the spices to 1.5x instead. You will likely need two separate baking sheets.
Swap the positions of the pans halfway through cooking (top rack to bottom rack) to ensure both trays get even browning from the top heating element.
If you find you have leftovers or want to try this flavor profile in a different format, you can easily use the same ranch and crumb logic for a Buffalo Chicken Pizza. Just skip the pounding and cut the chicken into bite sized pieces before coating and baking.
Realities of Kitchen Lore
Let's clear up a few things that people often get wrong about breaded chicken. These myths usually lead to extra work for zero reward.
- Searing seals in juices: This is false. Searing creates flavor via browning, but it doesn't create a moisture proof seal. In fact, searing then baking often results in drier chicken because you are cooking it twice. Our over high heat oven method does both at once.
- You need an egg wash: While eggs are a classic binder, the mayo/sour cream mix is superior here. It adds fat and acidity, which tenderizes the meat, whereas egg just acts as glue.
- low-fat mayo is a healthy swap: In this specific recipe, low-fat mayo is a mistake. It contains thickeners and sugars that will burn or become watery, ruining the crust. Stick to the real stuff for the best result.
Keeping Your Ranch Chicken Fresh Longer
This dish is best eaten immediately while the crust is at its peak "shatter" level, but leftovers can still be great if handled correctly.
- Storage: Keep leftover chicken in an airtight container in the fridge for up to 3 days. Do not wrap it in foil while it is still warm, or the steam will turn the crust into mush.
- Freezing: You can freeze the cooked chicken for up to 2 months. To reheat, don't use the microwave. Put it back in a 375°F (190°C) oven or an air fryer until the crust crisps back up.
- Zero Waste Tip: If you have leftover panko Parmesan mix that didn't touch the raw chicken, don't throw it out! Toast it in a dry pan for 2 minutes and use it as a crunchy topping for steamed broccoli or a pasta dish the next day. If you have extra ranch dressing mixture, it makes a fantastic dip for raw veggies.
Best Sides for Ranch Chicken Dinners
Serving this is all about balance. Since the chicken is rich, creamy, and crunchy, you want sides that provide a bit of contrast.
A bright, acidic green salad with a lemon vinaigrette is the perfect foil for the savory ranch flavors. If you want something heartier, roasted smashed potatoes work well because they share that "crispy exterior" theme.
I also love serving this over a bed of simple buttered noodles or rice to soak up any of the herb scented juices that escape when you cut into the meat.
For a fun twist, slice the chicken into strips and serve it inside warm flour tortillas with a bit of shredded cabbage and extra lime juice. It’s a "Ranch Chicken Taco" that feels completely different from the standard plated dinner.
No matter how you serve it, the star is always that contrast between the shattering crust and the velvety meat inside. It's a reliable, weeknight friendly meal that never feels like a compromise. Let's get cooking!

Very High in Sodium
935 mg 935 mg (41% 41%)
The American Heart Association recommends a limit of 2,300mg per day for most adults, ideally striving for no more than 1,500mg.
Tips to Reduce Sodium in Your Chicken Recipe
-
Lower Sodium Seasoning Mix-30%
Replace the Hidden Valley Ranch seasoning mix with a reduced sodium version or make your own blend of herbs and spices. A typical seasoning packet can be very high in sodium.
-
Reduced Sodium Parmesan-15%
Opt for reduced sodium grated Parmesan cheese. Traditional Parmesan cheese is a significant source of sodium.
-
Boost Flavor with Herbs and Spices
Increase the garlic powder and cracked black pepper. Experiment with other no-sodium herbs like paprika, onion powder, or dried parsley to enhance flavor.
-
Control Mayonnaise and Sour Cream-5%
While not the primary sodium culprits here, consider using light or reduced sodium mayonnaise and sour cream for a small additional reduction.
Recipe FAQs
What exactly is ranch chicken?
It is a protein forward dish featuring chicken breasts coated in a savory ranch seasoned crust. The recipe uses a creamy layer of mayonnaise and sour cream to bind a crunchy topping of Panko, Parmesan, and ranch seasoning, resulting in a golden brown finish.
Is cowboy chicken the same as ranch chicken?
No, this is a common misconception. While both often rely on similar seasoning profiles, cowboy style recipes typically incorporate barbecue flavors or bacon, whereas this ranch focused preparation relies strictly on the blend of herbs and dairy in our official ingredient list.
Can you use ranch dip mix on chicken?
Yes, it is the primary seasoning agent for this dish. By splitting the packet between the creamy base and the Panko breadcrumb coating, you ensure deep, consistent flavor throughout every bite of the crust.
What makes ranch chicken so good?
The combination of high fat dairy and a wire rack baking technique. Using mayonnaise and sour cream creates a barrier that keeps the breast meat succulent, while the rack allows heat to circulate for a perfectly crisp bottom. If you enjoy achieving this type of crispy texture, you can apply the same air-circulation principle to other poultry dishes.
How to ensure the Panko crust stays on during baking?
Pat the chicken breasts completely dry with paper towels before starting. Moisture on the surface of the meat acts as a barrier that prevents the creamy ranch mixture from adhering properly, causing the crust to slide off during the cooking process.
How to avoid overcooking the chicken?
Pound the breasts to a uniform 1 inch thickness before breading. This ensures every part of the meat reaches the safe internal temperature of 165°F (74°C) at the exact same time, preventing the edges from drying out while the center finishes.
How to fix pale or soggy breading?
Mix the melted butter into the Panko and Parmesan until it resembles wet sand. If the crumbs are not thoroughly coated in fat before they touch the chicken, they will remain pale and fail to crisp up properly in the 400°F (200°C) oven.
Ultimate Creamy Ranch Chicken
Ingredients:
Instructions:
Nutrition Facts:
| Calories | 649 kcal |
|---|---|
| Protein | 47.2 g |
| Fat | 39.4 g |
| Carbs | 23.1 g |
| Fiber | 1.2 g |
| Sugar | 1.8 g |
| Sodium | 935 mg |
