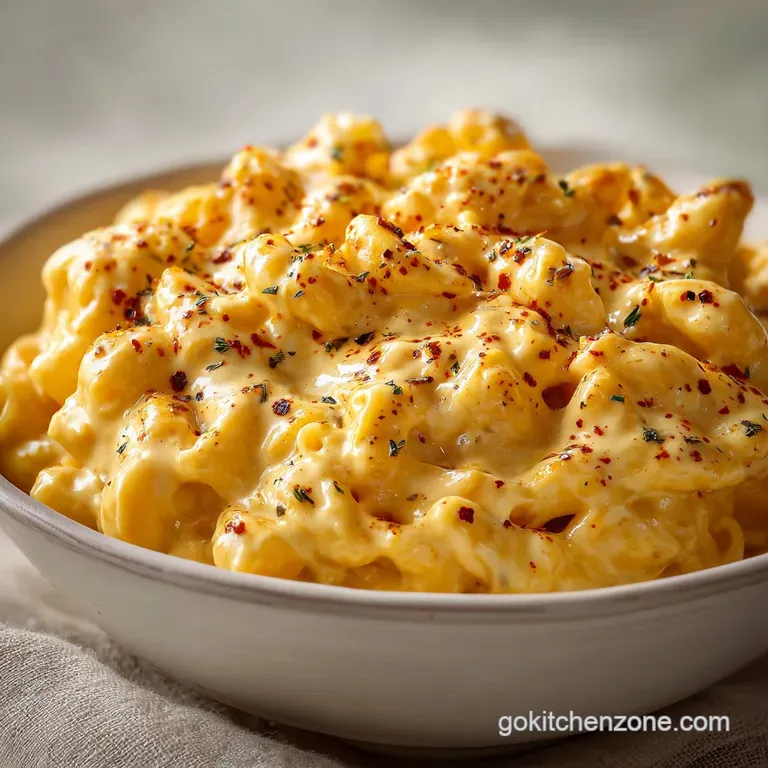
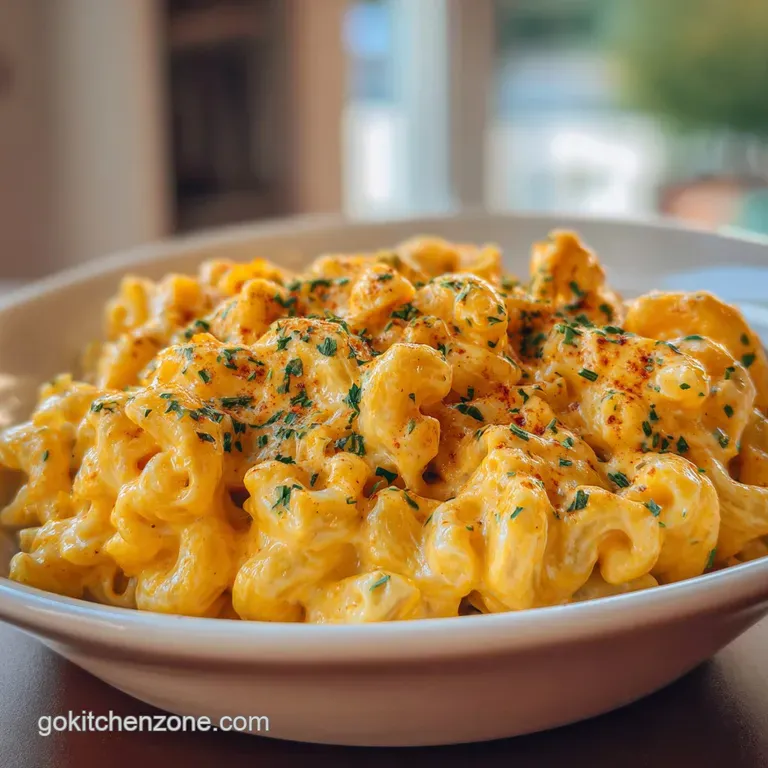
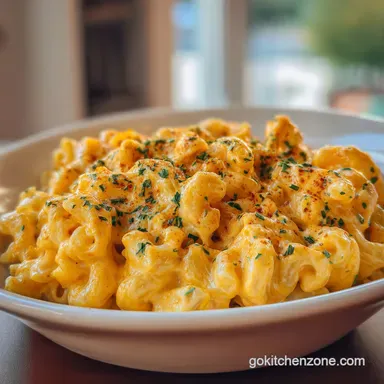
Chicken Mac and Cheese: Creamy Baked Casserole
- Time: Active 20 minutes, Passive 30 minutes, Total 50 minutes
- Flavor/Texture Hook: Silky, sharp cheddar sauce with a shattering panko crust
- Perfect for: Busy weeknight dinner struggle or crowd-pleasing meal prep
- Creating The Best Chicken Mac and Cheese
- Reasons You Will Love This
- The Physics of the Velvet Sauce
- Core Ingredients and Smart Swaps
- Necessary Kitchen Gear
- Mastering the Cooking Process
- Troubleshooting Your Pasta Dish
- Flavorful Twists and Variations
- Scaling the Recipe Size
- Storing and Reheating Your Leftovers
- Garnishing for a Great Look
- Debunking Kitchen Myths
- Very High in Sodium
- Recipe FAQs
- 📝 Recipe Card
Creating The Best Chicken Mac and Cheese
I remember one specific rainy Tuesday when the dinner struggle was hitting hard and the fridge looked pretty empty. I had some chicken breasts that needed using and a block of sharp cheddar that had been hiding behind the yogurt.
I decided to mash them together into something warm and filling, and that was the first time I realized how much better a meal gets when you add a little protein to the classic mac.
The sizzle of the chicken cubes hitting the hot olive oil was the first sign of life in my kitchen after a long day at work. There is something so grounding about the aroma of smoked paprika and black pepper toasting in the pan.
This isn't some fancy gourmet dish, it is a reliable, one pan feeling meal that actually works when you need to feed people fast without spending a fortune.
You can expect a sauce that doesn't break, chicken that stays juicy, and a crust that has a genuine shatter when you dig in with a spoon. We are skipping the powdery boxed stuff and using real components to get a result that feels like a massive win.
Trust me, once you see how the heavy cream and Gruyère interact, you will never go back to the blue box.
Reasons You Will Love This
- Starch Bridge: The flour in the roux creates a network that holds the fat and liquid together, preventing that oily separation often found in homemade sauces.
- Carryover Control: Searing the chicken separately ensures it develops a deep crust without overcooking during the final oven stage.
- Emulsification Stability: Using room temperature milk prevents the roux from seizing, which is the number one cause of a lumpy or grainy texture.
- Gluten Management: Boiling the pasta to just under al dente allows it to finish absorbing the cheese sauce in the oven without turning into mush.
| Method | Time | Texture | Best For |
|---|---|---|---|
| Stovetop | 25 minutes | Ultra creamy and loose | Quick weeknight hunger |
| Oven Baked | 50 minutes | Thick with a crispy crust | Weekend family dinners |
| Meal Prep | 60 minutes | Dense and easy to slice | Weekday lunches |
Choosing between stovetop and oven really comes down to how much you value that crispy top layer. If you are in a rush, you can skip the bake and just stir the seared chicken into the pot. However, the oven version gives you those little burnt cheese corners that everyone fights over at the table.
The Physics of the Velvet Sauce
The secret to this texture lies in the protein structure of the cheese. When you grate your own cheese, you avoid the cellulose anti clumping agents found in bags, allowing the proteins to melt into a single, cohesive curtain of sauce.
| Ingredient | Science Role | Pro Secret |
|---|---|---|
| Sharp Cheddar | Flavor base and fat | Grate it cold, then let it sit to reach room temp for even melting |
| All purpose Flour | Thickening agent | Cook it in butter for 2 minutes to remove the raw flour taste |
| Heavy Cream | Emulsion stabilizer | The high fat content prevents the sauce from curdling at high heat |
Core Ingredients and Smart Swaps
This list uses 1 lb boneless, skinless chicken breasts and 1 lb elbow macaroni or cavatappi pasta as the foundation. We build flavor with 1 tbsp extra virgin olive oil, 1 tsp smoked paprika, 1 tsp salt, and 1/2 tsp black pepper for the meat.
The sauce relies on 4 tbsp unsalted butter, 1/4 cup all purpose flour, 3 cups whole milk, and 1 cup heavy cream. For the cheese, we need 3 cups sharp yellow cheddar and 1 cup Gruyère cheese, both freshly grated.
The topping uses 1/2 tsp ground mustard, 1 cup panko breadcrumbs, 2 tbsp melted unsalted butter, and 1/4 cup freshly grated Parmesan cheese.
- Cavatappi Pasta: Elbow macaroni. Why this? The ridges on cavatappi hold significantly more sauce than smooth noodles.
- Gruyère Cheese: White cheddar or fontina. Why this? Gruyère has a high oil content that ensures a silky melt.
- Panko Breadcrumbs: Crushed crackers or cornflakes. Why this? Panko is larger and stays crispier under the broiler.
- Whole Milk: 2% milk with a splash more cream. Why this? Fat is necessary to keep the cheese proteins suspended.
Necessary Kitchen Gear
You will need a large pot for the pasta and a high sided skillet or dutch oven for the sauce. A box grater is mandatory here because pre shredded cheese is the enemy of a smooth sauce. I also recommend a whisk for the roux and a 9x13 inch baking dish for the final assembly.
If you have a cast iron skillet, you can do the whole thing in one pan, which saves a lot of cleanup time.
Mastering the Cooking Process
For the Chicken and Pasta
- Boil the 1 lb pasta in salted water for 2 minutes less than the package instructions until it has a firm bite. Note: It finishes cooking in the sauce.
- Pat the 1 lb chicken cubes dry with a paper towel. Note: Moisture prevents browning.
- Heat 1 tbsp olive oil in a skillet over medium high heat.
- Season chicken with 1 tsp smoked paprika, 1 tsp salt, and 1/2 tsp pepper.
- Sear the chicken for 5 minutes until golden brown and opaque.
- Remove the chicken from the pan and set it aside on a plate.
For the Liquid Gold
- Melt 4 tbsp butter in the same skillet over medium heat.
- Whisk in 1/4 cup flour and cook for 2 minutes until it smells like toasted nuts.
- Slowly pour in 3 cups milk and 1 cup heavy cream while whisking constantly.
- Simmer for 5 minutes until the sauce coats the back of a spoon.
- Turn off the heat and stir in the 3 cups cheddar and 1 cup Gruyère.
- Fold in the 1/2 tsp ground mustard and the cooked pasta and chicken.
The sauce should look slightly thinner than you think it should be. This is a trick I learned while perfecting my Panera Mac and recipe because the pasta will continue to soak up liquid even after you pull it out of the oven. If the sauce is too thick before it goes in, you will end up with a dry, clumpy bake.
For the Shattering Crust
- Transfer the mixture to a greased baking dish if you aren't using an oven safe skillet.
- Mix 1 cup panko with 2 tbsp melted butter and 1/4 cup Parmesan.
- Sprinkle the topping evenly over the pasta.
- Bake at 375°F for 20 minutes until the edges are bubbling and the top is dark gold.
Troubleshooting Your Pasta Dish
Maintaining Juicy Chicken Texture
If your chicken feels like rubber, it likely spent too much time in the initial sear. You want to just brown the outside and let the internal temperature reach its peak while it sits in the hot cheese sauce inside the oven.
Achieving a Velvety Sauce Texture
A grainy sauce usually happens because the heat was too high when the cheese was added. Cheese is a delicate emulsion of fat and protein. If you boil it, the proteins tighten up and squeeze out the fat, leaving you with a gritty mess. Always pull the pan off the burner before adding your grated cheese.
| Problem | Root Cause | Solution |
|---|---|---|
| Oily Sauce | Cheese overheated or separated | Whisk in a tablespoon of cold milk to re emulsify |
| Dry Pasta | Too much flour or too long in oven | Reduce baking time or increase milk by 1/4 cup |
| Bland Flavor | Not enough salt in pasta water | Add a pinch of salt to the breadcrumb topping |
Common Mistakes Checklist
- ✓ Never use pre shredded cheese (the starch coating ruins the sauce)
- ✓ Always salt the pasta water until it tastes like the sea
- ✓ Pat the chicken dry to ensure a proper Maillard reaction
- ✓ Use room temperature milk to prevent roux clumping
- ✓ Let the dish rest for 5 minutes after baking to set the sauce
Flavorful Twists and Variations
If you want a little more heat, adding a chopped jalapeño to the chicken sear is a brilliant move. You can also swap the smoked paprika for taco seasoning if you want a southwestern vibe. For those nights when you want something even more indulgent, our Cowboy Butter Chicken Pasta recipe offers a similar comfort level with a garlicky, herb heavy twist that pairs perfectly with this cheese profile.
If you want X, do Y
- For more crunch: Use crushed buttery crackers instead of panko for a richer, saltier crust.
- For a lighter meal: Swap the heavy cream for more milk and use half the amount of cheese with a sharp white cheddar.
- For a smokier profile: Add 3 strips of chopped, cooked bacon to the panko topping before baking.
Scaling the Recipe Size
Downscaling for Two
If you are only cooking for a small household, you can easily halve this recipe. Use a smaller 8x8 inch pan and reduce the baking time by about 5 minutes. Since the recipe calls for 1 lb of pasta, you can just use half a box and save the rest for later.
For the chicken, one large breast is usually enough.
Upscaling for a Crowd
When doubling the recipe for a party, work in batches when searing the chicken. Overcrowding the pan will cause the meat to steam rather than sear, and you will lose that beautiful golden crust.
Keep the spices at 1.5x the original amount to avoid overwhelming the cheese flavor, and use a very large stockpot to mix the sauce before transferring to two separate baking dishes.
Storing and Reheating Your Leftovers
Leftovers will keep in the fridge for up to 4 days if stored in an airtight container. Because the pasta continues to absorb moisture, it might look a bit dry the next day. To fix this, add a splash of milk before reheating in the microwave or oven.
This breaks down the solidified fat and brings back that silky texture we worked so hard for.
You can freeze this dish for up to 2 months. I recommend freezing it after assembly but before the final bake. Wrap it tightly in plastic wrap and then foil. When you are ready to eat, bake it from frozen at 350°F for about an hour, adding the panko topping during the last 20 minutes so it doesn't burn.
Don't throw away those cheese rinds! If you used a wedge of Parmesan or Gruyère, keep the rinds in a freezer bag. You can drop them into your next pot of vegetable soup or marinara to add a massive hit of savory umami flavor.
Garnishing for a Great Look
To make this look as good as it tastes, a sprinkle of fresh parsley or chives right before serving adds a pop of green that cuts through the yellow and gold. I also like to save a tiny bit of the smoked paprika to dust over the top of the panko.
Serve this in wide, shallow bowls rather than deep ones. This allows the panko crust to stay crisp and gives everyone a better ratio of topping to pasta in every bite. If you have extra Gruyère, a few thin shavings on top of the hot pasta right before it hits the table adds a glossy, professional finish.
Debunking Kitchen Myths
A common misconception is that you need to rinse pasta after boiling to stop it from sticking. This is a mistake because you lose the surface starch that helps the cheese sauce cling to the noodles. Just toss the drained pasta directly into the sauce.
Another myth is that searing meat seals in the juices. In reality, searing is all about the Maillard reaction, which creates those complex flavor compounds on the surface of the chicken. The moisture levels are actually controlled by the final internal temperature, not the initial sear.
Chef Note: If your sauce starts to look like it is curdling while you add the milk, don't panic. Just keep whisking vigorously and turn the heat down slightly. The fat and liquid will eventually play nice and smooth out.

Very High in Sodium
1180 mg mg of sodium per serving (51% % of daily value)
The American Heart Association recommends limiting sodium intake to no more than 2,300mg per day for most adults. This recipe exceeds half of that limit per serving!
Actionable Tips to Reduce Sodium
-
Reduce Cheese Sodium-20%
Reduce the amount of cheddar cheese by half (using 1.5 cups instead of 3 cups) and replace Gruyère cheese with a low-sodium Swiss cheese to significantly cut down on the sodium content.
The sodium in cheddar and gruyere cheeses contribute significantly to the overall sodium level.
-
Control the Salt-15%
Eliminate the added 1 tsp of salt entirely. The other ingredients, especially the cheeses, will still provide plenty of saltiness. Taste and adjust seasonings (pepper, smoked paprika, ground mustard) after cooking, if needed.
-
Unsalted Pasta-10%
Ensure you are cooking the pasta in completely unsalted water. This prevents the pasta from absorbing excess sodium during cooking.
-
Unsalted Butter
You are already using unsalted butter, which is excellent! Ensure that all butter products used in the recipe are unsalted to avoid hidden sources of sodium.
-
Spice It Up!
Experiment with sodium free herbs and spices like garlic powder, onion powder, dried oregano, or a pinch of cayenne pepper to enhance the flavor without adding any sodium.
Recipe FAQs
Is chicken good in mac and cheese?
Yes, absolutely. Adding chicken transforms mac and cheese from a side dish into a hearty, complete meal. It provides a savory protein element that complements the creamy, cheesy pasta beautifully.
What cheeses go best in chicken mac?
Sharp cheddar and Gruyère are a classic pairing. Sharp cheddar offers a tangy, familiar base, while Gruyère adds a nutty depth and superior meltability, contributing to a velvety sauce. Other good options include fontina, Monterey Jack, or a smoked gouda.
What is Snoop Dogg's mac and cheese recipe?
Snoop Dogg's mac and cheese is famously decadent and creamy. While there are variations, it often involves a rich béchamel sauce made with heavy cream, multiple types of cheese like cheddar and Monterey Jack, and sometimes a touch of hot sauce for flavor.
Can you cook pasta and chicken together?
Yes, but with caution. For best results, sear chicken separately before adding it to the pasta and sauce, allowing it to finish cooking in the mac and cheese mixture. Cooking pasta and chicken together from raw in the same pot can lead to uneven cooking and a less desirable texture for both components.
How do I make chicken mac and cheese creamy?
Use a proper béchamel sauce base and high fat dairy. Cook a roux with butter and flour, then slowly whisk in milk and heavy cream until thickened. Adding freshly grated cheeses off the heat and stirring until melted ensures a smooth, emulsified sauce.
Should I pre-cook chicken for mac and cheese?
Yes, pre-cooking chicken is highly recommended. Searing chicken separately develops flavor and ensures it's cooked through without becoming rubbery in the pasta dish. It allows you to control its texture and moisture, contributing to a superior overall dish.
What kind of pasta is best for chicken mac and cheese?
Pasta shapes with nooks and crannies are ideal for holding the cheesy sauce. Elbow macaroni is traditional, but cavatappi, rotini, shells, or penne also work wonderfully, gripping the sauce for maximum flavor in every bite.
Chicken Mac And Cheese
Ingredients:
Instructions:
Nutrition Facts:
| Calories | 1112 kcal |
|---|---|
| Protein | 59 g |
| Fat | 61 g |
| Carbs | 75 g |
| Fiber | 3 g |
| Sugar | 7 g |
| Sodium | 1180 mg |
