How to Fix a Leaky Shower Head: Quick DIY Solutions

To fix a leaky shower head, tighten the connections and replace any worn-out washers or seals. If the problem persists, consider replacing the shower head.
A leaky shower head can waste water and increase your utility bills. Fixing it yourself can save money and prevent further damage. The most common causes of leaks are loose connections, worn washers, or damaged seals. Identifying the exact issue allows you to choose the right solution.
Basic tools like a wrench, plumber’s tape, and replacement parts are typically all you need. Addressing the problem promptly ensures your shower functions efficiently and helps conserve water. Knowing how to fix a leaky shower head is a valuable skill for any homeowner.
Introduction To Leaky Shower Head Dilemmas
A leaky showerhead is a common issue. It can be very frustrating. The constant drip can annoy anyone. Fixing it is easier than you think. A leaky showerhead wastes water. It also increases your water bill. Knowing how to fix it is important. Let’s dive into the details.
The Annoyance Of Drips
Dripping sounds can drive you crazy. It can disturb your sleep. It can make relaxing difficult. A steady drip can ruin your peace. Fixing the leak will stop the noise. Your home will be quiet again.
Potential Water Waste And Costs
A leaky showerhead wastes a lot of water. Even a small drip adds up. This wasted water costs you money. A drip every second can waste gallons in a month.
Here is a table showing water waste:
| Drip Frequency | Water Wasted (Gallons per Month) |
|---|---|
| 1 drip/second | 259 |
| 1 drip/2 seconds | 130 |
| 1 drip/3 seconds | 86 |
Fixing the leak saves water. It also saves money. Your water bill will be lower. It helps the environment too. Every drop counts.
Identifying The Source Of The Leak
Fixing a leaky shower head can save water and money. The first step is identifying the source of the leak. This involves checking different parts of the shower system to know where the problem is.
Shower Head Vs. Valve Leaks
First, check if the leak is from the shower head or the valve. A leak from the shower head means water drips from the head when it is off. A valve leak means water drips from the faucet or pipe when the shower is off.
Visual Inspection Tips
To identify the source, start with a visual inspection. Here are some tips:
- Check the shower head for drips.
- Look for water stains on the wall.
- Inspect the valve handle for moisture.
Turn off the water supply. Remove the shower head. Check for damage or worn-out parts. Use a flashlight for a better view.
| Inspection Area | What to Look For |
|---|---|
| Shower Head | Drips, cracks, worn-out washers |
| Valve | Moisture, corrosion, loose handle |
| Wall | Water stains, mold, dampness |
By following these steps, you can easily identify the source of the leak. This makes fixing the problem easier and faster.
Preparation Steps Before The Fix
Fixing a leaky showerhead is simple. Before starting, prepare well. This ensures an easy and successful repair. Let’s go through the steps needed before fixing your shower head.
Gathering Necessary Tools
First, gather all the tools you need. This saves time and effort.
- Adjustable wrench
- Plumber’s tape
- Bucket
- Rags or towels
- Old toothbrush
- Vinegar
Having these tools ready makes the process smooth. You won’t need to stop midway to find something.
Safety Precautions
Safety is important when fixing a shower head. Follow these steps to stay safe.
- Turn off the water supply. This prevents water from spraying everywhere.
- Place a bucket under the shower head. It catches any drips.
- Use rags or towels to protect surfaces. This keeps your bathroom clean.
- Wear gloves if needed. Some parts might be sharp or dirty.
These safety steps prevent accidents and messes.
Simple Fixes: Tightening And Cleaning
Fixing a leaky shower head can be simple. Often, the problem is loose connections or clogged nozzles. Tightening and cleaning the shower head may solve the issue. Let’s explore these basic fixes in detail.
Adjusting The Shower Head
A loose shower head can cause leaks. Follow these steps to tighten it:
- Turn off the water supply.
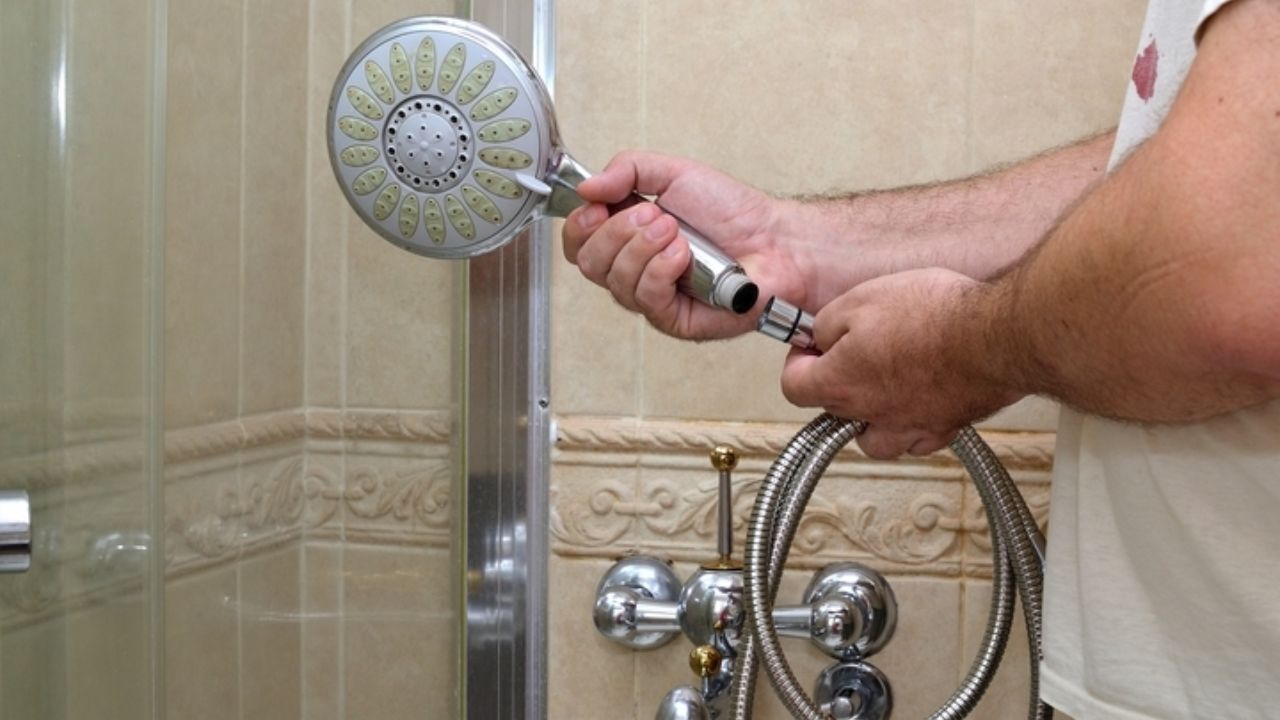
- Use a wrench to unscrew the shower head.
- Check for worn-out washers or O-rings. Replace if necessary.
- Wrap plumber’s tape around the shower arm threads.
- Screw the shower head back on tightly.
Make sure not to over-tighten, as this can cause damage.
Unclogging Nozzles
Clogged nozzles can also cause leaks. Here’s how to clean them:
- Remove the shower head.
- Soak it in a vinegar solution for at least 30 minutes.
- Use a small brush to scrub the nozzles.
- Rinse the shower head with water.
- Reattach the shower head.
Cleaning the nozzles can improve water flow and stop leaks.
| Issue | Solution |
|---|---|
| Loose Shower Head | Tighten with a wrench |
| Clogged Nozzles | Soak in vinegar and scrub |
| Worn Washers | Replace with new ones |
These simple steps can help you fix a leaky showerhead. They are easy to follow and effective. Happy fixing!
Washer And O-ring Replacement
Is your shower head leaking and causing a mess in your bathroom? Replacing the washer and O-ring could solve the problem. This guide will help you identify and fix these parts. Follow these steps to fix your leaky shower head.
Detecting Washer Wear
A worn washer is a common cause of leaks. To check the washer, you need to disassemble the shower head. Here’s how:
- Turn off the water supply.
- Remove the shower head using a wrench.
- Inspect the washer inside the shower head.
If the washer is cracked or deformed, it needs replacement. A damaged washer won’t seal properly, causing leaks.
Step-by-step O-ring Replacement
The O-ring is another part that can cause leaks. Follow these steps to replace it:
- Remove the shower head from the shower arm.
- Locate the O-ring inside the shower head.
- Use a small tool to remove the old O-ring.
- Clean the area where the O-ring was located.
- Place the new O-ring in the same spot.
- Reattach the shower head to the shower arm.
Ensure the new O-ring is the same size as the old one. A proper fit is crucial to prevent leaks.
Advanced Diy: Replacing The Shower Head
Is your shower head still leaking after basic fixes? It might be time for an upgrade. Replacing the shower head is a great advanced DIY project. It’s easier than you think and can save you money.
Choosing A Replacement
First, you need a new showerhead. There are many types available.
- Fixed Shower Heads
- Handheld Shower Heads
- Rain Shower Heads
- High-Pressure Shower Heads
Think about water pressure, spray pattern, and style. Look for a showerhead that fits your needs. Check reviews and ratings for better insight.
Installation Process
Follow these steps to replace your shower head:
- Turn off the water: Make sure the water is off before starting.
- Remove the old shower head: Use a wrench if it’s tight. Turn counterclockwise to loosen.
- Clean the threads: Remove old Teflon tape and debris from the pipe threads.
- Apply new Teflon tape: Wrap new tape around the threads clockwise.
- Attach the new shower head: Screw it on clockwise. Hand-tighten it first, then use a wrench if needed.
- Check for leaks: Turn on the water and check for leaks. Tighten more if necessary.
You have successfully replaced your shower head. Enjoy your new, leak-free shower experience.
Sealant And Tape Solutions
A leaky shower head can be annoying. Fixing it yourself is simple. Using sealant and tape solutions can stop the leak quickly. This guide covers two methods: applying thread sealant and using a plumber’s tape.
Applying Thread Sealant
Thread sealant, also known as pipe dope, helps seal connections. It creates a watertight seal. Follow these steps:
- Turn off the water supply.
- Remove the shower head.
- Clean the threads on the pipe.
- Apply a small amount of thread sealant.
- Reattach the shower head.
- Turn on the water and check for leaks.
Use a cloth to wipe away any excess sealant. Ensure all threads are covered evenly.
Using Plumber’s Tape
Plumber’s tape, or Teflon tape, is another solution. It seals threaded pipe connections effectively. Here’s how to use it:
- Turn off the water supply.
- Remove the shower head.
- Clean the threads on the pipe.
- Wrap the plumber’s tape around the threads. Wrap it 3-4 times.
- Reattach the shower head.
- Turn on the water and check for leaks.
Make sure the tape is snug and smooth. This ensures a tight seal.
When To Call A Professional
Fixing a leaky shower head can be simple. Sometimes, the problem persists despite your best efforts. In such cases, it’s wise to call a professional. Knowing when to seek expert help can save time, money, and frustration.
Persistent Leak Troubles
If the leak continues after basic fixes, it’s time to call a pro. Persistent leaks may indicate a bigger issue. It could be a problem with the plumbing system. A professional can diagnose and fix the root cause.
Also, if you notice water stains or mold around the shower, get expert help. These signs mean there might be a hidden leak. Professionals have the tools to detect and repair these problems.
Benefits Of Expert Intervention
Calling a professional has many benefits. Experts have the right tools and knowledge. They can fix the issue quickly and efficiently.
Here are some key benefits:
- Accurate Diagnosis: Professionals can identify the exact cause of the leak.
- Quality Repairs: They use high-quality materials for lasting repairs.
- Time-saving: Experts can fix the problem faster than a DIY approach.
- Safety: Professionals ensure that the repair is safe and up to code.
Hiring a professional can also prevent future problems. They can offer advice on maintaining your shower head and plumbing system.
Maintaining Your Shower Head Post-fix
After fixing your leaky shower head, maintaining it is crucial. Regular maintenance keeps your shower head in good condition and extends its life. Follow these simple steps to ensure your shower head stays in top shape.
Regular Cleaning Routines
Cleaning your shower head regularly is essential. It prevents buildup and ensures a smooth water flow.
- Remove the shower head once a month.
- Soak it in a vinegar solution for 30 minutes.
- Scrub it with a soft brush to remove any deposits.
- Rinse it thoroughly with water.
Periodic Inspection Advice
Inspecting your shower head periodically helps identify potential issues early. This can save you from bigger problems later.
- Check for any signs of rust or corrosion.
- Ensure there are no cracks or leaks.
- Verify that the water flow is consistent and strong.
- Replace any worn-out parts immediately.
Regular maintenance and inspections keep your shower head functioning perfectly. Follow these simple steps and enjoy a hassle-free shower experience.
Frequently Asked Questions
How Do I Stop My Shower Head From Leaking?
To stop a leaking shower head, tighten the connections. Replace worn-out washers or seals. Clean mineral deposits. Use plumber’s tape on threads. If issues persist, replace the shower head.
Why Is Water Trickling Out Of My Shower Head?
Water trickling out of your shower head might indicate a clogged nozzle or a faulty shower valve. Clean the nozzle or check the valve for issues.
Why Is My Shower Dripping When Turned Off?
Your shower drips because of a faulty valve or worn-out washer. Replace these parts to stop the leak.
Why Is My Shower Head Tap Leaking?
A leaking shower head tap usually means a worn-out washer or O-ring. It could also indicate a loose or damaged valve. Regular maintenance can prevent leaks.
How Can I Fix A Leaky Shower Head?
First, turn off the water supply. Then, remove the shower head and check for worn-out washers or seals.
What Tools Do I Need To Fix A Leaky Shower Head?
You need an adjustable wrench, plumber’s tape, and a screwdriver to fix a leaky shower head.
Why Is My Shower Head Leaking?
A leaky shower head usually results from worn-out washers, seals, or mineral buildup blocking the flow.
How Do I Remove Mineral Buildup?
Soak the shower head in white vinegar for a few hours. Scrub with a brush to remove buildup.
Can Plumber’s Tape Stop A Leak?
Yes, a plumber’s tape can help seal connections and prevent leaks in the shower head.
Is It Expensive To Fix A Leaky Shower Head?
No, fixing a leaky showerhead is generally inexpensive. Most repairs only require basic tools and materials.
Conclusion
Fixing a leaky showerhead is easier than you might think. Follow our step-by-step guide to save water and money. Regular maintenance can prevent future leaks. Now, enjoy a leak-free shower and peace of mind. Don’t forget to check other plumbing fixtures for potential issues.

:max_bytes(150000):strip_icc()/how-to-fix-a-leaking-shower-head-4154274-hero-96869029aa204b64abe6ecc27bd82d55.jpg)


