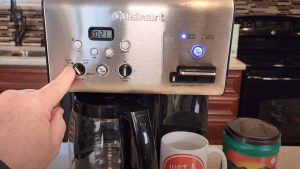
To use a Keurig coffee maker, first, fill the water reservoir, then place a K-cup in the holder, and press the brew button. Keurig coffee makers are convenient and easy to use, making them a popular choice for home and office use.
Many people enjoy the convenience and speed of making a single cup of coffee at a time, and Keurig machines provide just that. Whether you are a busy professional looking for a quick caffeine fix in the morning or a coffee enthusiast wanting a variety of flavors to choose from, Keurig coffee makers offer a solution.
In this guide, we will explain how to use a Keurig coffee maker step by step, providing tips for getting the most out of your machine and ensuring a delicious cup of coffee every time. So, let’s dive into the world of Keurig coffee makers and discover how to make the perfect cup of coffee with ease.
Unboxing And Initial Setup
When it comes to embracing the convenience of a Keurig coffee maker, the unboxing and initial setup process is where your journey begins. This crucial step ensures that you are ready to brew that perfect cup of coffee in no time. By following a few simple steps, you’ll soon be savoring the aroma of freshly brewed coffee wafting through your kitchen.
Unpacking The Keurig Coffee Maker
Unpacking your brand-new Keurig coffee maker is an exciting experience. The anticipation of brewing your delicious cup of coffee adds to the excitement. As we dive into the unboxing process, ensure that you have enough space on your kitchen counter or any desired location to set up your coffee maker. Follow these steps to successfully unbox your Keurig coffee maker:
- Remove the Keurig coffee maker from its packaging, handling it with care.
- Set aside any accessories that come with the coffee maker.
- Inspect the machine for any visible damage or defects. Contact customer support immediately if you notice any issues.
Assembling The Components
Once you’ve unboxed your Keurig coffee maker, assemble its components to get closer to your first cup. Follow these steps: 1. Insert the removable water reservoir securely into its designated area. 2. Adjust the drip tray to your cup size preference. 3. Place a mug on the tray to catch excess liquid. 4. Connect the power cord and plug it into an outlet. 5. Press the power button; check for the illuminated display or indicator light. 6. Allow the coffee maker to warm up for optimal brewing temperature. Congratulations! Your Keurig coffee maker is now unboxed and assembled. With setup complete, you’re ready to explore the world of one-touch brewing.
Understanding Keurig Coffee Maker Basics
When it comes to brewing a quick and convenient cup of coffee, Keurig coffee makers are a popular choice. To make the most out of your Keurig machine, it’s essential to understand the basic features and functions. In this guide, we’ll walk you through the essential operations and settings to help you get started with your Keurig coffee maker.
Getting Familiar With The Control Panel
Before diving into brewing your first cup of coffee with your Keurig, it’s important to familiarize yourself with the control panel. The control panel is typically located on the front of the machine and consists of various buttons and indicators that allow you to customize your coffee brewing experience.
- Power Button: The power button is used to turn the machine on and off. Press this button to activate the Keurig machine.
- Brew Size Buttons: These buttons allow you to choose the desired cup size for your coffee. Depending on the Keurig model, you may have options for different cup sizes such as 6 oz, 8 oz, and 10 oz.
- Indicator Lights: The indicator lights on the control panel provide important information about the machine’s status, such as when it’s heating up or ready to brew.
Preparing The Water Reservoir
One of the key components of a Keurig coffee maker is the water reservoir, which holds the water used for brewing. Properly preparing the water reservoir ensures that your machine is ready to brew a perfect cup of coffee.
- Remove the Reservoir: Start by removing the water reservoir from the machine. Depending on the model, the reservoir may be detachable for easy refilling.
- Fill with Water: Fill the reservoir with fresh, clean water to the desired level indicated on the reservoir. It’s important to use filtered or bottled water for the best-tasting coffee.
- Reinsert the Reservoir: Once filled, carefully reinsert the reservoir back into the machine, making sure it is securely in place.
Brewing Your Perfect Cup Of Coffee
When it comes to brewing your perfect cup of coffee with a Keurig coffee maker, it’s essential to understand the key steps to ensure a delightful and flavorful experience. From inserting the K-Cup Pod to adjusting the brew strength and size, each stage plays a vital role in creating that ideal cup of joe.
Inserting The K-cup Pod
To start, the process is simple. Begin by lifting the handle located at the top of the Keurig coffee maker. Once open, carefully place your K-Cup Pod into the designated slot. Close the handle securely, ensuring it snaps into place. This step prepares the machine for the next crucial phase.
Adjusting Brew Strength And Size
Now, it’s time to customize your brew to suit your taste preferences. Look for the brew strength and size options located on the control panel of the Keurig coffee maker. With a simple press of the appropriate buttons, you can select the boldness and quantity of your coffee. Unleash the rich aroma and robust flavor by adjusting these settings according to your desired strength and cup size.
Maintenance And Cleaning Tips
Proper maintenance and regular cleaning are essential to keep your Keurig Coffee Maker in optimal condition and ensure that every cup of coffee you brew is flavorful and delicious. In this section, we will discuss two important aspects of maintaining your coffee maker: descaling the coffee maker regularly and cleaning and replacing the filter.
Descaling The Coffee Maker Regularly
Over time, mineral deposits from the water and coffee can build up in your Keurig Coffee Maker, affecting its performance and the taste of your coffee. Descaling is the process of removing these deposits and should be done every three to six months, or when the “Descale” indicator light turns on. To descale your coffee maker, you will need a descaling solution or a mixture of equal parts vinegar and water. Follow these steps:
- Empty the water reservoir and remove any remaining pods or K-cups.
- Pour the descaling solution or vinegar and water mixture into the reservoir, filling it to the max fill line.
- Place a large ceramic mug on the drip tray to collect the liquid.
- Start the brewing cycle without inserting a pod or K-cup, selecting the largest cup size.
- Once the cycle is complete, pour the liquid from the mug into the sink.
- Repeat the process until the “Add Water” indicator lights up.
- Empty the water reservoir and rinse it thoroughly.
- Fill the reservoir with fresh water, again up to the max fill line.
- Repeat the brewing cycle without a pod or K-cup to rinse the machine.
- Discard the water from the mug and repeat the rinse cycle until the water comes out clear.
Cleaning And Replacing The Filter
The filter in your Keurig Coffee Maker helps to remove impurities from the water, improving the taste of your coffee. It is important to clean and replace the filter regularly to prevent clogs and ensure optimal coffee brewing.
- Remove the water reservoir from the coffee maker.
- Take out the filter assembly from the reservoir.
- Disassemble the filter assembly by separating the parts.
- Wash each part with soap and warm water, ensuring all residue is removed.
- Rinse each part thoroughly and let them air dry.
- Reassemble the filter assembly and place it back into the water reservoir.
- Put the water reservoir back into the coffee maker.
If your coffee maker uses a charcoal water filter, it is recommended to replace it every two months or after brewing about 60 tank refills. To replace the filter, follow the instructions provided by the manufacturer.
Troubleshooting Common Issues
As convenient as Keurig coffee makers are, sometimes you may encounter a few common issues while using them. But fret not! In this section, we’ll guide you through troubleshooting these problems so that you can continue enjoying your favorite brew without any hiccups. Let’s dive in!
Dealing With Brewing Problems
If you’re facing issues like incomplete or weak brews, take these steps to address them. Firstly, use the correct size and type of K-Cup for your desired strength and flavor, as different blends have specific brewing parameters. Check the packaging for instructions. Using the wrong or expired K-Cup can lead to subpar results. Ensure the water reservoir is filled to its maximum capacity, as an insufficient amount may affect brew quality. Confirm that the reservoir is properly seated without gaps. If the brewed coffee has an off taste or strange odor, it may be due to internal parts. Regular cleaning and descaling are vital for optimal Keurig performance. Consult the manufacturer’s guidelines for cleaning instructions specific to your model.
Resolving Water Dispensing Issues
For water dispensing issues, consider these solutions. First, check the water source; ensure the reservoir has clean, filtered water. Poor water quality or a dirty reservoir can impede flow. Another common problem is clogged needles; use a paper clip or needle (carefully) to clear any blockages. Be cautious not to damage the needles. If using a water filter accessory, check if it needs replacement, as neglect can reduce flow. Follow manufacturer guidelines for maintenance. These troubleshooting steps help conquer common Keurig issues, ensuring your coffee maker continues to deliver the perfect brew. Happy brewing!
Advanced Tips For Coffee Enthusiasts
As a coffee enthusiast, you’re always looking for ways to enhance your brewing experience with your Keurig coffee maker. In this section, we’ll explore advanced tips and techniques that will allow you to take your coffee game to the next level. From exploring compatible accessories to customizing your brewing preferences, these tips will help you achieve the perfect cup of coffee every time.
Exploring Compatible Accessories
Have you ever wondered how you can elevate your coffee experience with your Keurig coffee maker? Exploring compatible accessories can be the answer! With a wide range of accessories available, you can customize and enhance your coffee brewing like never before. If you’re a fan of a strong cup of joe, try using a reusable K-cup. This accessory allows you to use your own freshly ground coffee, giving you more control over the flavor and strength of your brew. And if you prefer to enjoy your coffee on the go, consider getting a travel mug that fits perfectly under your Keurig machine. Another accessory worth exploring is the Keurig Frother. If you enjoy lattes or cappuccinos, this tool will help you create that perfect foam and texture for an indulgent coffee experience. Simply pour your freshly brewed coffee into the frother, and in no time, you’ll have a creamy and delicious drink. Whether it’s a reusable K-cup, a travel mug, or a frother, these compatible accessories will open up a world of possibilities to customize your Keurig coffee brewing according to your taste and preferences.
Customizing Your Brewing Preferences
Did you know that you can customize your brewing preferences with your Keurig coffee maker? These advanced features allow you to tailor your coffee to suit your specific tastes, ensuring that every cup is exactly how you like it. Start by adjusting the brew strength. Keurig machines often have multiple settings, allowing you to choose from regular, strong, or even an extra strong brew. Experiment with different settings to find the perfect strength that suits your preferences. Next, explore the options to adjust the cup size. Depending on the model of your Keurig machine, you may have the ability to brew single cups or carafes. Make sure to refer to your machine’s manual to understand the settings and customize the serving size to your liking. Furthermore, many Keurig machines come with temperature control options. If you prefer your coffee hotter or cooler than the default setting, you can easily adjust it to achieve the perfect temperature. Customizing your brewing preferences with your Keurig coffee maker allows you to create a cup of coffee that is perfectly suited to your taste buds. Take advantage of these advanced features to elevate your brewing experience and savor every sip.
Frequently Asked Questions Of How To Use Keurig Coffee Maker
How Do I Clean My Keurig Coffee Maker?
To clean your Keurig coffee maker, start by unplugging it and removing any pods or filters. Disassemble the brewer and clean the removable parts with warm soapy water. Use a toothpick to unclog any coffee grounds from the exit needle.
Run a vinegar-water mixture through the brewer and finish by running several cycles with clean water.
How Often Should I Descale My Keurig Coffee Maker?
Descaling your Keurig coffee maker is recommended every 3 to 6 months, depending on the usage frequency. However, if you notice mineral build-up or slower brewing times, it may be necessary to descale your machine more frequently. Follow the manufacturer’s instructions for your specific model to descale properly and maintain optimal performance.
Can I Use Regular Ground Coffee In My Keurig?
Yes, you can use regular ground coffee in your Keurig coffee maker by utilizing a reusable coffee filter. This allows you to enjoy your preferred coffee blend while reducing waste from single-use pods. Simply fill the filter with your desired amount of ground coffee, place it in the brewer, and select your brewing size for a fresh cup of coffee.
How do I set up my Keurig coffee maker for the first time?
Begin by filling the water reservoir, turning on the machine, and allowing it to heat. Once heated, place a K-Cup in the holder, close the lid, and select your desired cup size.
Why is my Keurig not brewing?
Check if there’s enough water, the machine is properly plugged in, and the lid is closed. If the issue persists, try descaling your Keurig as mineral buildup may affect performance.
Can I use non-Keurig K-Cups in my coffee maker?
While Keurig recommends using its branded K-Cups, some third-party options are compatible. However, be aware that using unauthorized K-Cups may void your warranty.
How often should I describe my Keurig machine?
Regular descaling is essential to prevent mineral deposits. Keurig suggests descaling every three to six months, depending on water hardness. Refer to the manual for specific instructions.
What does it mean if my Keurig displays “Prime” or “Not Ready”?
This message indicates that the machine is not yet fully heated. Allow it to finish heating before attempting to brew. If the problem persists, check water levels and perform any necessary maintenance.
Can I adjust the coffee strength on my Keurig machine?
While Keurig machines have preset cup sizes, you can control the strength by selecting a smaller cup size for a more concentrated brew.
Conclusion
To sum up, mastering the art of using a Keurig coffee maker is a game-changer for any coffee lover. You can enjoy a delicious cup of coffee in no time by following these simple steps. Remember to keep the machine clean and experiment with different coffee flavors for a customized experience.
So, go ahead and enhance your mornings with the convenience and versatility of a Keurig coffee maker! Cheers to a perfect brew every time!


